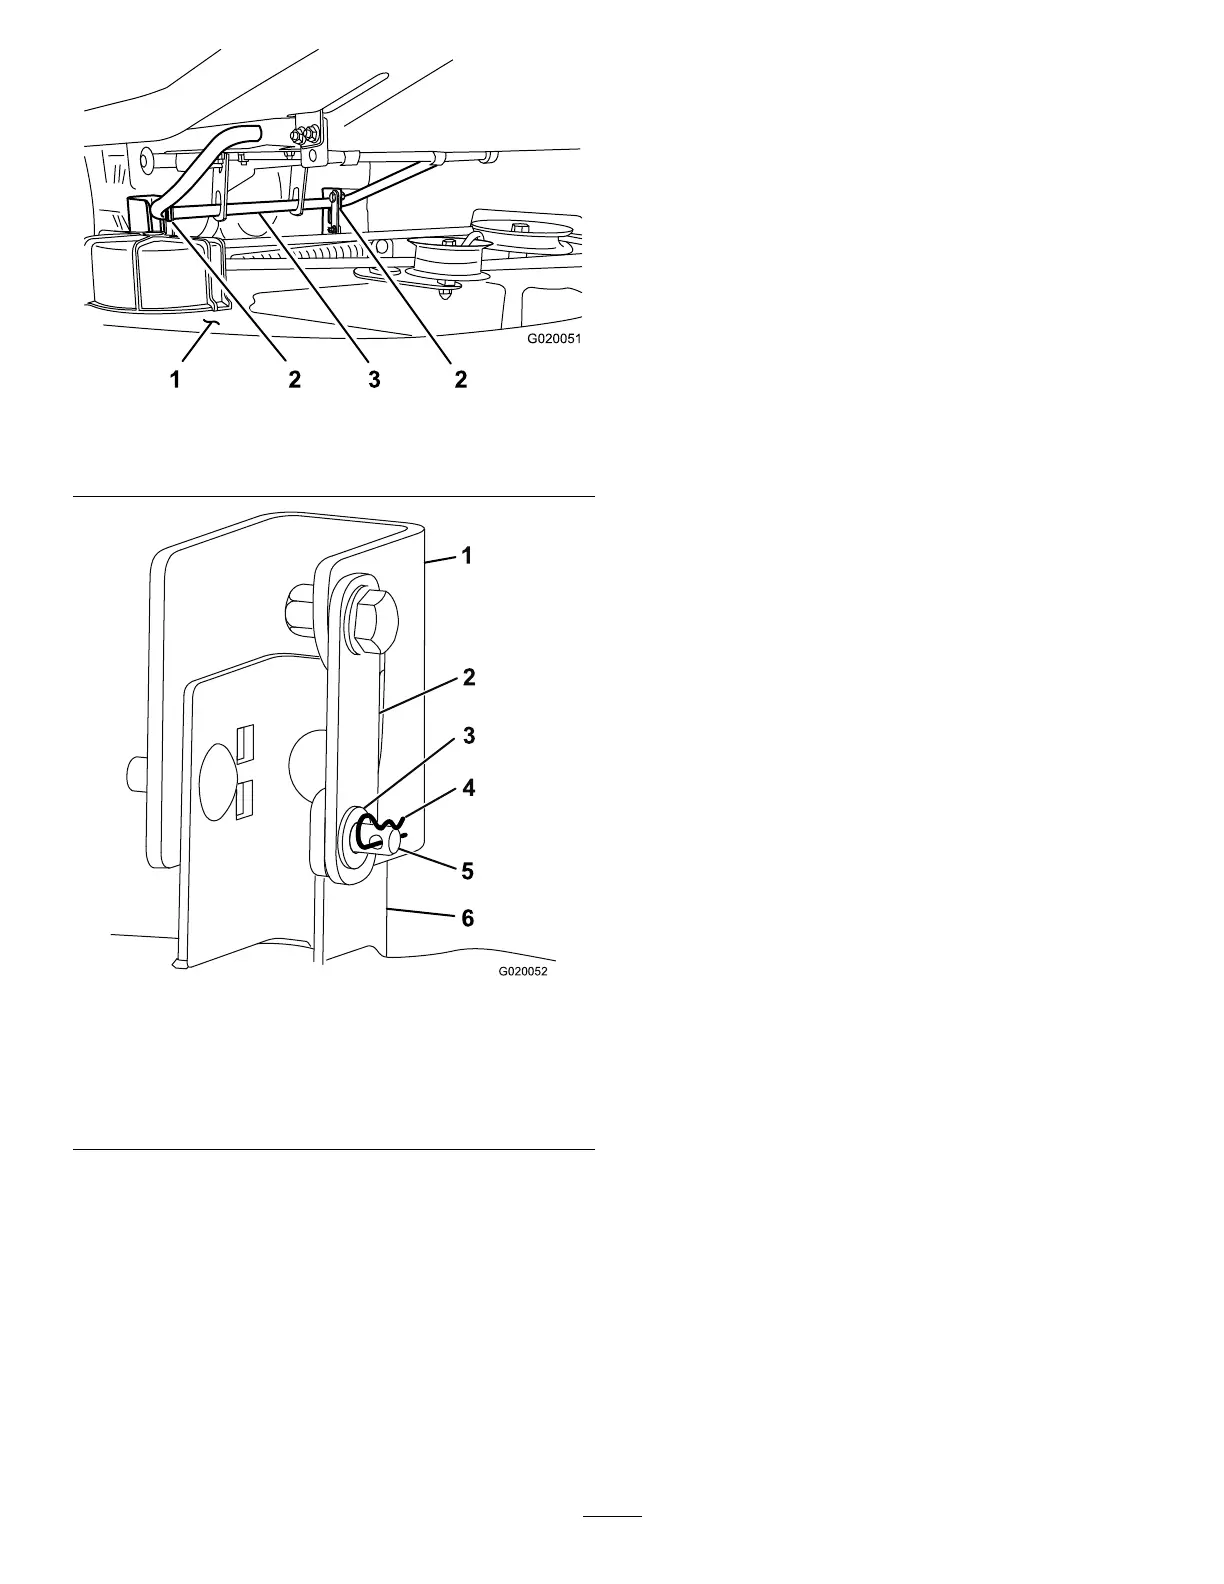
Figure37
1.Mowerdeck
3.Rearliftrod
2.Brackets
Figure38
Rearliftrodnotshown
1.Hangerbracket4.Hairpincotter
2.Deck-supportbracket
5.Clevispin
3.Washer6.Deckbracket
8.Lifttherearofthedeckslightlytotakethepressure
offoftheclevispins,andremovethem(Figure37and
Figure38).
9.Liftthemowerdeckandthehangerbracketsclearof
therearliftrod,andlowertherearofthemowerdeck
carefullytotheground(Figure37).
10.Slidethemowerdeckforwardtoremovethemower
beltfromtheenginepulley.
11.Slidethemowerdeckoutfromunderneaththe
machine.
Note:Retainallpartsforfutureinstallation.
InstallingtheMower
1.Parkthemachineonalevelsurface.
2.Disengagethebladecontrol(PTO).
3.Stoptheengine,removethekey,andwaitforallmoving
partstostopbeforeleavingtheoperatingposition.
4.Slidethemowerdeckunderthemachine.
5.Installthemowerbeltontotheelectric-clutchpulley
(
Figure35).
6.Movetheheight-of-cutlevertothelowestposition.
7.Lifttherearofthemowerdeck,andguidethehanger
bracketsovertherearliftrod(Figure37).
8.Swiveleachdeck-supportbracketsothattheholein
thelooseendalignswiththeholeinthehangerbracket
(Figure38).
9.Installtheclevispinthroughthebracketsoneachside;
theninstallthewashersontheclevispinsandhairpin
cottersthroughtheclevispins(Figure38).
10.Attachthefrontsupportrodtothemowerdeckwith
thewasherandthehairpincotter(
Figure36).
11.Checkthemowerlevel;referto
LevelingtheMowerfromSide-to-Side(page29)and
AdjustingtheFront-to-RearBladeSlope(page29).
28