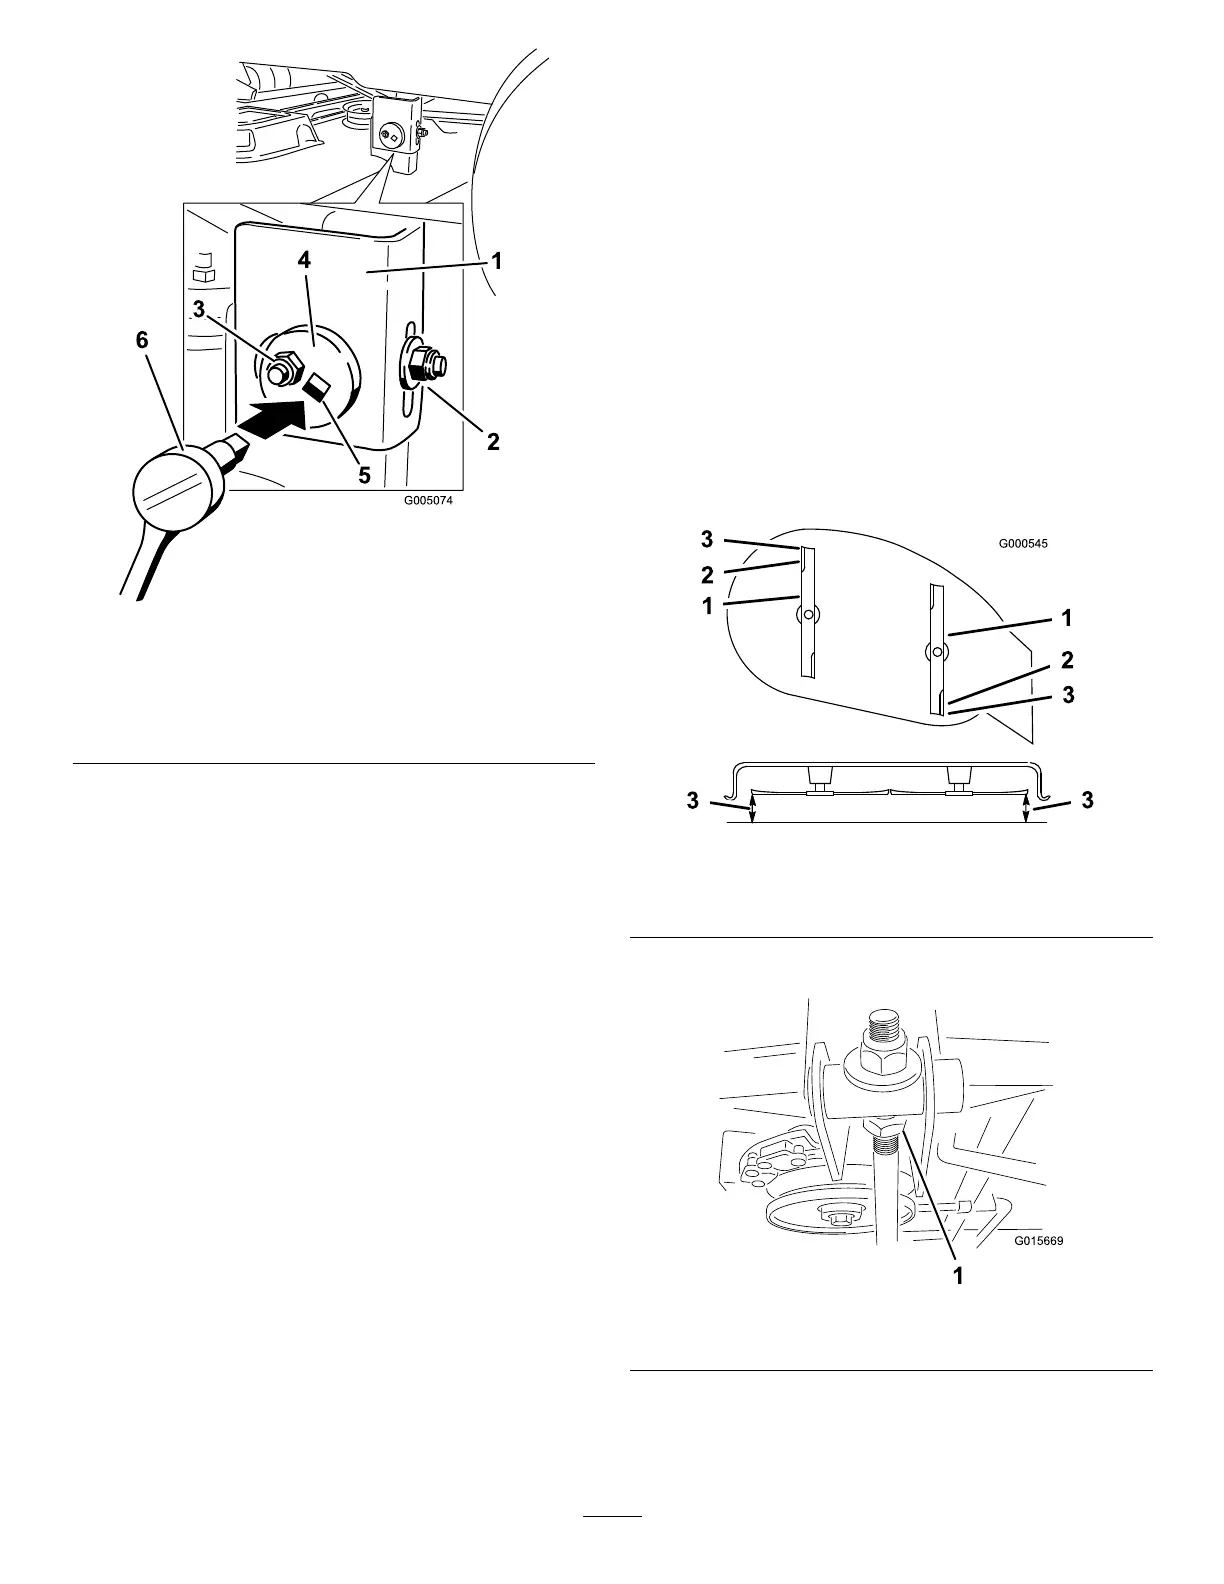
Figure36
1.Hangerbracket4.Eccentricadjustmentplate
2.Rear-lockingnut
5.Socketwrenchwith
3/8–inchextension
3.Side-lockingnut
8.Loosentheside-lockingnutonthehangerbracket
justenoughsothatyoucanadjusttheeccentricplate
(Figure36).
Note:Usea3/8–inchdriveextensiononasocket
wrenchtomanipulatetheeccentricplate.Usethe
wrenchtopositiontheheightofthemowerdeck
andadjustittothedesiredheight.
9.Stopthedeckattheadjustedpositionandtighten
theside-lockingnutonthehangerbrackettohold
thenewposition(
Figure36).
10.Continuelevelingthedeckbycheckingthe
front-to-rearslope;refertoAdjustingthe
Front-to-RearSlope.
AdjustingtheFront-to-Rear
BladeSlope
Checkthefront-to-rearbladeslopewheneveryouinstall
themower.Beforeyouchecktheslope,settheair
pressureinthetirestotherecommendedlevel;referto
CheckingtheTirePressure.Ifthefrontofthemoweris
notwithinarangeof0to1/4inch(0to6mm)lower
thantherearofthemower,adjustthebladeslopeas
follows:
1.Parkthetractoronalevelsurface.
2.Disengagethebladecontrol(PTO).
3.Stoptheengine,removethekey,andwaitforall
movingpartstostopbeforeleavingtheoperating
position.
4.Checkandadjusttheside-to-sidebladelevelifyou
havenotcheckedthesetting;refertoLevelingthe
MowerfromSide-to-Side.
5.Movetheheight-of-cutleverintooneofthemiddle
notches.
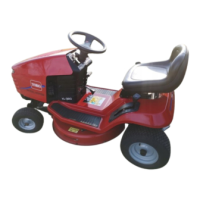
6.Measurefromthetopofthefrontbladetothe
atsurfaceandthetipoftherearbladetotheat
surface(
Figure37).Ifthefrontbladetipisnot0to
1/4inch(0to6mm)lowerthantherearbladetip,
adjustthefrontlocknut.
Figure37
1.Bladesfronttorear
3.Measurehere
2.Outsidecuttingedges
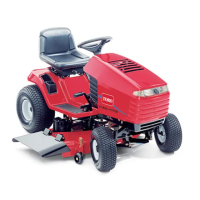
7.Loosenthejamnut(Figure38).
Figure38
1.Jamnut
8.Adjustthefront-to-rearbladeslopebyrotatingthe
adjustmentnutinthefrontofthemower(Figure39).
29