thentightenthefourlevelingadjustlockingnuts
(Figure64).
Figure64
1.Deckliftarm
3.Levelingadjustlockingnut
2.Deckhanger
4.Slotindeckhanger
5.Recheckthatblockstjustsnuglyunderthedeck
skirt.Makesureallattachmentboltsaretight
6.Verifythedeckislevelbycheckingtheside-to-side
levelandfront-to-rearbladeslope;repeatdeck
levelingprocedureifnecessary.
InspectingtheBelts
ServiceInterval:Every50hours
Checkthebeltsforsquealingwhenthebeltisrotating,
bladesslippingwhencuttinggrass,frayedbeltedges,
burnmarksandcracksaresignsofawornmowerbelt.
Replacethemowerbeltifanyoftheseconditionsare
evident.
ReplacingtheMowerBelt
Squealingwhenthebeltisrotating,bladesslippingwhen
cuttinggrass,frayedbeltedges,burnmarksandcracks
aresignsofawornmowerbelt.Replacethemowerbelt
ifanyoftheseconditionsareevident.
1.Disengagethebladecontrolswitch(PTO),movethe
motioncontrolleverstotheneutrallockedposition
andsettheparkingbrake.
2.Stoptheengine,removethekey,andwaitforall
movingpartstostopbeforeleavingtheoperating
position.
3.Lowerthemowertothe3inch(76mm)height-of-cut
position.
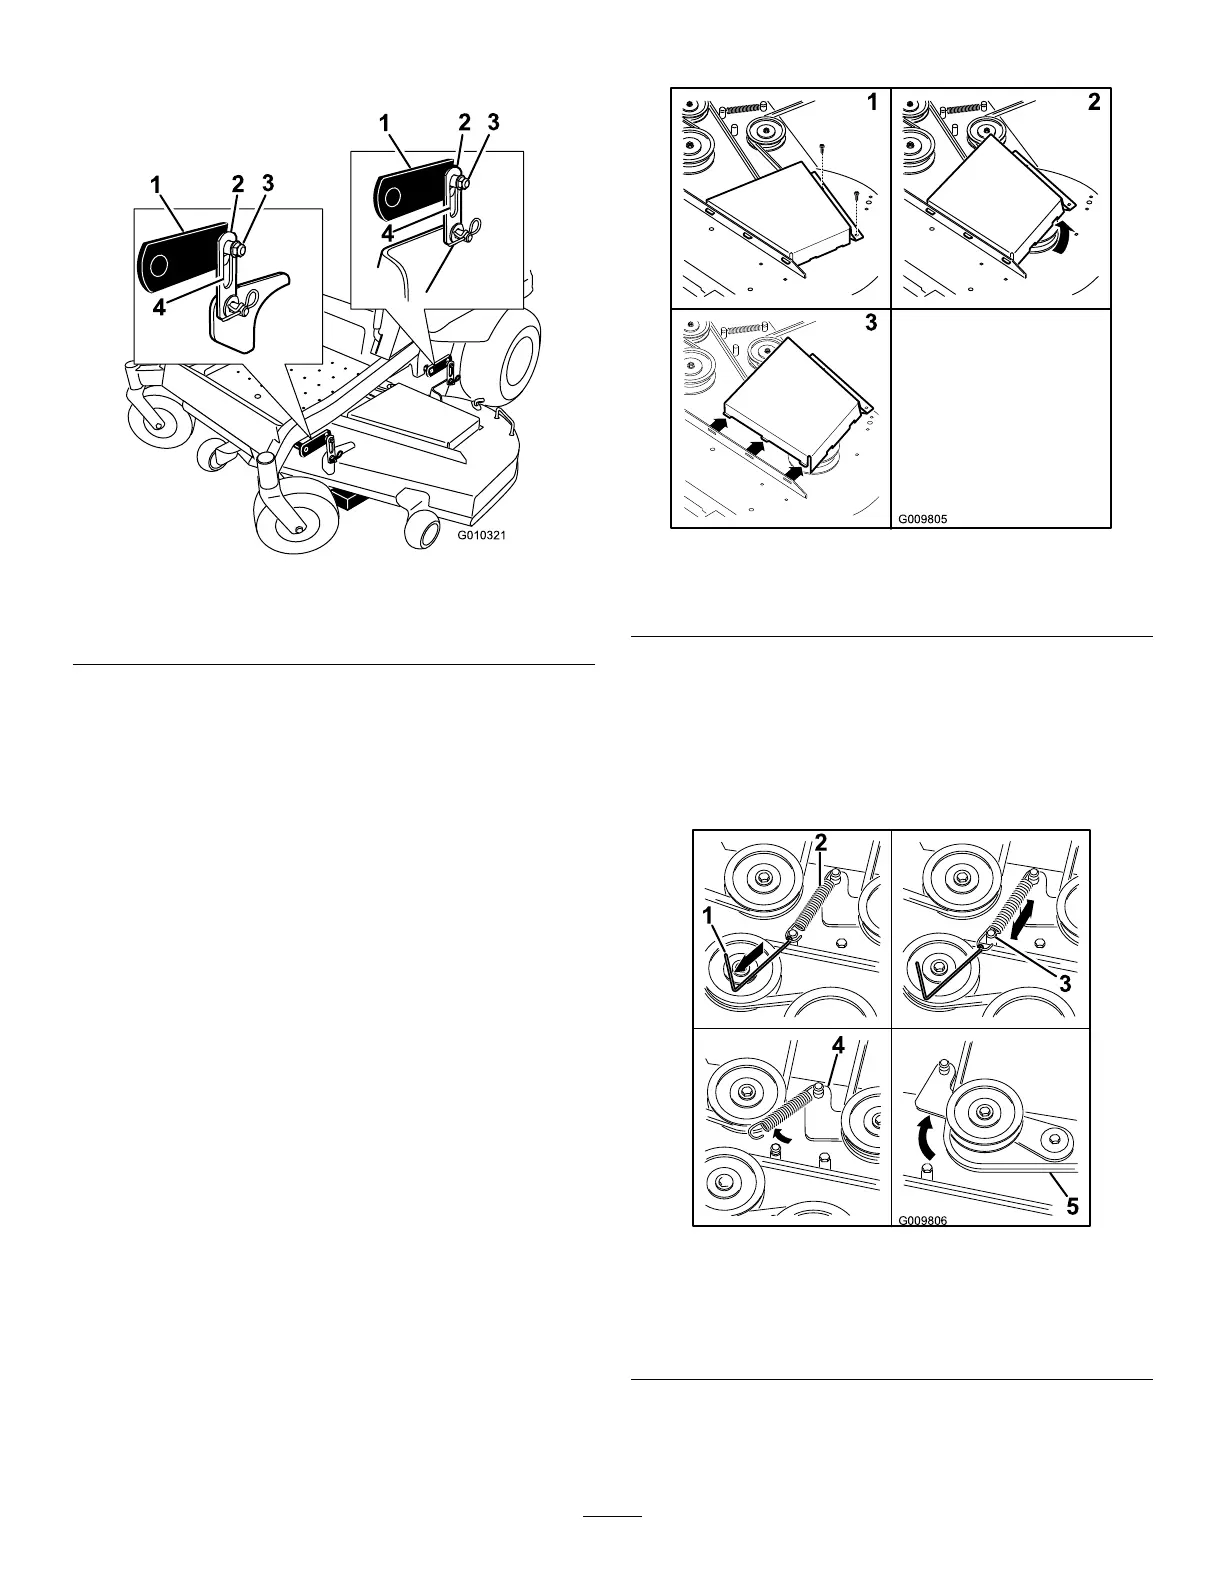
4.Removethebeltcovers(Figure65).
Figure65
1.Removethescrews3.Removebeltcover
2.Pivotthebeltcoverup
5.Removetheoorpantoaccesstheidlerpulley;
refertotheRemovingtheFloorPanprocedurein
Premaintenance.
6.Usingaspringremovaltool,(Toropartno.92-5771),
removetheidlerspringfromthedeckpostto
removetensionontheidlerpulley(Figure66).
Figure66
1.Springremovaltool(T oro
partno.92-5771)
4.Idlerarm
2.Idlerspring5.Mowerbelt
3.Deckpost
7.Lowerthemowertothelowestheight-of-cut.Place
theheight-of-cutpininthelockpositionforlowest
height-of-cut.
45