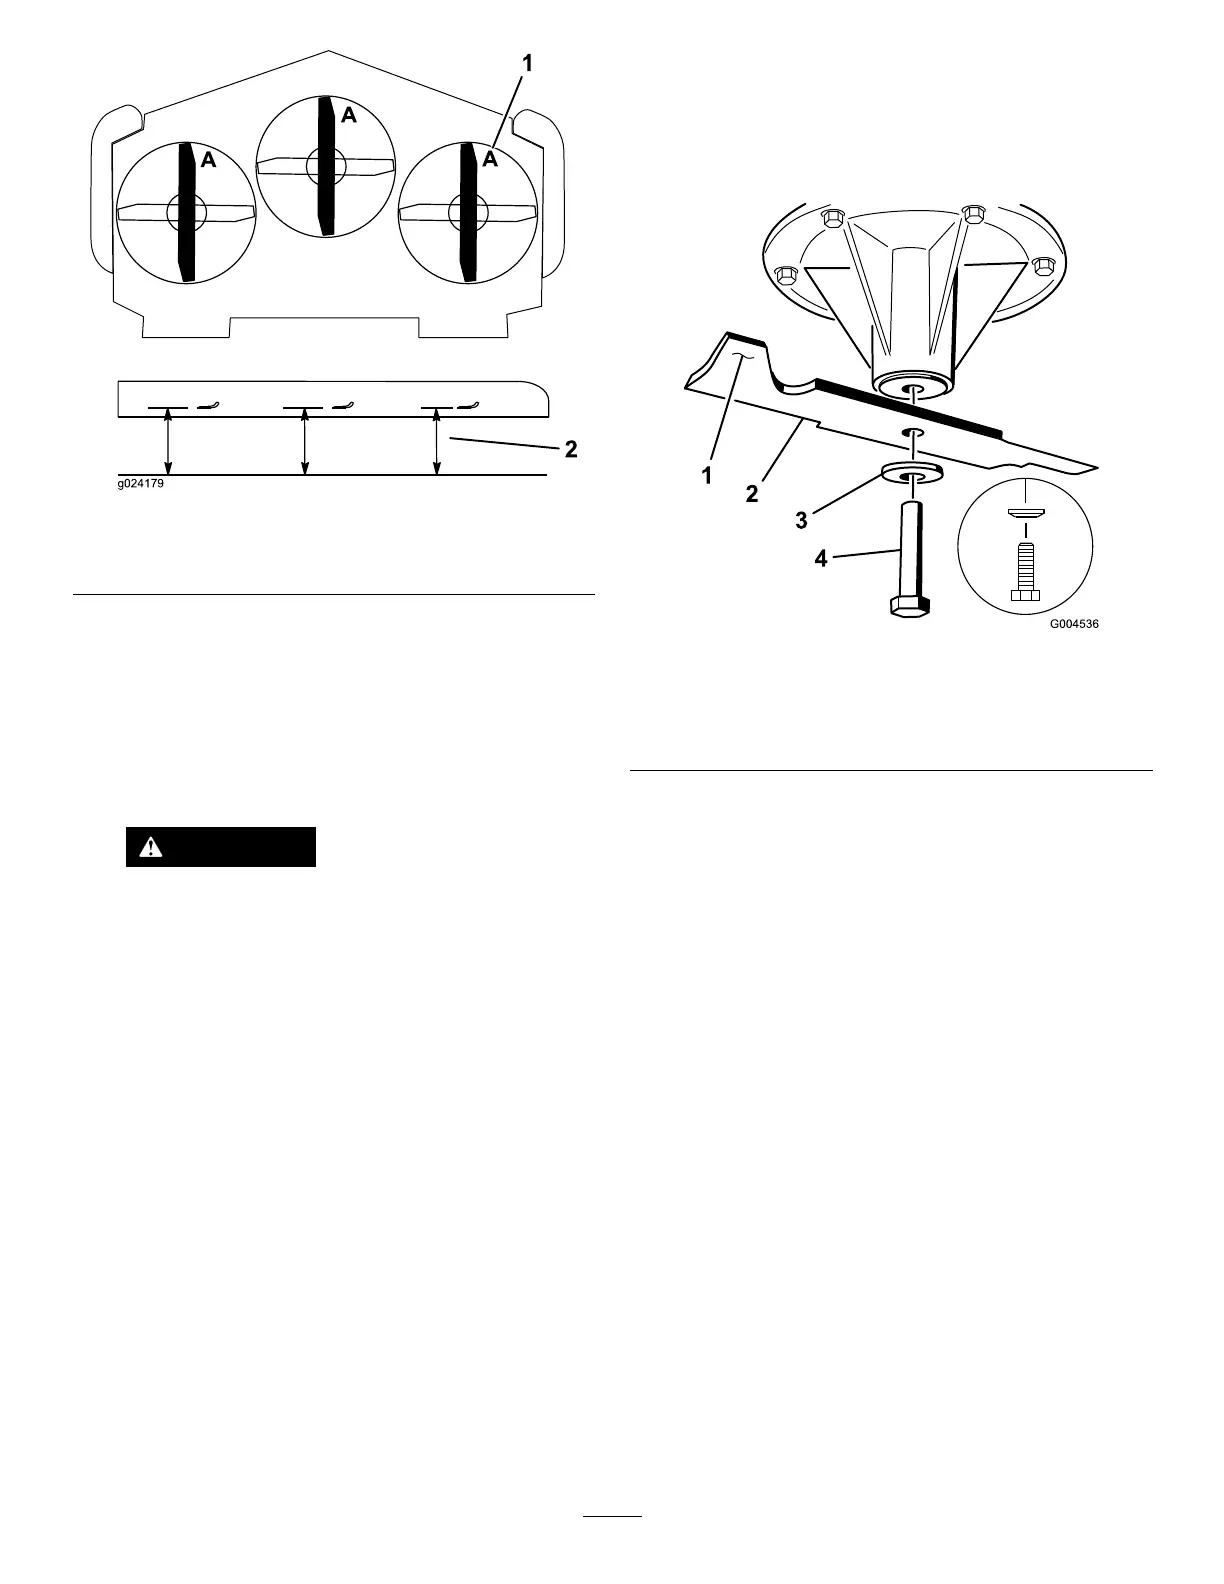
Figure97
1.Measureherefromblade
tohardsurface
2.PositionA
4.Rotatetheoppositeendsofthebladesforward.
5.Measurefromalevelsurfacetothecuttingedgeof
thebladesatthesamepositionasinstep3above.
Thedifferencebetweenthedimensionsobtainedin
steps3and4mustnotexceed3mm(1/8inch).Ifthis
dimensionexceeds3mm(1/8inch),thebladeisbent
andreplaceit;refertoRemovingtheBlades(page59)
andInstallingtheBlades(page61).
WARNING
Abladethatisbentordamagedcouldbreak
apartandcouldseriouslyinjureorkillyouor
bystanders.
•Alwaysreplacebentordamagedblade
withanewblade.
•Neverleorcreatesharpnotchesinthe
edgesorsurfacesofblade.
RemovingtheBlades
Important:Theright-handbladeonthismowerdeck
iscounter-rotatingandusesaleft-handthreadedblade
bolt.UseFigure99forthecorrectplacementofthe
mowerblades.
Replacethebladesifasolidobjectishit,ifthebladeisout
ofbalanceorisbent.Toensureoptimumperformanceand
continuedsafetyconformanceofthemachine,usegenuine
Tororeplacementblades.Replacementbladesmadebyother
manufacturersmayresultinnon-conformancewithsafety
standards.
1.Holdthebladeendusingaragorthicklypaddedglove.
2.Removetheleftandcenterbladebolt,curvedwasher,
andbladefromthespindleshaft(Figure98).
3.Removetherightbladebolt(left-handthreadedbolt),
curvedwasher,andbladefromthespindleshaft(Figure
99).
Note:Makenoteofthetypebladeandwhereeach
bladeisinstalled.SeeFigure99forthecorrectposition.
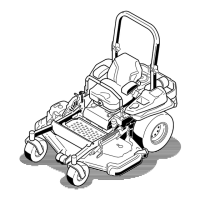
Figure98
LeftandCenterSpindleShown
1.Sailareaofblade3.Curvedwasher
2.Blade4.Bladebolt
59