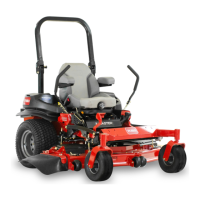
InstallingtheBlades
Important:Theright-handbladeonthismowerdeck
iscounter-rotatingandusesaleft-handthreadedblade
bolt.UseFigure103forthecorrectplacementofthe
mowerblades.
1.Installtheleftandcenterblades,curvedwashers,and
bladeboltstothespindleshafts(Figure102andFigure
103).
Note:Ensurethecurvedpartofthebladeispointing
upwardtowardtheinsideofthemowerdecktoensure
propercutting.
Note:Ensurethecurved-washerconeisinstalled
towardsthebolthead(Figure102).
2.Installtherightblade,curvedwasher,andbladebolt
(left-handthreadedbolt)tothespindleshaft(Figure
102andFigure103).
Figure102
Leftandcenterspindleshown
1.Sailareaoftheblade3.Curvedwasher
2.Blade4.Bladebolt
3.Torquethebladeboltsto115-150N-m(85-110ft-lb)
(Figure103).
Figure103
1.Frontofmowerdeck4.Counter-rotatingblade
2.Right-handthreadedblade
bolts
5.Left-handthreadedblade
bolt
3.Regularblades
RemovingtheMowerDeck
Beforeservicingorremovingthemowerdeck,lockoutthe
springloadeddeckarms.
WARNING
Deckliftarmassemblieshavestoredenergy.
Removingthedeckwithoutreleasingthestored
energycancauseseriousinjuryordeath.
Donotattempttodisassemblethedeckfromthe
frontframewithoutlockingoutthestoredenergy.
1.Stopengine,waitforallmovingpartstostop,and
removekey.Engageparkingbrake.
2.Removetheheightadjustmentpinandlowerthedeck
totheground.
3.Placetheheightadjustmentpininthe7.6cm(3inch)
cuttingheightlocation.Thislocksthedeckliftarmsin
thelowestpositionwhenthedeckisremovedandthe
storedenergyinthedeckspringisreleased.
4.Removethebeltcovers.
5.Liftuptheoorpanandinsertaratchetintothesquare
holeinthedeckidler(Figure104).
61