TORO®- Grandstand Service Instruction Manual 3-19
CHASIS
3
Tower Removal
1. Lower the deck and take tension out of the height of
cut assembly.
2. Remove the height of cut assembly, see “Height of
Cut Assembly Removal,” page 3-5.
3. Remove the cushion assembly.
4. Remove the fuel tank, see “Fuel Tank Removal,”
page 3-10.
5. Remove the knee cushion retention knobs.
6. Remove the wiring harness, see “Wiring Harness
Removal,” page 8-2.
7. Remove the hour-meter, PTO switch, and throttle
control.
NOTE: You will have to remove the choke control if
equipped.
8. Remove the platform, see “Platform Removal,” page
3-12.
9. Remove the controls, see “Left Hand Motion Control
Removal,” page 4-2 and “Right Hand Motion
Control Removal,” page 4-3.
10. Remove the parking brake, see “Parking Brake
Removal,” page 3-2.
NOTE: You do not have to remove the brake cables
and brake calipers.
11. Drain fluid from the hydraulic reservoir and hose.
Remove both items.
12. Remove the fuel tank mount.
13. Remove the bolt and nut holding the fan guard into
place.
14. Remove the 4 bolts and nuts holding the tower to
the frame.
Tower Installation
1. Install the tower to the frame. Secure fan guards
with nuts and bolts.
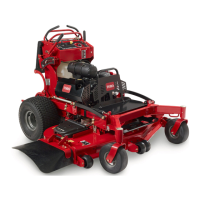
2. Install the 4 bolts and nuts to secure the tower to the
frame (Figure 17).
3. Install the fuel tank mount.
4. Install the hydraulic reservoir and hose.
5. Install the brake cable and brake handle.
6. Install the hour-meter, PTO switch, and throttle
control.
7. Install the wiring harness, see “Wiring Harness
Installation,” page 8-2.
8. Install the controls, See “Left and Right Hand Motion
Control Installation,” page 4-3 and 4-4.
9. Install the platform, see page 3-12.
10. Install the height of cut assembly,
11. Install the fuel tank, page 3-10.
12. Install the cushion retention knobs.
13. Lift the knee cushion in place.
NOTE: Tracking and speed will have to be set once
the controls are installed. Hydraulic fluid
will need to be added.
Figure 17
 Loading...