Maintaining the Headlights
Replacing the Headlight
Specication: See your Parts Catalog .
1. Disconnect the battery; refer to Disconnecting
the Battery ( page 42 ) .
2. Open the hood.
3. Disconnect the electrical connector for the
harness from the connector of the lamp
assembly ( Figure 48 ).
g312735
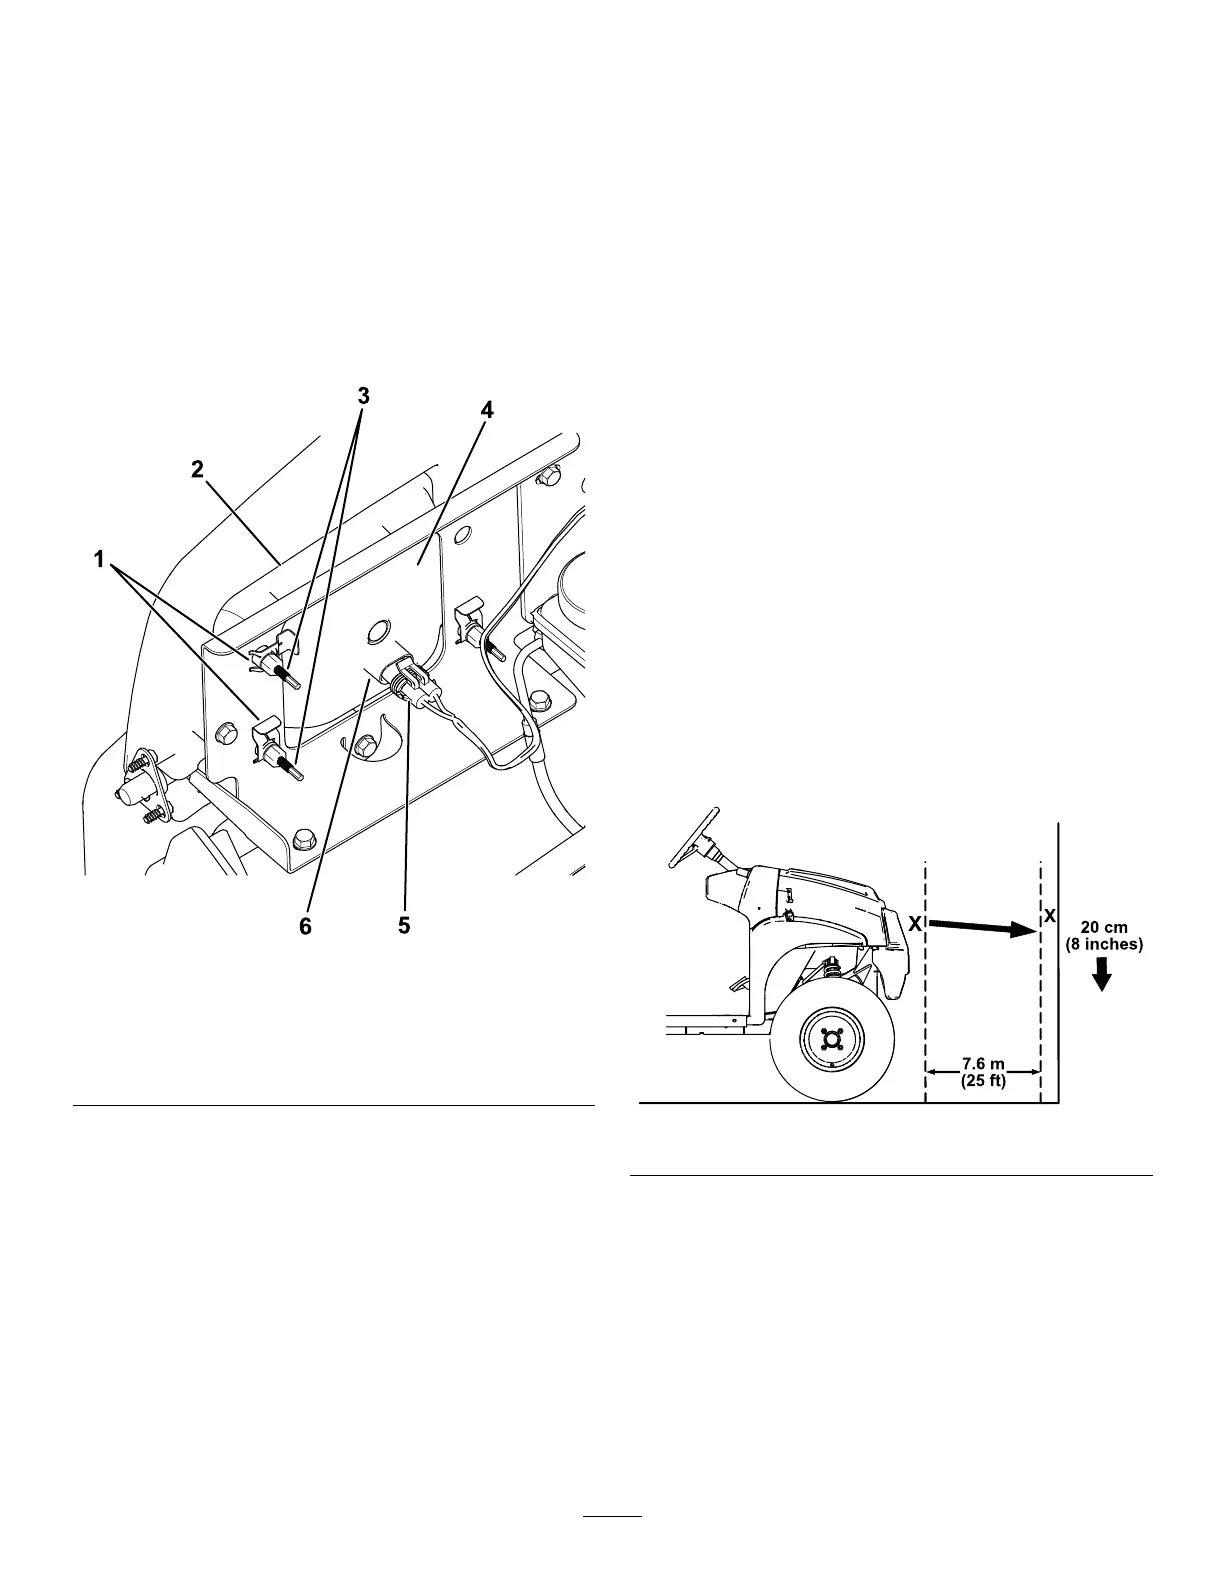
Figure 48
1. Speed clip
4. Headlight
2. Opening in the bumper
5. Harness-electrical
connector
3. Adjustment screw 6. Lamp assembly
4. Remove the speed clips that secure the
headlight to the headlight bracket ( Figure 48 ).
Note: Retain all parts for installation of the new
headlight.
5. Remove the headlight assembly by moving it
forward through the opening in the front bumper
( Figure 48 ).
6. Install the new headlight through the opening in
the bumper ( Figure 48 ).
Note: Ensure the adjustment posts are lined up
with the holes in the mounting bracket behind
the bumper .
7. Secure the headlight assembly with the speed
clips that you removed in step 4 .
8. Connect the electrical connector for the harness
to the connector of the lamp assembly ( Figure
48 ).
9. Adjust the headlights to direct the beams to
the desired position, refer to Adjusting the
Headlights ( page 44 ) .
Adjusting the Headlights
Use the following procedure to adjust the headlight
beam position whenever a headlight assembly is
replaced or removed.
1. Park the machine on a level surface with the
headlights approximately 7.6 m (25 ft) from a
wall ( Figure 49 ).
2. Measure the distance from the oor to the center
of the headlight and make a mark on the wall at
the same height.
3. T urn the key switch to the O N position, and turn
on the headlights.
4. T ake note of where the headlights aim on the
wall.
The brightest part of the headlight beam should
be 20 cm (8 inches) below the mark placed on
the wall ( Figure 49 ).
g312734
Figure 49
5. At the back of the headlight assembly , rotate
adjustment screws ( Figure 48 ) to pivot the
headlight assembly and align the position of the
cast beam.
6. Connect the battery and close the hood; refer to
Connecting the Battery ( page 43 ) .
44