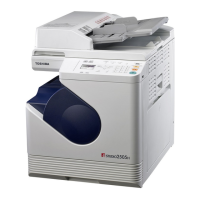
Do you have a question about the Toshiba e-studio 2540c and is the answer not in the manual?
Guidelines for service technicians regarding adjustments and potential issues.
Explains the meaning of icons used throughout the manual for clarity.
Procedures to adjust settings for a darker and sharper copy image.
Methods to adjust the density of solid colored and gradational images.
Optimizing image quality for different paper types by adjusting transfer bias and fuser temperature.
Optimizing image quality control intervals based on environment and usage conditions.
Adjusting registration motor speed to correct color misalignment in paper feeding direction.
Adjusting target high density control values to customize image density.
Adjusting image processing for sharp and dark copy images of text and graphics.
Adjusting color balance, hue, and density to match the original's color balance.
Adjusting color balance and density to prevent color blending in gray areas.
Adjusting saturation, color balance, and density for vivid color copies.
Adjusting density and background for pale areas to improve highlight reproducibility.
Adjusting background density to eliminate it for better contrast with text.
Adjusting background density to prevent ghosting from thin paper originals.
Adjusting image processing (sharpness) to eliminate moiré on photo images.
Adjusting sharpness intensity to obtain sharper copy images from light/blurred originals.
Adjusting sharpness intensity to soften visible edges or contours in photo images.
Adjusting density and level for bold text/logos to achieve higher color saturation.
Performing automatic calibration for paper types to maintain steady color balance.
Selecting specific original modes to improve halftone reproduction in black and white.
Adjusting the threshold for auto color mode to switch between full color and black modes.
Periodically adjusting color reproducibility via automatic calibration for consistent color balance.
Adjusting color balance for different paper types via automatic calibration.
Changing printer driver settings like "Image Quality Type" to match original color balance.
Adjusting "Image Quality Type" to match printout color balance with monitor display.
Changing printer driver options to ensure consistent gray hue across different data types.
Using printer driver settings to reproduce gray areas using only black toner.
Adjusting print brightness via the printer driver's "Brightness" setting.
Adjusting print saturation via the printer driver's "Saturation" setting.
Adjusting print contrast via the printer driver's "Contrast" setting.
Increasing sharpness intensity via printer driver settings for sharper print images.
Decreasing sharpness intensity via printer driver settings for softer print images.
Decreasing sharpness intensity to reduce jagged edges in low-resolution images.
Adjusting sharpness or toner amount to prevent toner scattering on colored text/lines.
Adjusting printer driver options, color balance, or gamma for clear printing of light-colored lines/text.
Adjusting printer driver options or color balance to darken light areas while preserving high-color areas.
Changing printer driver options to clearly print thin or double lines in solid filled areas.
Enabling "Toner Save" option on printer driver to reduce image density and toner usage.
Adjusting upper limit of image density in toner save mode for desired density.
Changing printer driver option to print illegible colored text in black for better legibility.
Enabling "Do not Print Blank Pages" option on printer driver to ignore blank pages.
Adjusting printer driver or color balance to match black text hue on monitor.
Adjusting limit value of maximum toner used to avoid toner fixing problems.
Registering desired print image quality as Custom Color Settings.
Selecting twin color print mode to change colored text and lines on full-color originals.
Setting items for using ICC profiles for color interchange and balance.
Switching overprint setting for PDF files in USB direct print.
Adjusting threshold value to store B/W images clearly in Auto Color mode.
Selecting compression rate to reduce JPEG file size for scanned images.
Selecting "Printed Image" mode to minimize moiré in color photo images stored.
Changing "Image Quality Type" to match stored image color balance with original.
Selecting scan resolution or sharpness to minimize moiré when printing from e-Filing.
Printing images directly from e-Filing box to maintain quality, avoiding PC download conversion.
Storing images as RGB data via Scan to Box for monitor display and editing.
Selecting appropriate printing image mode for optimal processing of stored color images.
Appendix listing e-Filing settings by data input/output methods.
Adjusting compression rate or scan resolution to reduce noise around text and edges.
Adjusting background density to ensure clear contrast between background and image.
Scanning in grayscale mode for clearer black and white scanning and printing.
Minimizing scanned image file size by selecting resolution and compression rates.
Adjusting sharpness intensity to scan soft and blurred originals sharply.
Adjusting black density for scanned full-color images to match original hue.
Adjusting gamma curve balance for scan density to control halftone gradation.
Registering custom mode settings for specific original types to optimize scanning.
Adjusting white void amount to eliminate shading around scanned images.
Performing periodic calibration for consistent color balance on printouts.
Assigning specific profiles and calibration sets to media types for consistent color across different papers.
Using Color Editor to adjust CMYK simulation/output profiles for desired color balance.
Applying image file's color profile instead of GA-1211 default profile.
Adjusting gray and black area tones using K toner or CMYK toners.
Changing smoothing setting to suppress jagginess in low-resolution images.
Changing image quality settings to suppress moiré or jaggy edges on photographs.
Adjusting sharpness setting on printer driver or default settings for sharper/softer images.
| Functions | Print, Copy, Scan, Fax |
|---|---|
| Print Speed (Black) | 25 ppm |
| Print Speed (Color) | 25 ppm |
| Print Resolution | 1200 x 1200 dpi |
| Scan Resolution | 600 x 600 dpi |
| Connectivity | USB, Ethernet |
| Duplex Printing | Yes |
| Fax Transmission Speed | 33.6 Kbps |
| Maximum Paper Size | A3 |
| Copy Resolution | 600 x 600 dpi |
| Scanner Type | Flatbed and ADF |
| Copy Speed (Color) | 25 ppm |
| Copy Speed (Black) | 25 ppm |
| Paper Size | Legal, Letter |
| Network Connectivity | Ethernet |
| Operating System Compatibility | Windows, macOS, Linux |
| Type | Color Laser |
