EasyManua.ls Logo

Toshiba E-STUDIO 2500C User Manual

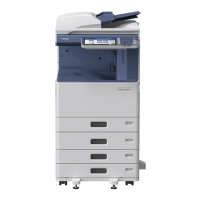
Toshiba E-STUDIO 2500C
418 pages
To Next Page IconTo Next Page
Page #1 background imageLoading...
Page #1 background image
MULTIFUNCTIONAL DIGITAL COLOUR SYSTEMS
Operator's Manual
for Basic Functions

Table of Contents

Other manuals for Toshiba E-STUDIO 2500C

Questions and Answers:

Toshiba E-STUDIO 2500C Specifications

General IconGeneral
FunctionsPrint, Copy, Scan, Fax
Print TechnologyLaser
Print Speed (Color)25 ppm
Print Speed (Black)25 ppm
Print Resolution600 x 600 dpi
First Print Out Time (Mono)8.4 seconds
Scan Resolution600 dpi
Copy Speed25 cpm
Copy Resolution600 x 600 dpi
Fax Transmission Speed33.6 kbps
Fax Resolution (Super Fine)300 x 300 dpi
Supported Operating SystemsWindows, Mac OS
Paper SizeA3, A5, B5, Legal, Letter, Executive
Scanner TypeColor Scanner
InterfaceUSB 2.0, Ethernet

Summary

Notice to Users

For Germany only

Specific notices and regulations applicable only to Germany.

Before Reading This Manual

Trademarks

Lists trademarks of Microsoft and Adobe Systems, and other product names.

Toshiba Quality is Second to None

Supplies / Parts

Details on the benefits and quality of genuine Toshiba supplies and parts.

Features of the e-STUDIO2500c/3500c/3510c

General Precautions

When installing or moving

Safety warnings and precautions related to installing and moving the equipment.

Disclaimer Notice

Forgery Prevention Function/Storage of Colour Copies

Storage of colour copies

Guidelines for storing colour copies to prevent fading and damage.

Chapter 1: BEFORE USING EQUIPMENT

Description of Each Component

Detailed explanation and illustration of the equipment's various parts and components.

Preparation 1- Turning Power On/Off

Step-by-step instructions for turning the equipment's power on and off correctly.

Preparation 2- Setting Copy Paper

Instructions on how to load and set various types and sizes of copy paper.

Chapter 2: HOW TO MAKE COPIES

Setting Originals

Information on acceptable originals and how to place them for copying.

Making Copies

Detailed procedure for making copies, including initial settings and copying steps.

Bypass Copying

Instructions for using the bypass tray for various paper types and sizes.

Chapter 3: SETTING OF BASIC COPY MODES

Paper Selection

Options for selecting paper size and source, including automatic and manual methods.

Enlargement and Reduction Copying

Procedures for enlarging or reducing copies using various methods.

Selecting Finishing Modes

Details on available finishing options like sorting, stapling, and booklet making.

Duplex Copying

Guide to performing double-sided copying from various original types.

Chapter 4: IMAGE ADJUSTMENT

Colour Balance (YMCK Adjustment)

Adjusting the overall color balance by modifying toner amounts (Y, M, C, K).

RGB Adjustment

Adjusting the overall color balance by changing red, green, and blue strengths.

Chapter 5: USING THE EDITING FUNCTIONS

IMAGE SHIFT

Creating margins to allow for binding by shifting the original image.

2IN1 / 4IN1

Copying multiple originals onto a single sheet of paper.

JOB BUILD

Copying different kinds of originals at one time by setting them as jobs.

Chapter 6: e-FILING

Creating User Boxes

Steps to create user boxes for organizing and managing documents.

Storing Documents in e-Filing

Instructions for saving scanned original data into the e-Filing system.

Chapter 7: TEMPLATE

Registering User Groups and Templates

Process for registering function combinations as templates in groups.

Recalling Templates

How to recall and apply registered templates for copying, scanning, or fax.

Chapter 8: JOB STATUS

Confirming Print Job Status

How to check the status of print jobs, including pausing, deleting, and moving.

Log List

Reviewing the history of copy, print, scan, and fax operations.

Error Code

List of error codes and their corresponding problems and solutions.

Chapter 9: BLINKING GRAPHIC SYMBOLS

Blinking Graphic Symbols

Overview of graphic symbols on the touch panel and their meanings.

Replace Toner Cartridge Symbol

Information on the symbol indicating toner replacement and related maintenance.

Jam Symbols

Guidance on identifying and resolving paper misfeeds in various parts of the equipment.

Chapter 10: WHEN THIS MESSAGE APPEARS

“Toner near Empty”

Explanation of the 'Toner near Empty' message and how to reset the counter.

“Check paper size setting on control panel for drawer N”

Troubleshooting steps for mismatches between placed paper size and registered settings.

Chapter 11: MAINTENANCE

Daily Inspection

Recommended weekly cleaning procedures for key components to ensure quality.

Simple Troubleshooting

Checks and countermeasures for common operational issues and malfunctions.

Chapter 12: SPECIFICATIONS & OPTIONS

e-STUDIO2500c/3500c/3510c Specifications

Detailed technical specifications for the e-STUDIO2500c/3500c/3510c models.

Specifications of Options

Technical specifications for available optional accessories like feeders and finishers.

Packing List

List of items included in the product packaging.

Related product manuals