74
Chapter 13
Customize Your Network Settings
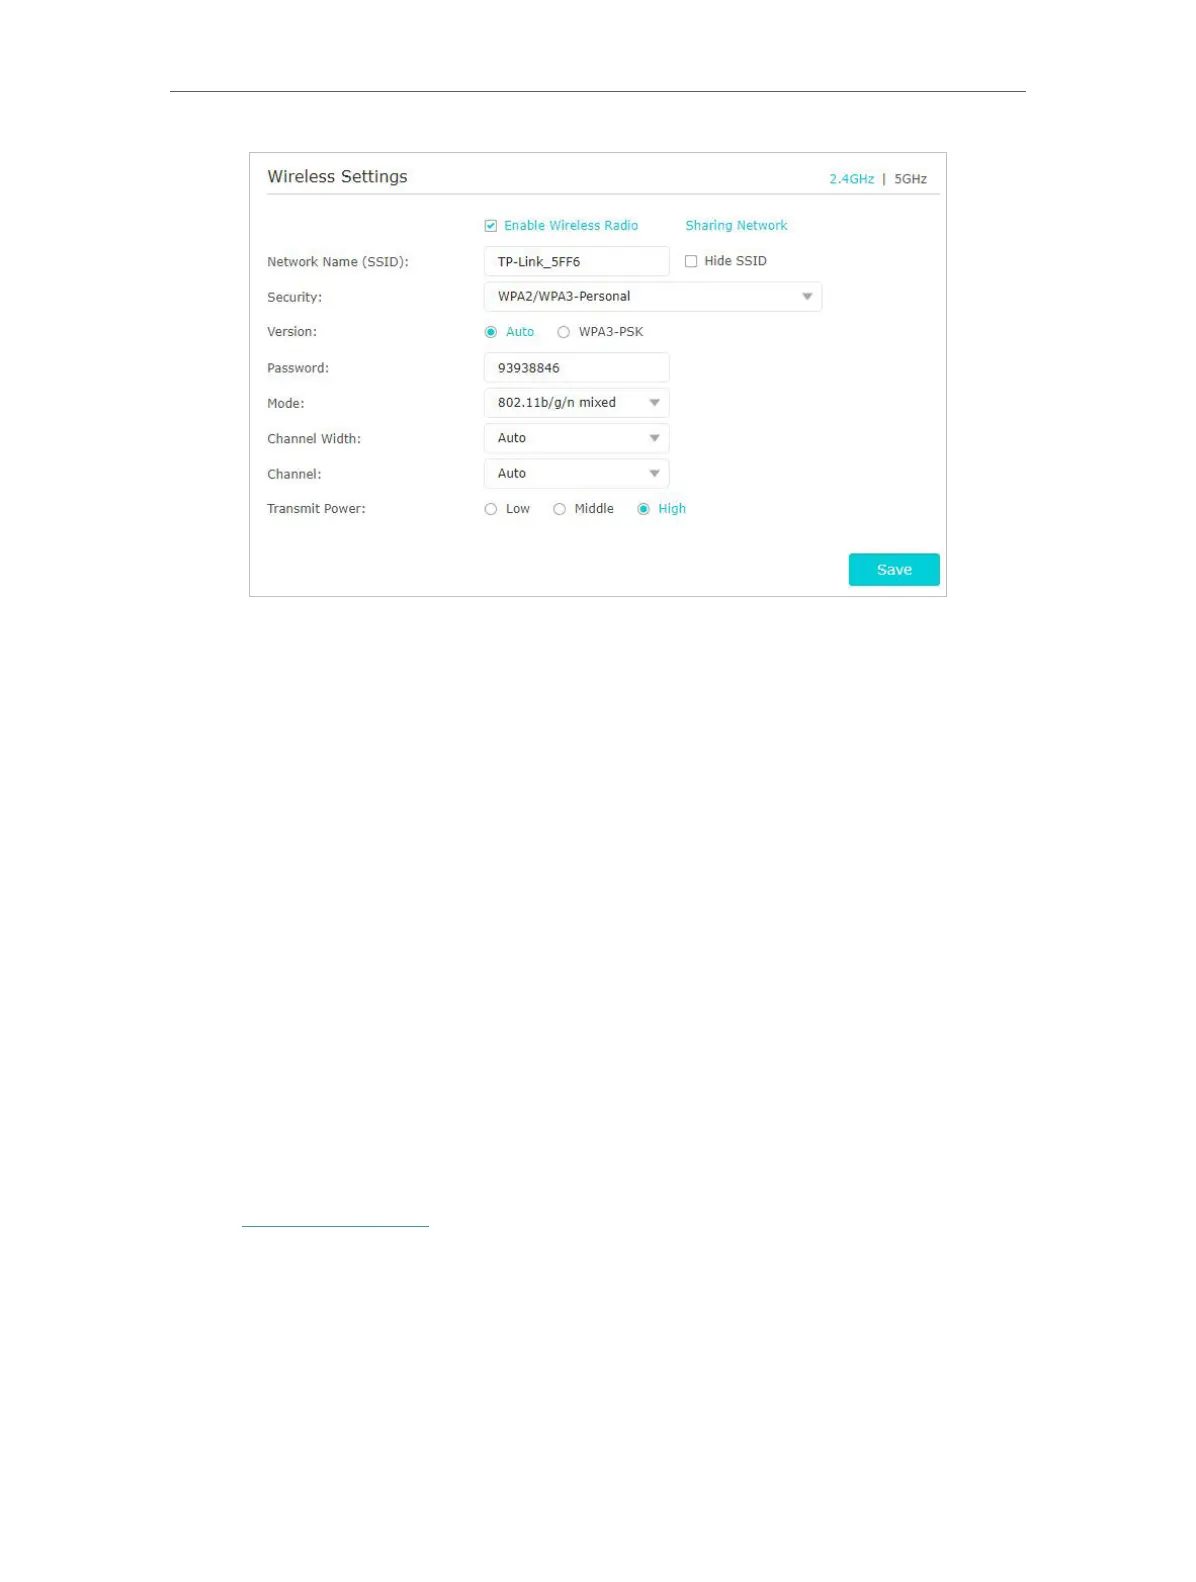
3. Select an option from the Security drop-down list. We recommend you don’t change
the default settings unless necessary. If you select other options, configure the
related parameters according to the help page.
In addition
• Mode - Select a transmission mode according to your wireless client devices. It is
recommended to just leave it as default.
• Channel Width - Select a channel width (bandwidth) for the wireless network.
• Channel - Select an operating channel for the wireless network. It is recommended
to leave the channel to Auto, if you are not experiencing the intermittent wireless
connection issue.
• Transmit Power - Select either High, Middle or Low to specify the data transmit power.
The default and recommended setting is High.
13. 7. Use WPS for Wireless Connection
Wi-Fi Protected Setup (WPS) provides an easier approach to set up a security-protected
Wi-Fi connection.
1. Visit http://tplinkwifi.net, and log in with your TP-Link ID or the password you set for
the router.
2. Go to Advanced > Wireless > WPS.
13. 7. 1. Set the Router’s PIN
Router’s PIN is enabled by default to allow wireless devices to connect to the router
using the PIN. You can use the default one or generate a new one.