105
Chapter 11
Guest Network
12. 1. Create a Network for Guests
1. Visit http://tplinkwifi.net or http://192.168.0.1, and log in with your TP-Link ID or the
password you set for the router.
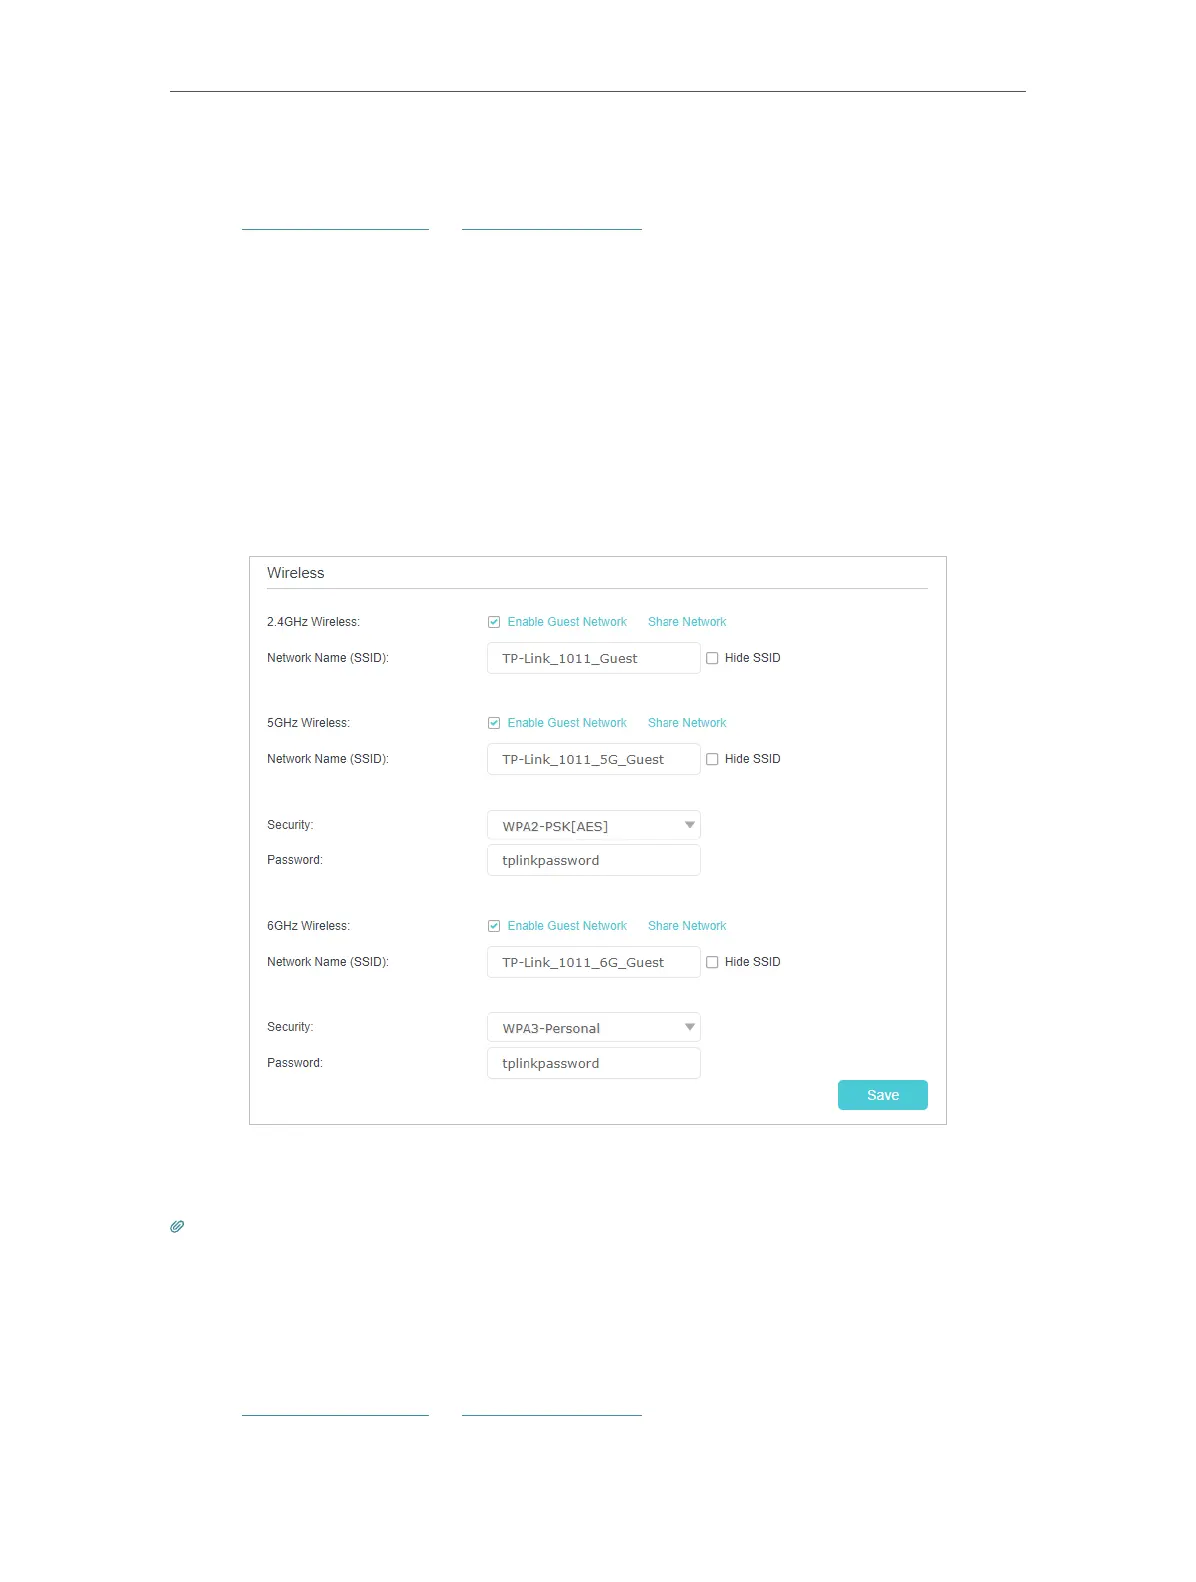
2. Go to Advanced > Guest Network. Locate the Wireless section.
3. Create a guest network as needed.
1 ) Tick the Enable checkbox for the 2.4GHz or 5GHz wireless network.
2 ) Customize the SSID. Don‘t select Hide SSID unless you want your guests to
manually input the SSID for guest network access.
3 ) Select the Security type and customize your own password. If No security is
selected, no password is needed to access your guest network.
4. Click Save. Now your guests can access your guest network using the SSID and
password you set!
Tips:
To view guest network information, go to Network Map and locate the Guest Network section. You can turn on or off the
guest network function conveniently.
12. 2. Customize Guest Network Options
1. Visit http://tplinkwifi.net or http://192.168.0.1, and log in with your TP-Link ID or the
password you set for the router.