Manage the Range Extender 21
a) IP Address: The IP address to be assigned to the extender.
b) Subnet Mask: The subnet mask that matches the static IP address
entered above.
c) Default Gateway: The gateway address of your Wi-Fi network.
4) Click
to apply your configuration.
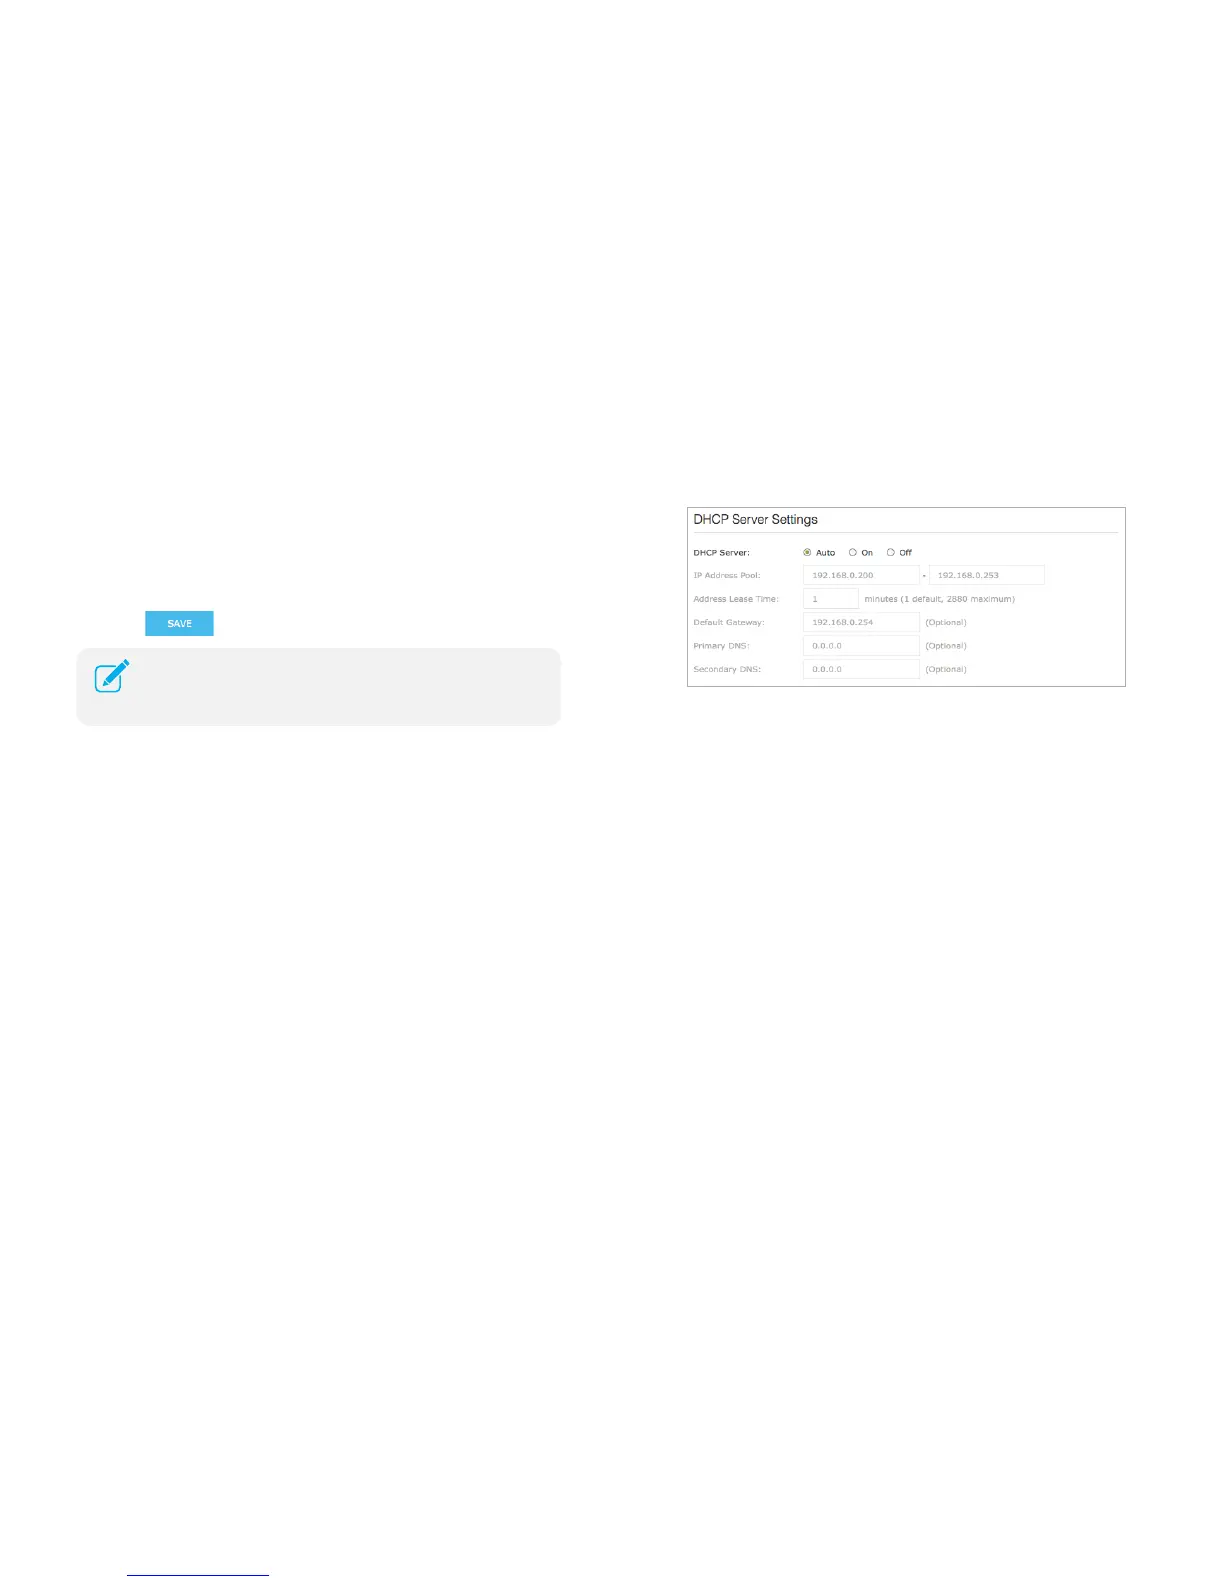
DHCP Server
By default, the Range Extender is configured as a DHCP (Dynamic Host
Configuration Protocol) server to automatically allocates dynamic IP
addresses to DHCP clients connected to your extended networks.
To change the DHCP Server Settings:
1) Launch a web browser and type: http://tplinkrepeater.net in the URL
field, then log in using the admin credentials.
2) Go to Settings > Network > DHCP Server Settings.
3) Under DHCP Server, select one of the following options:
● Auto: This option is selected by default to automatically allocate IP
addresses to devices.
● On: If you want the extender to allocate IP addresses from a IP
address pool, select this option and enter the following:
a. IP Address Pool: Enter the starting and ending IP addresses in
dotted-decimal notation. These addresses must be in the same
subnet as the main (host) network.
b. Address Lease Time: Enter the time duration that an IP address
is leased to the client between 1 and 2880 minutes. The default is
1 minute.
c. Default Gateway: Enter the LAN IP address of your main (host)
network. This field is optional.
d. Primary DNS: Enter the primary DNS address of your main (host)
network. This field is optional.
e. Secondary DNS: Enter the secondary DNS address of your main
 Loading...