• From the main menu select System
• From the system menu select Charge
• Highlight required charge rate and press <OK>
• Press <cancel> to return to main menu
Note: The fast charge option is only available when the instrument is
switched on. The instrument will also charge at a trickle rate if the instrument
is connected for charging but not switched on.
Driver Installation
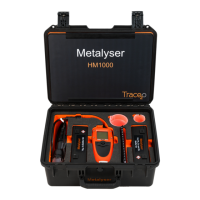
Your
Metalyser
®
is compatible with most computers with a USB socket, but first
the USB drivers may need to be installed. The drivers are located on the
Softwar
e
USB stick provided for all versions of Windows post Windows
95.
• Insert the USB memory stick into an available USB port on your PC
•
Connect
the USB cable supplied to the Metalyser
®
instrument as
described
for battery
charging.
Connect the other end to an
available
USB
port on your PC
• Windows
will
run the ‘install new
hardware wizar
d’
• When asked if
Windows can
connect
to Windows
update
to
search
for
software.
Select
‘No, not this time’
• Select
‘Install
from a list or specific location’, navigate to USB memory
drive
• Windows should install the dr
ivers
• Once
complete,
the wizard
will
run again. Use the same settings as
befor
e
• Once Windows has installed the drivers, reboot
the
computer and your
Metalyser
®
should be installed
•
To
verify
correct installation select fast charge on the instrument and
check
that the fast
charge
icon
(see
page 7) is
displayed
on the
Metalyser
®
’s
screen
4.2 Powering up the system
Turn on the Metalyser
®
instrument by pressing the power button. The
display will come on.
Next press and hold the power button on the tablet PC for 5 seconds
before releasing. The lights should now come on and the instrument will
start up. Windows will load and request a log-on. Please enter:
Username: HM3000
Password : <None>
It is recommended the password is changed to one of your personal
choosing.
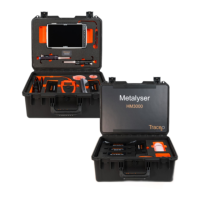
Metalyser® Field Pro HM3000 Instruction Manual v 5.0
 Loading...