20
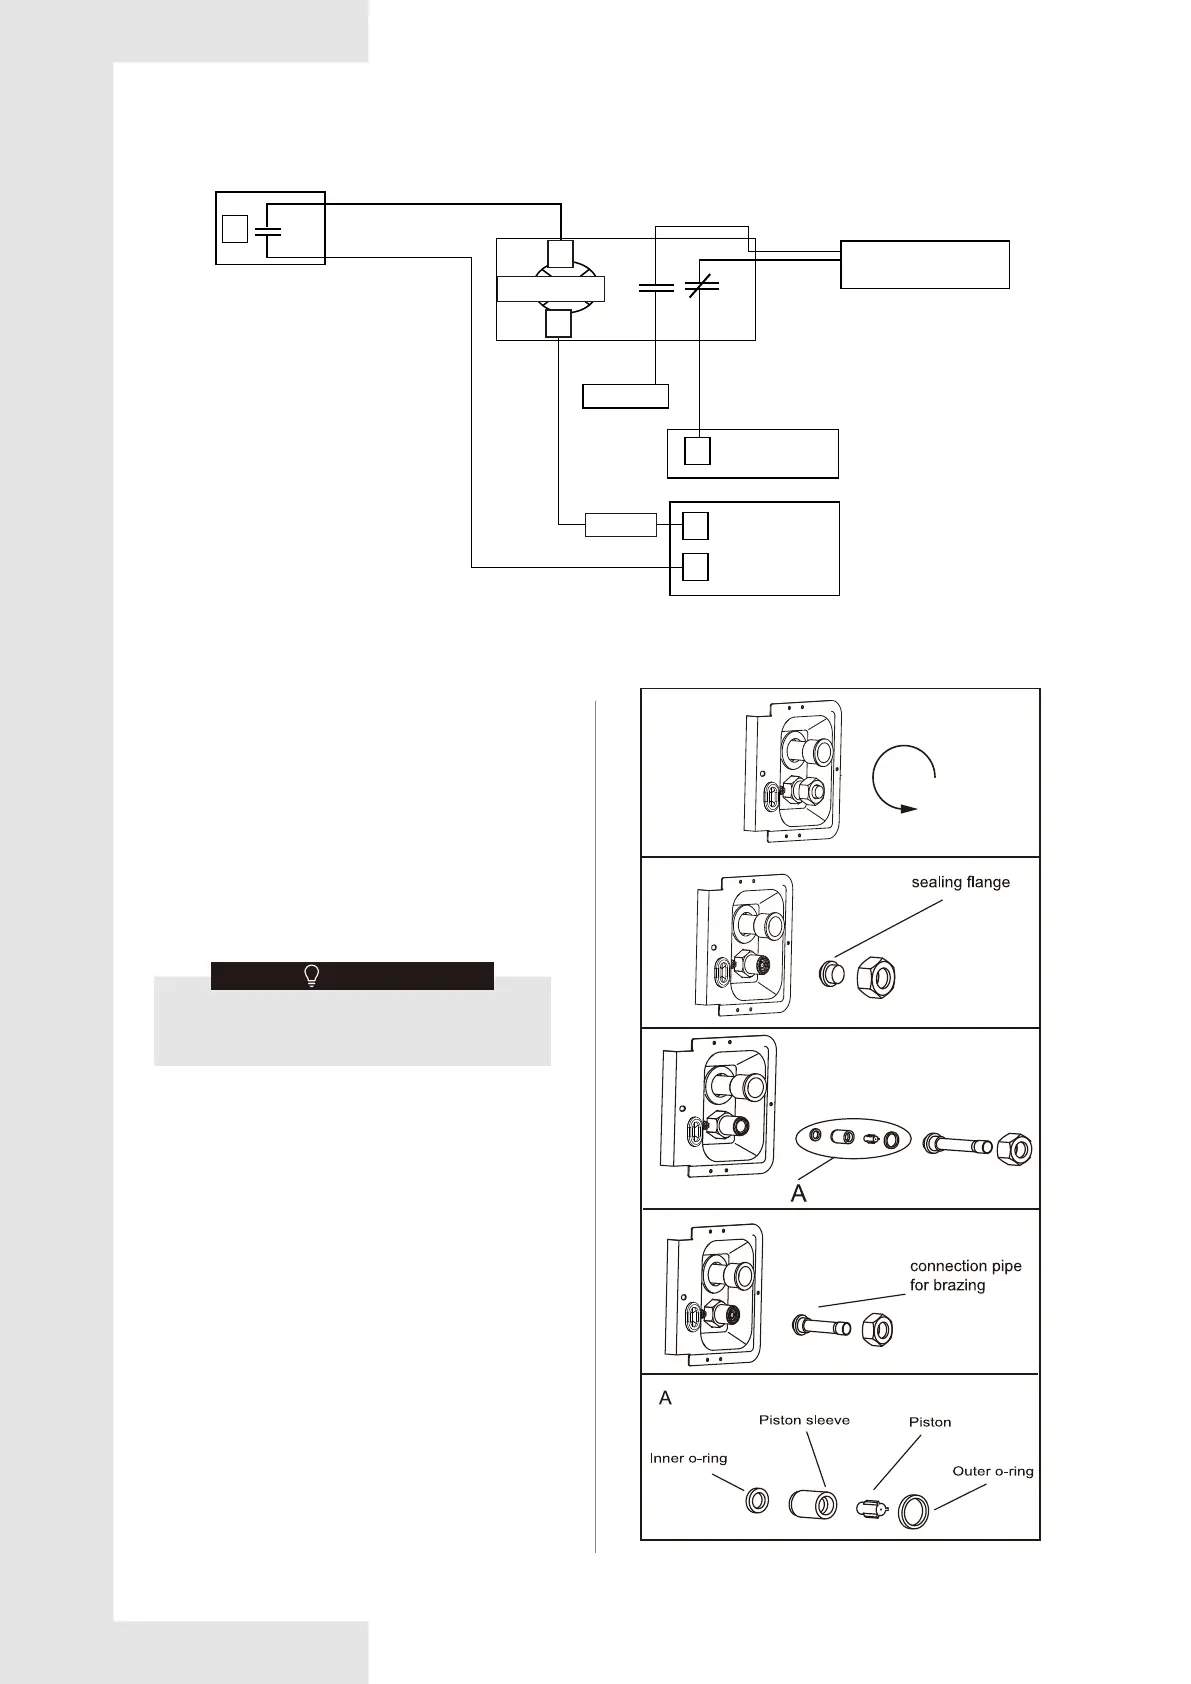
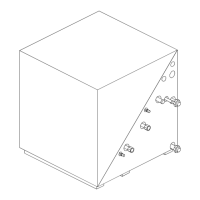
Fig. 4-1
4 PISTION/TXV INSTALLATION
4.1 Piston Installation
Avoid pulling the piston sleeve out when
removing the pre-installed piston.
1. Using a wrench to loosen the nut, remove the nut and
sealing flange.
2. Check the piston sizes for each outdoor/coil
combination in Table 4-1 and choose the correct piston
size for your combination.
3. If a different size piston is needed for your system
combination, remove the pre-installed piston.
4. Choose correct size piston from the doc pack and
insert it with correct orientation.
5. Replace outer O-ring with the O-ring provided in the
doc pack.
6. Attach the connection pipe with nut and tighten to 1/6th
turn past hand-tighten.
NOTE
This coil comes with a factory installed piston metering
device. See Table 4-1 for factory installed piston size.
Some system combinations will require a different sized
piston to be field installed.
* Use the piston size recommended by the outdoor unit if
available.
* The ship-with literature bag will contain additional
R454B pistons for most applications.
* Contact your local parts center to order the appropriate
piston if it is not included with the literature.
Mitigation Board Accessory Shutdown and Alarm Switch
CN34 Switch
Rated @ 1 amp 24 V AC / 120 V AC / 240 V AC
C
C
C
R
R
RELAY
24 V Coil
ALARM
24 V
P
EAC
FURNACE
Power Source