RT-SVX063E-EN
27
Installation
Roof Curb and Ductwork
The roof curbs consist of two main components: a
pedestal to support the unit condenser section and a
“full perimeter” enclosure to support the unit’s air
handler section.
Before installing any roof curb, verify the following:
• It is the correct curb for the unit.
• It includes the necessary gaskets and hardware.
• The purposed installation location provides the
required clearance for proper operation.
• The curb is level and square — the top surface of
the curb must be true to assure an adequate curb-
to-unit seal.
Step-by-step curb assembly and installation
instructions ship with each Trane accessory roof curb
kit. Follow the instructions carefully to assure proper
fit-up when the unit is set into place.
NNoottee:: To assure proper condensate flow during
operation, the unit (and curb) must be as level as
possible. The maximum slope allowable for
rooftop unit applications is 4" end-to-end and 2"
side-to-side.
If the unit is elevated, a field constructed catwalk
around the unit is strongly recommended to provide
easy access for unit maintenance and service.
Recommendations for installing the Supply Air and
Return Air ductwork joining the roof curb are included
in the curb instruction booklet. Curb ductwork must be
fabricated and installed by the installing contractor
before the unit is set into place.
NNoottee:: For sound consideration, cut only the holes in the
roof deck for the ductwork penetrations. Do not
cut out the entire roof deck within the curb
perimeter.
Unit Rigging and Placement
WWAARRNNIINNGG
HHeeaavvyy OObbjjeecctt!!
FFaaiilluurree ttoo ffoollllooww iinnssttrruuccttiioonnss bbeellooww ccoouulldd rreessuulltt iinn
uunniitt ddrrooppppiinngg wwhhiicchh ccoouulldd rreessuulltt iinn ddeeaatthh oorr
sseerriioouuss iinnjjuurryy,, aanndd eeqquuiippmmeenntt oorr pprrooppeerrttyy--oonnllyy
ddaammaaggee..
EEnnssuurree tthhaatt aallll tthhee lliiffttiinngg eeqquuiippmmeenntt uusseedd iiss
pprrooppeerrllyy rraatteedd ffoorr tthhee wweeiigghhtt ooff tthhee uunniitt bbeeiinngg
lliifftteedd.. EEaacchh ooff tthhee ccaabblleess ((cchhaaiinnss oorr sslliinnggss)),, hhooookkss,,
aanndd sshhaacckklleess uusseedd ttoo lliifftt tthhee uunniitt mmuusstt bbee ccaappaabbllee
ooff ssuuppppoorrttiinngg tthhee eennttiirree wweeiigghhtt ooff tthhee uunniitt.. LLiiffttiinngg
ccaabblleess ((cchhaaiinnss oorr sslliinnggss)) mmaayy nnoott bbee ooff tthhee ssaammee
lleennggtthh.. AAddjjuusstt aass nneecceessssaarryy ffoorr eevveenn uunniitt lliifftt..
1. To configure the unit Center-of-Gravity, utilize
TOPSS or contact the local Trane sales office.
2. Test lift the unit to ensure it is properly rigged and
balanced, make any necessary rigging adjustments.
For 10 foot wide units, remove all shipping
supports prior to setting unit on roof curb. Failure to
do so will result in roof curb and/or unit damage.
3. Align the base rail of the unit air handler section
with the curb rail while lowering the unit onto the
curb. Make sure that the gasket on the curb is not
damaged while positioning the unit. (The pedestal
simply supports the unit condenser section)
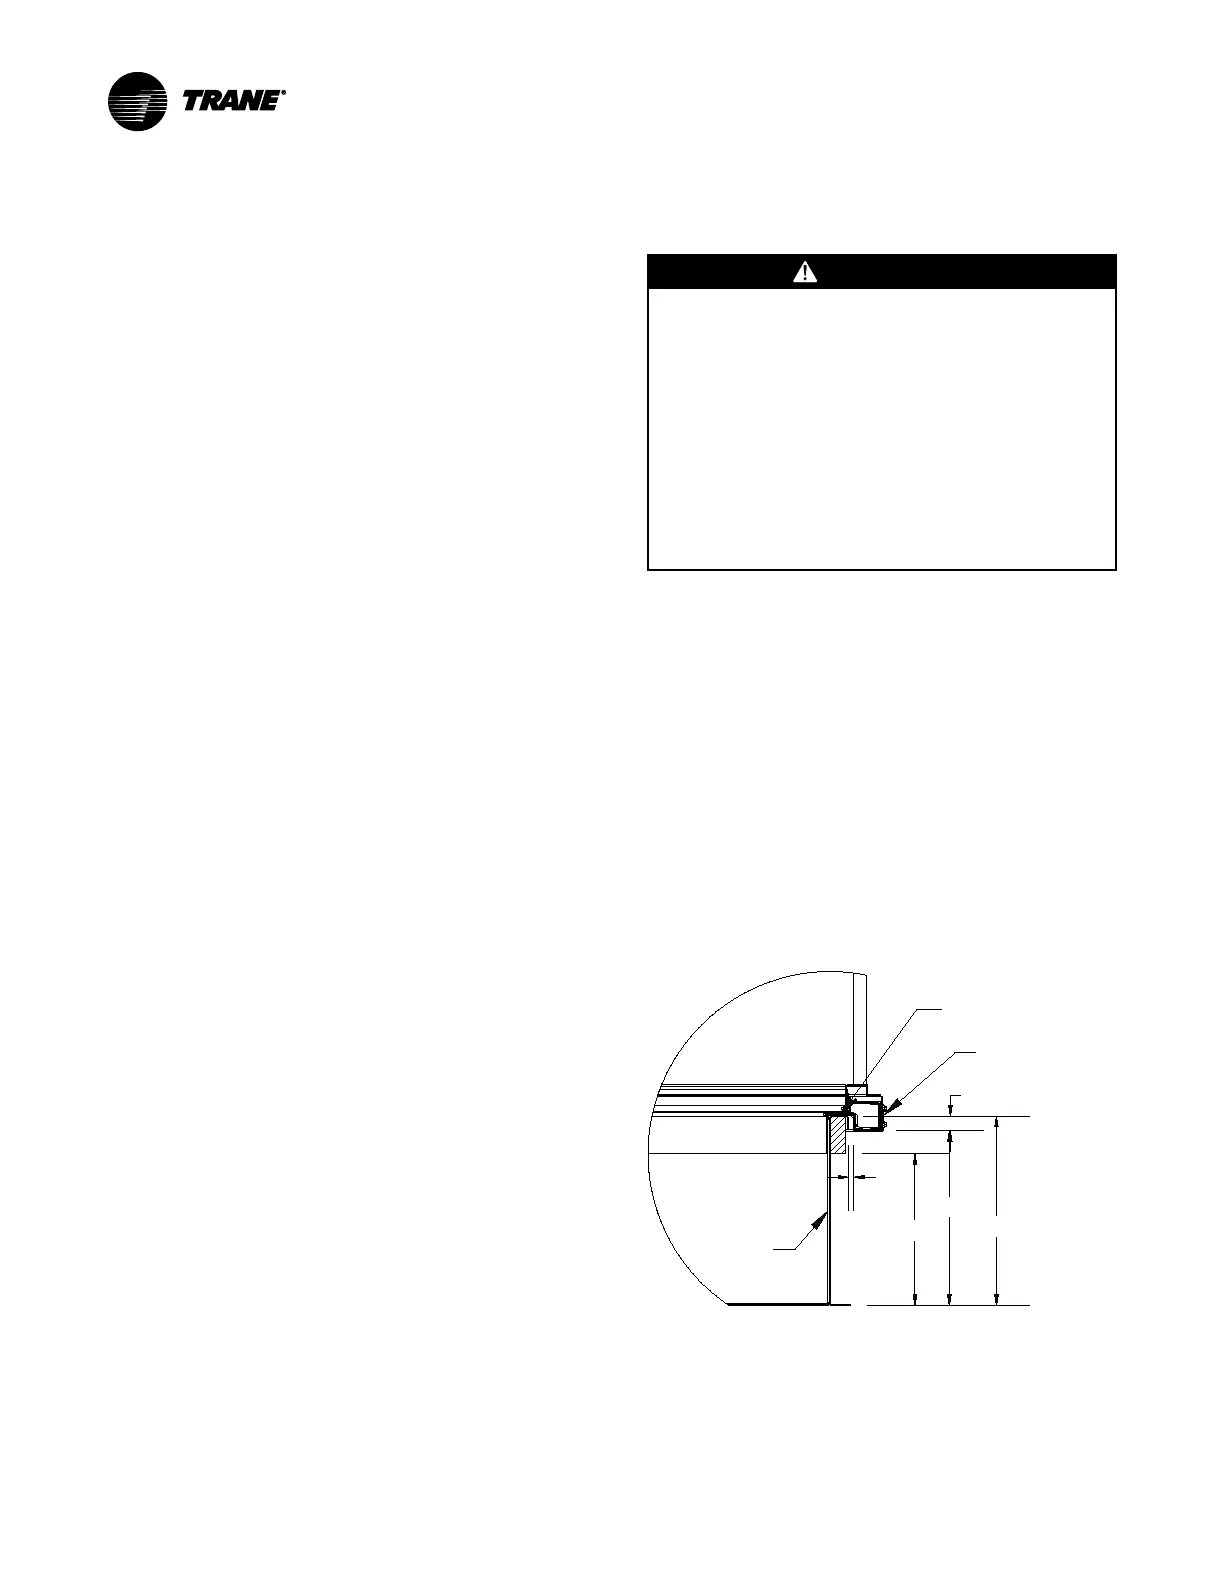
A cross section of the juncture between the unit and
the roof curb is shown below.
Figure 14. Typical unit base and roof curb cross
section
16.60
14.43
SHIPS WITH CURB -
FIELD INSTALLED GASKET,
2 x 4 NAILER
LIFTING LUGS/UNIT BASE
0.50
ROOF CURB
1.40
18.00

 Loading...


