28 BAS-SVX17B-EN
Maintenance and Troubleshooting
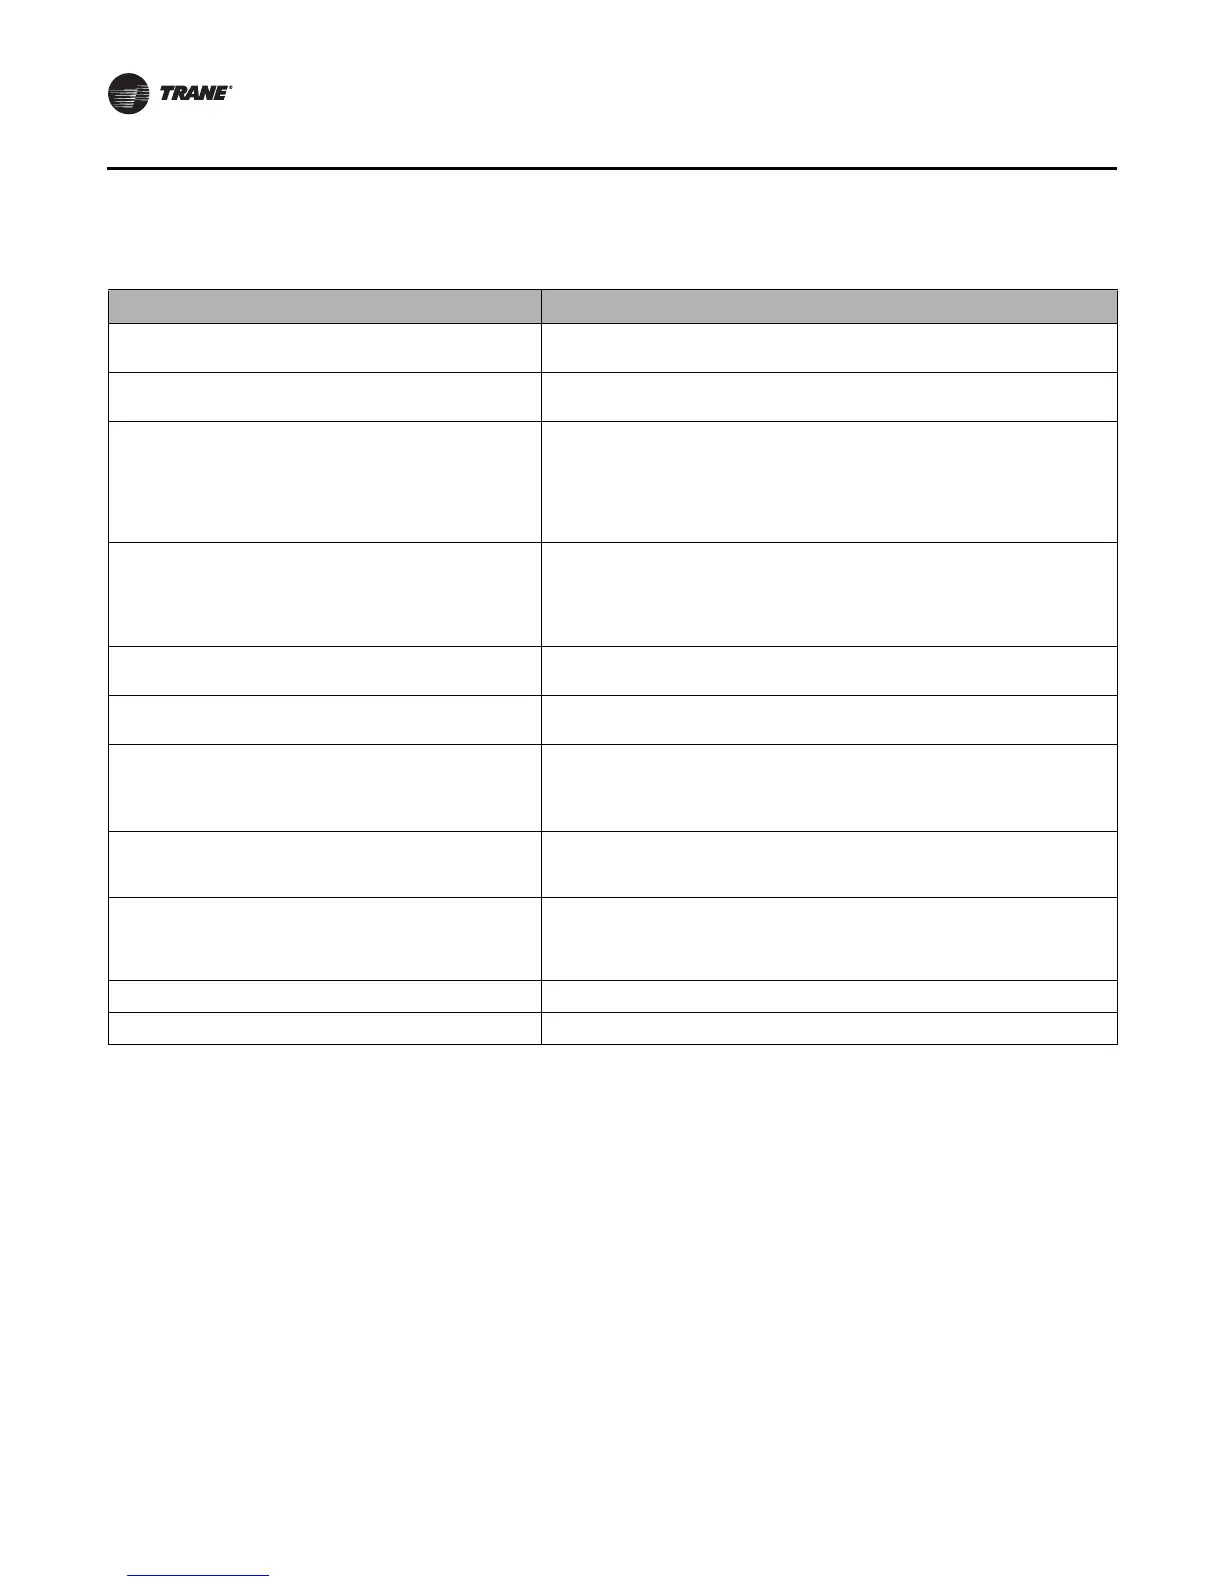
Troubleshooting Table
Problem Solution
Display does not come on.
Check the 24 Vac power supply at terminals 11 and 14 at the sensor. Verify that
the terminal block is properly positioned on its pins.
No communication to the unit controller.
Check for 22–32 Vdc between terminals 11 and 12 at the sensor. Check wiring if
no voltage is present.
SH appears in the temperature location on the display and
“Off” flashes.
Verify that Option 11 is set correctly for CV/HP configurations (option 10 for VAV
configurations):
• If set to 1, check the wiring from the remote sensor at terminals S1 and S2 for
a shorted condition.
• If set to 0, the on-board thermistor has shorted and the sensor must be
replaced.
OP appears in the temperature location on the display and
“Off” flashes.
Verify that option 11 is set correctly for CV/HP configurations (option 10 for VAV
configurations):
• If set to 1, check the wiring from the remote sensor at terminals S1 and S2 for
an open circuit condition.
• If set to 0, the on-board thermistor is open and the sensor must be replaced.
Zone temperature does not appear.
Verify that option value 1 has been selected for option 13 (CV/HP configurations).
Verify that option value 1 has been selected for option 12 (VAV configurations).
Keypad does not respond.
Check to see if the lock symbol is on. To unlock the keypad, press and hold the
left and right arrow keys for 4 seconds.
The fan is set to the On position, but the fan is not running
(CV/HP configurations only).
Verify that the value for option 10 is set correctly (CV/HP configurations only).
• If set to 1, check that the fan is set to On for the current period of day.
• If set to 0, check the value for Option 6. If it is set to 1, the fan will always
operate in Auto mode for unoccupied periods.
The system is operating before the scheduled period begins
(CV/HP configurations only).
If option 7 is set to 1, the computed recovery option is enabled. This allows system
operation to begin before the scheduled occupied period, so that the occupied
temperature setpoint is reached efficiently.
The check filter symbol flashes.
To reset the timer, press the up and down arrows for 2 seconds. The check filter
symbol will disappear. If this function is not desired, or a different interval is
desired, set option 11 (VAV configurations) or option 12 (CV/HP configurations)
to a different value.
The number “99” flashes. Space temperature is above the measurable range.
The number “32” flashes. Space temperature is below the measurable range.
 Loading...