22 18-HD66D1-4
Section 5. Zone Sensor Setup
The Zone Sensors Screen is used to associate
temperature sensors with zones. The Zone Sensor
Setup Screen is compromised of two sections:
Select Zone/Damper and Available Sensors.
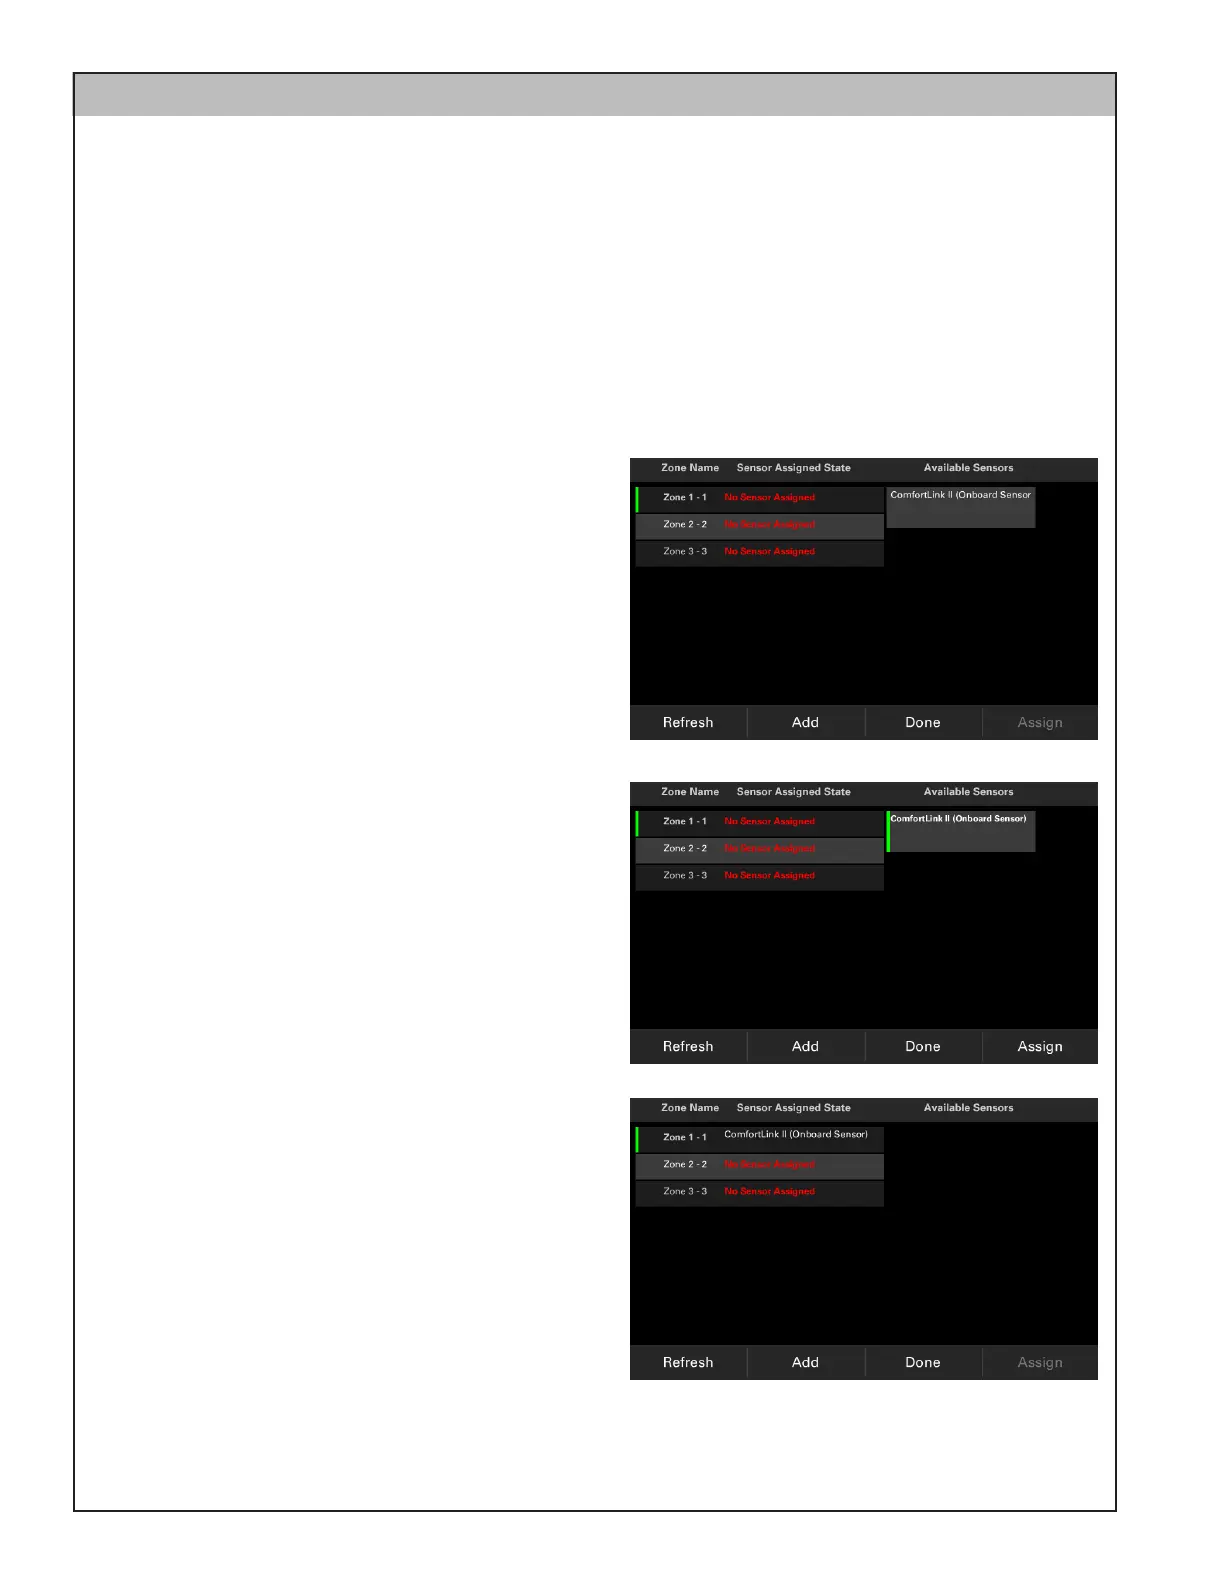
STEP 1 - Select Zone/Damper
All enabled zones will be displayed in the left
column of the Zone Sensor Setup. Select the zone
to which a sensor will be assigned by touching it on
the display screen.
Note: The onboard sensor of the 950/1050 control
is automatically assigned to Zone 1. All other zones
sensors must be manually assigned.
STEP 2: Select an Available Sensor
Available zone sensors are displayed in the right
column. Select a sensor by touching the sensor
listed. A green mark will indicate the sensor has
been selected.
Note:
Communicating Sensors are displayed only if
they are addressed the same as the selected
zone.
Non-Communicating Sensors are displayed only
if they are wired to the corresponding zone slot.
STEP 3 - Confirm the Assignment
Confirm the assignment of the selected sensor to
the selected zone by pressing the “Assign” button.