V3 / V4 / V5 / V6 / V8
750 50 0045 03 11
4.2 Setting into Operation
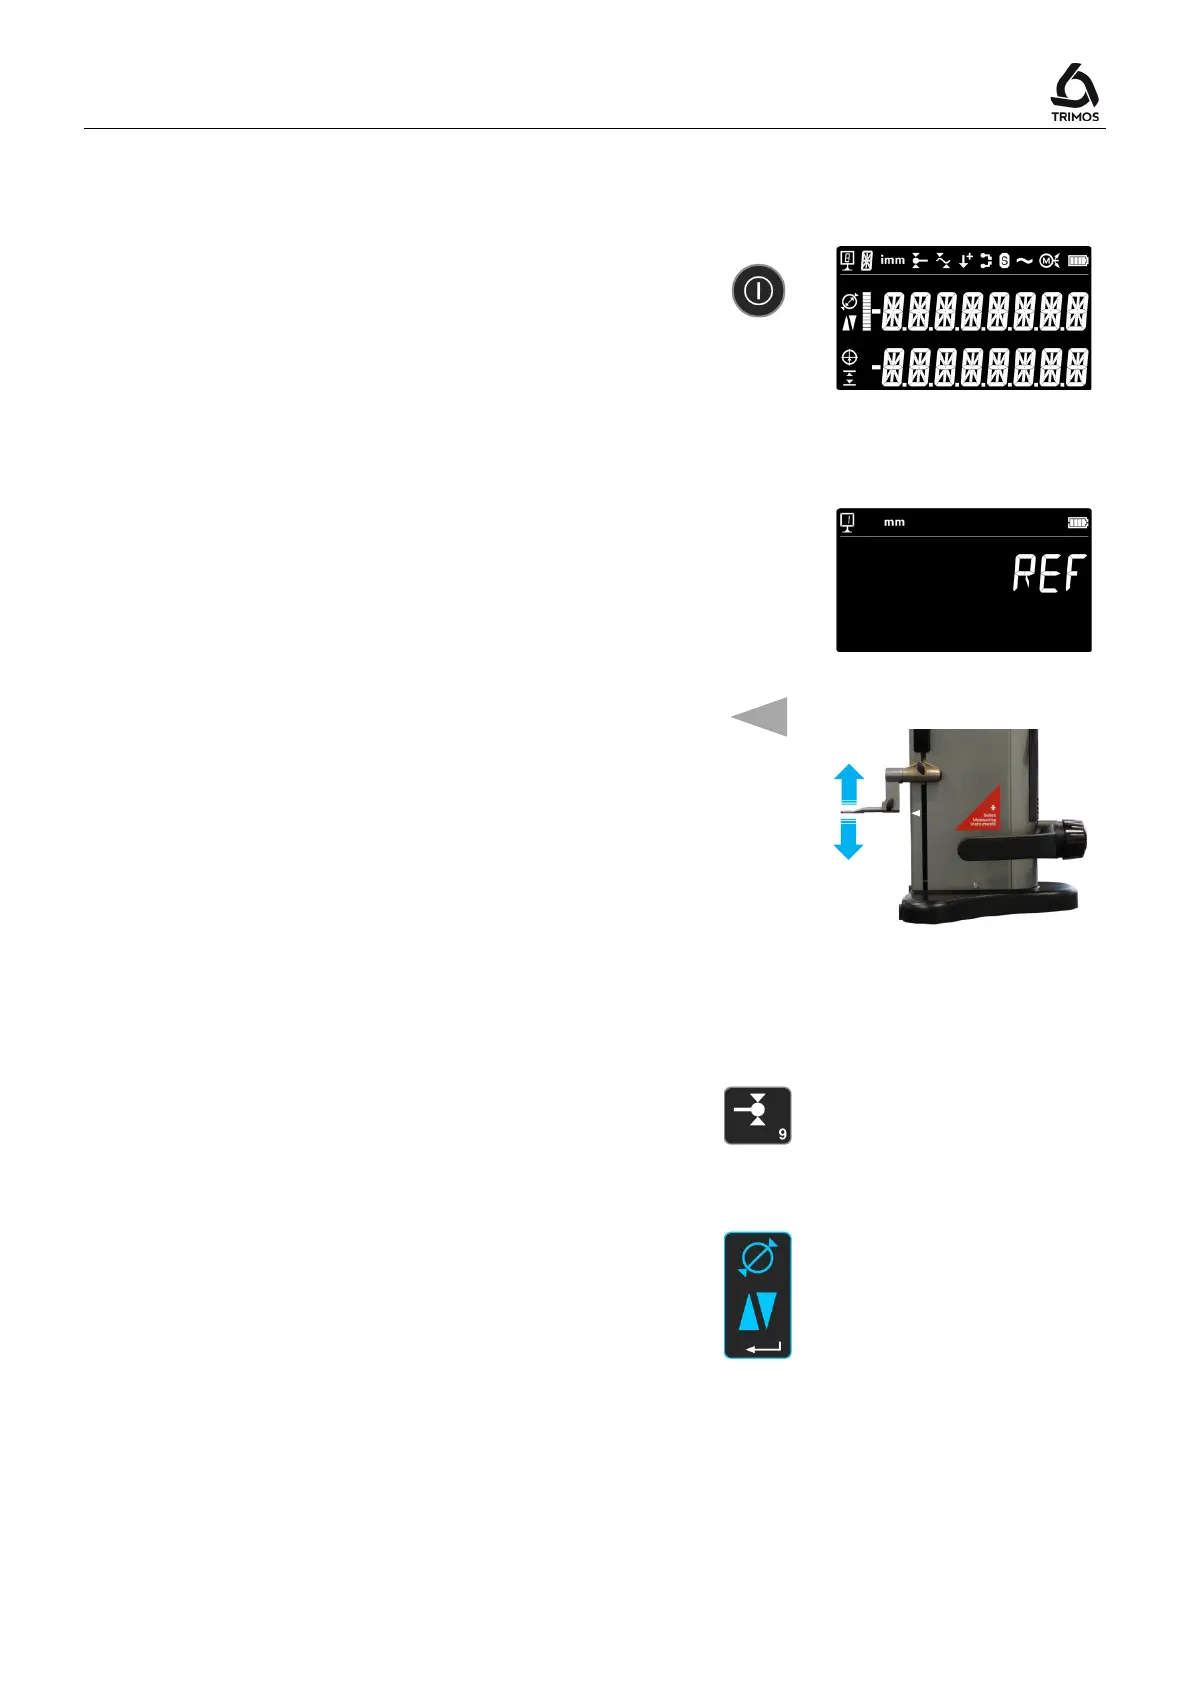
1. Switch on the instrument by pressing button
On/Off during 2 seconds. All segments of the
display will light up.
Switch off the instrument by pressing the same
button until the instrument turns off.
> 2 s
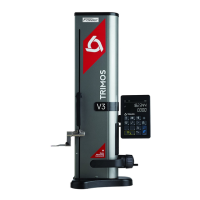
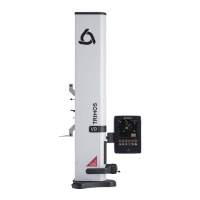
2. The display will ask for the reference position.
Move the measuring carriage slowly across the
mark indicating the reference position with the
help of the handle for carriage displacement (the
acquisition of reference is carried out by
displacing the carriage upwards). An acoustic
signal will confirm that the reference has been
detected and the display starts counting. If the
display does not start counting, repeat the
sequence.
Note :
This procedure is automatically carried out in
motorized mode (V5 & V6). The probe will
position itself at the same level as the reference
gauge (see below).
3. The instrument is now asking for the probe
constant. This function compensates the
dimension and the deflexion of the measuring
insert when probing downwards and upwards
(reversed surfaces, diameters). The last stored
probe constant value will be displayed.
Note 1 :
This procedure may be interrupted by pressing on
the probe constant key or on the
.
The latest probe constant value measured is then
recorded.
Note 2 :
The start mode can differ, according to the
instrument configuration (§ 9).
or