TINYPRO6 – Operational Manual
TRINITY
[6]
Installation and Commissioning
The unit can be used only for either 3P4W or 3P3W according to your ordering
option and requirement in your electrical installation.
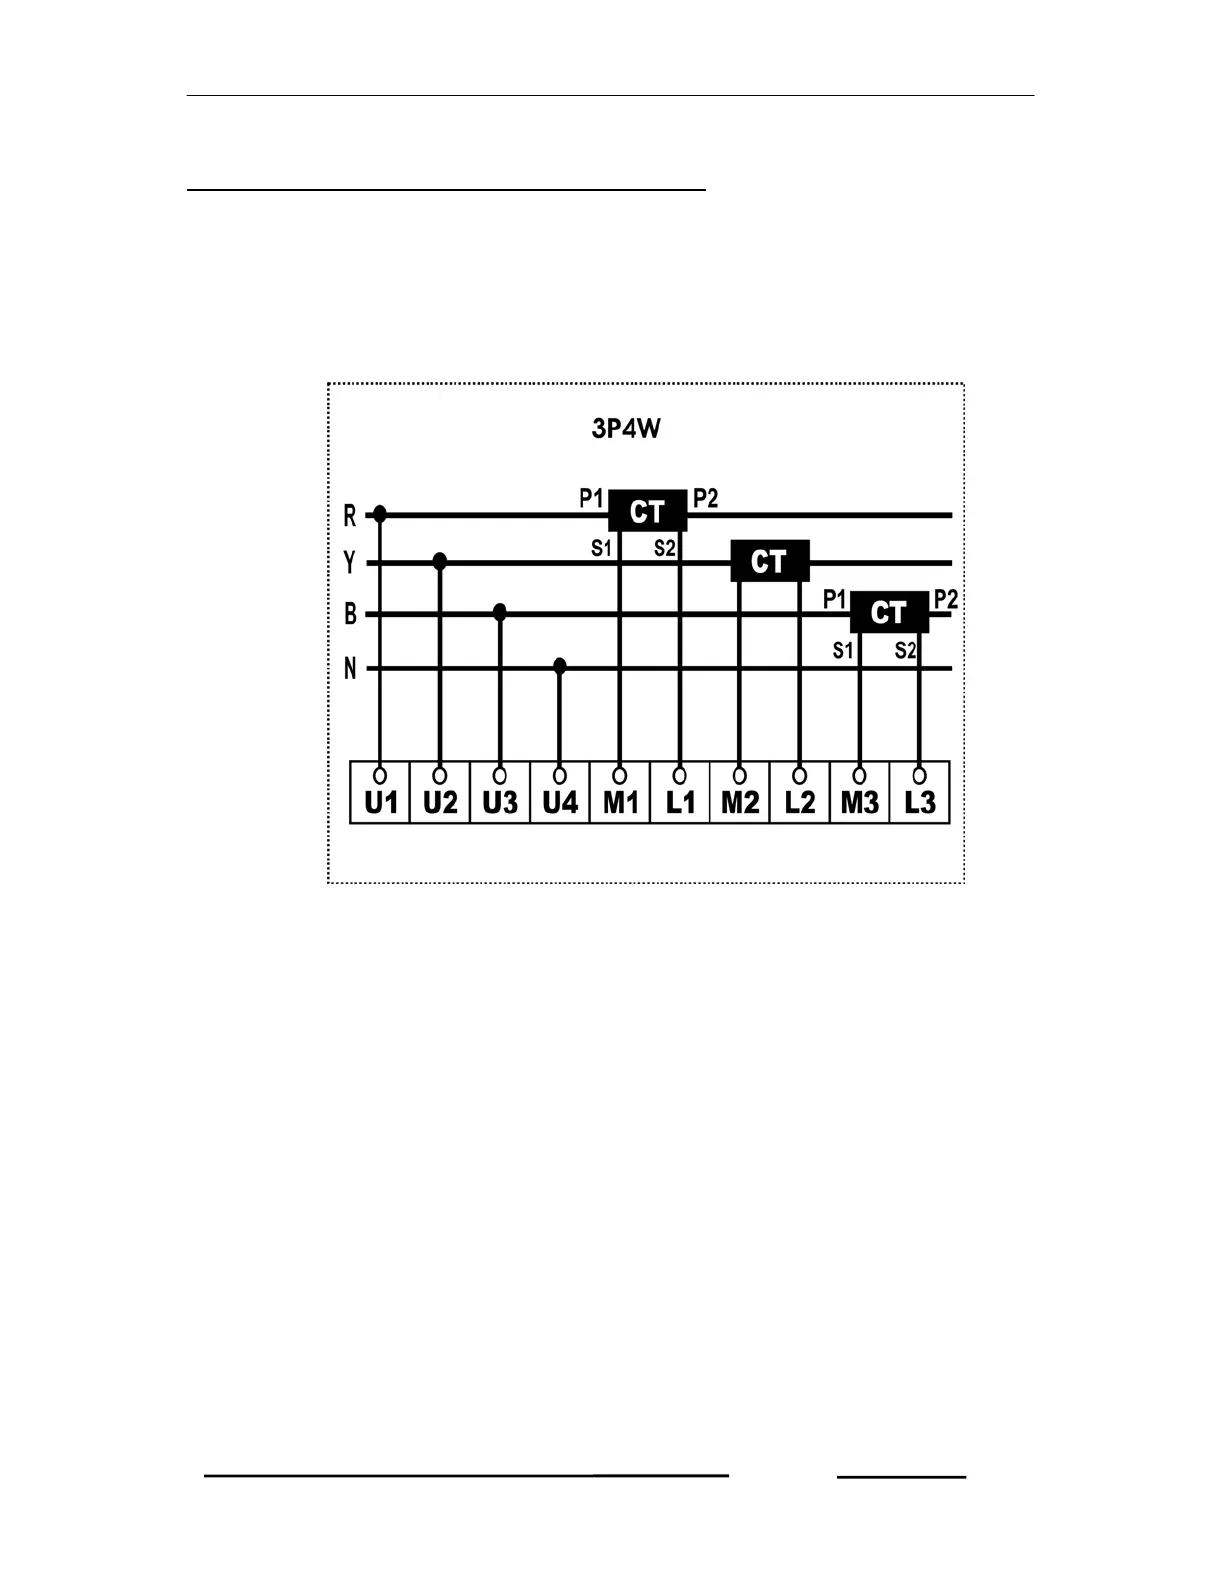
To install and commission for 3P4W, proceed the following instructions:
1. Push the unit into the panel and mount using the claim provided on it.
2. Connect the auxiliary supply (80V AC to 270V AC) to the terminals marked P
and N.
3. Connect the three phases with the phase sequence being R-Y-B to the
terminals marked U1, U2 and U3 respectively. Make sure that the phases
coming to the unit come through control fuses of 1.0A rating. This will protect
the electronic inside from damage due to severe over voltage or phase faults
in the system.
4. Connect the neutral wire to the terminal marked U4.
5. Connect the two wires from the R-phase CT to the terminal marked M1 and
L1 such that S1 from CT goes to M1.
6. Connect the two wires from the Y-phase CT to the terminals marked M2 and
L2 such that S1 from the CT goes to M2.
7. Connect the two wires from the B-phase CT to the terminals marked M3 and
L3 such that S1 from the CT goes to terminal marked M3.