6
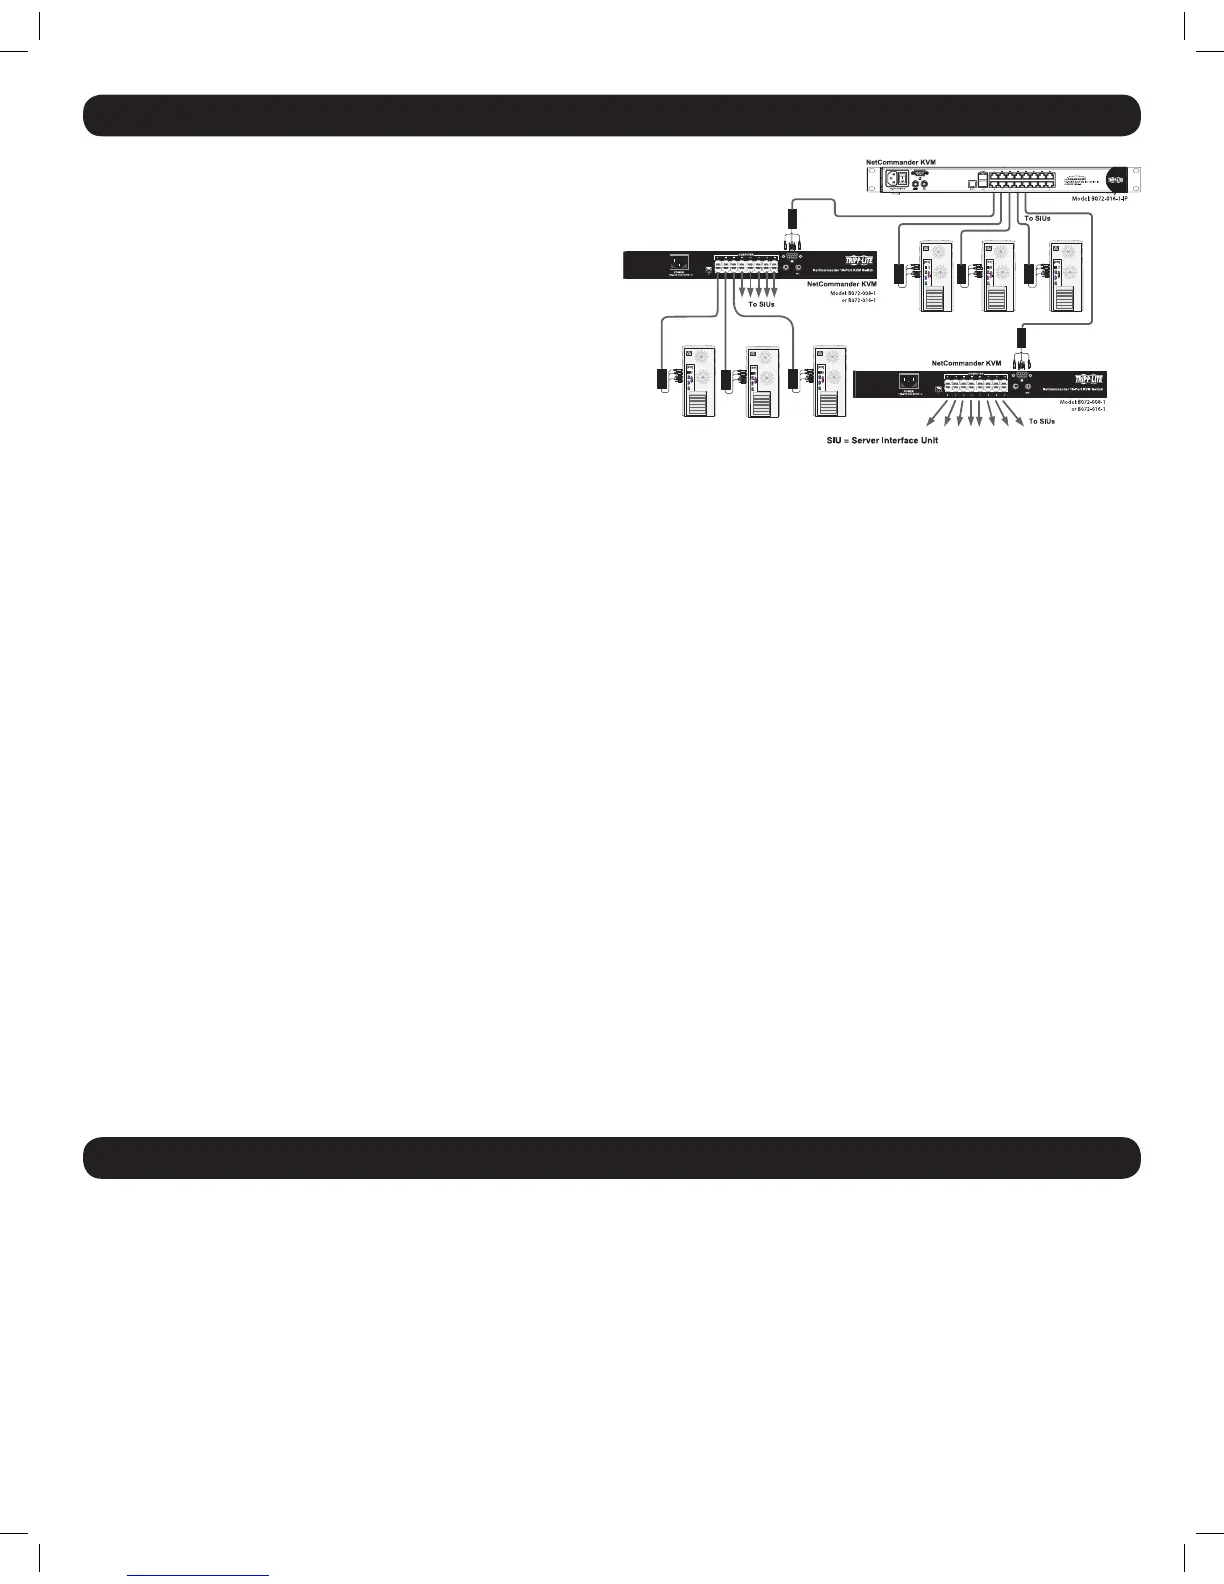
8. Connection (Cascading Multiple KVM Switches)
The number of connected computers/servers can be increased to up to
256 by cascading an additional level of KVM switches from the B072-
016-1-IP. You can cascade any combination of B072-008-1 and B072-
016-1 KVM switches. In a cascade installation, the B072-016-1-IP is
the rst level KVM, and all KVMs cascaded from it are second level KVMs.
To cascade additional KVM switches, follow the instructions below.
Note:
• IfauserhasbeengrantedaccesstoaportwithasecondlevelKVM
connectedtoit,thentheywillhaveaccesstoalloftheportsonthat
KVM. The only security settings available for the second level KVM
ports are those found in that KVMs OSD.
• SecondlevelKVMportaccesswillbelimitedtothatKVM’sOSDmenu
and keyboard hotkey commands.
• The B072-016-1-IP will not store the video and mouse settings for
secondlevelKVMports.Theuserwillneedtoadjustthesesettingseach
time they access a computer/server connected to a second level KVM.
1. Before connecting a second level KVM, you must rst change its
hotkey to something different than that of the rst level KVM. To do
this, you must connect a keyboard and monitor to the console ports
on the second level KVM, so that you can access its OSD. When
connected, open the second level KVM OSD using the default [Shift]
[Shift] hotkey and navigate to the GENERAL SETTINGS page of the F2
SETTINGS menu. Change the hotkey according to the Hotkey section.
2. Connect a Cat5e/6 cable from an available B072-016-1-IP port
to a B078-101-PS2 SIU. Note: The distance between the rst
and second level KVMs, and between the second level KVMs and
connected computers, must not add up to more than 100 ft..
3. Connect the VGA and PS/2 connectors on the B078-101-PS2 to the
console ports of a B072-008-1 or B072-016-1 KVM switch.
4. Open the B072-016-1-IP local OSD and navigate to the PORTS
SETTINGS page of the F2 SETTINGS menu. Highlight the port that you
just connected the second level KVM to and set its hotkey according
to the PortsSettings section.
5. Repeat steps 1 through 4 for each additional second level KVM switch
you wish to connect.
6. Connect a computer/server to an available port on a second level
KVM switch using Cat5e/6 cable and a B078-101-PS2 or B078-
101-USB Server Interface Unit (SIU). Note: The distance between
therstandsecondlevelKVMs,andbetweenthesecondlevelKVMs
and connected computers, must not add up to more than 100 ft.
7. Repeat step 5 for each computer you are connecting.
9. Initial Settings (Default IP Address)
By default, the B072-016-1-IP is set to have the network’s DHCP server pull an IP Address for it. Referencing the unit’s Mac address, which can be found on the
console’s bottom panel, have your network administrator provide you with the IP address assigned by the DHCP server. If the B072-016-1-IP is not connected
to a network with a DHCP server, it will boot up with the default IP address 192.168.0.155. To set up your own static IP address, you must login to the B072-
016-1-IP Web Conguration Interface, disable DHCP and enter in the desired address information. (See the Device section for details.) Note:Ifyou’reKVM
isconnectedtoanetworkwithaDHCPserver,butisnotgettinganIPaddressassignedtoit,youmayneedtopowerofftheKVMandthenpoweritbackon.
201204111 93-2769.indd 6 8/2/2012 10:15:58 AM

 Loading...