14
Aspirante pumped electric
FITTING THE RISER RAIL
Decide the position for the rail on the wall
within the shower area. Proceed as follows:
Offer one of the two brackets to the wall for the
lower position only. Note there are three holes
in the brackets but two screws will usually be
enough. Mark the centre hole and either of the
other two. Drill and plug the wall. Replace the
bracket to the wall and secure to the wall with
the screws supplied (fig.21). Locate the rail
onto this lower bracket, making sure the rail
engages fully on the bracket. Make sure the
indent in the riser rail engages into the cut-out
on the bracket end (fig.22).
Locate the second bracket on top of the rail.
Make sure the rail is vertical. Again mark the
centre hole plus one of the other two holes.
Remove the bracket and rail.
Drill and plug the wall. (The wallplugs provided
are suitable for most brick walls – use an
appropriate masonry drill, but if wall is
plasterboard or a soft building block, you must use
suitable wallplugs and a suitable drill bit).
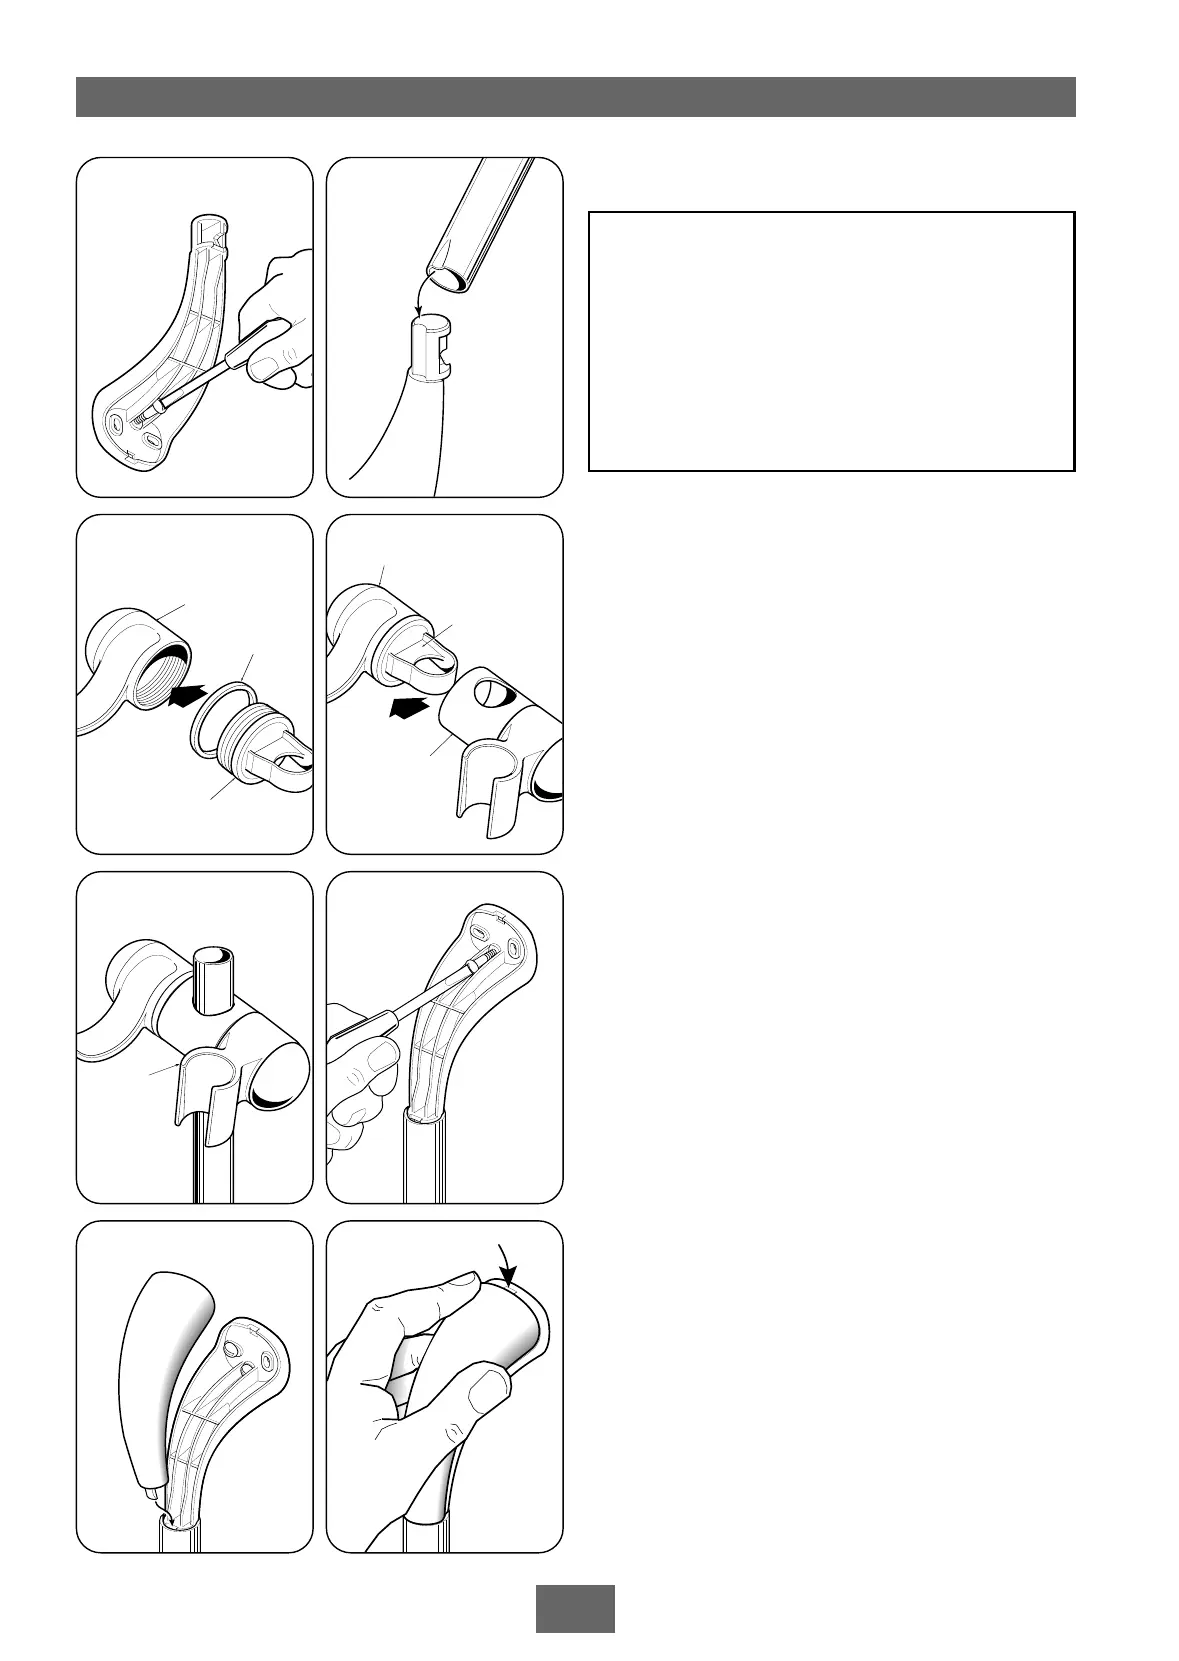
With the saddle, spacer and lever parts to hand,
screw the saddle two or three turns into the
lever (fig.23). Place the saddle and lever into
the slider/holder assembly (fig.24) so that the
holes align, then slide onto the rail (fig.25).
Tighten to the rail by turning the lever. When
tight, the lever should be facing forwards and
not pointing to the wall. If not, slacken off and
remove from the rail. Rotate the saddle and
lever 180° within the slider/holder assembly
then replace onto the rail and tighten. Make
sure the tapered thin end of the sprayhead
holder is in the uppermost position.
Place the rail onto the installed lower bracket.
Fig.22
 Loading...