13
GB
OPERATION
Introduction
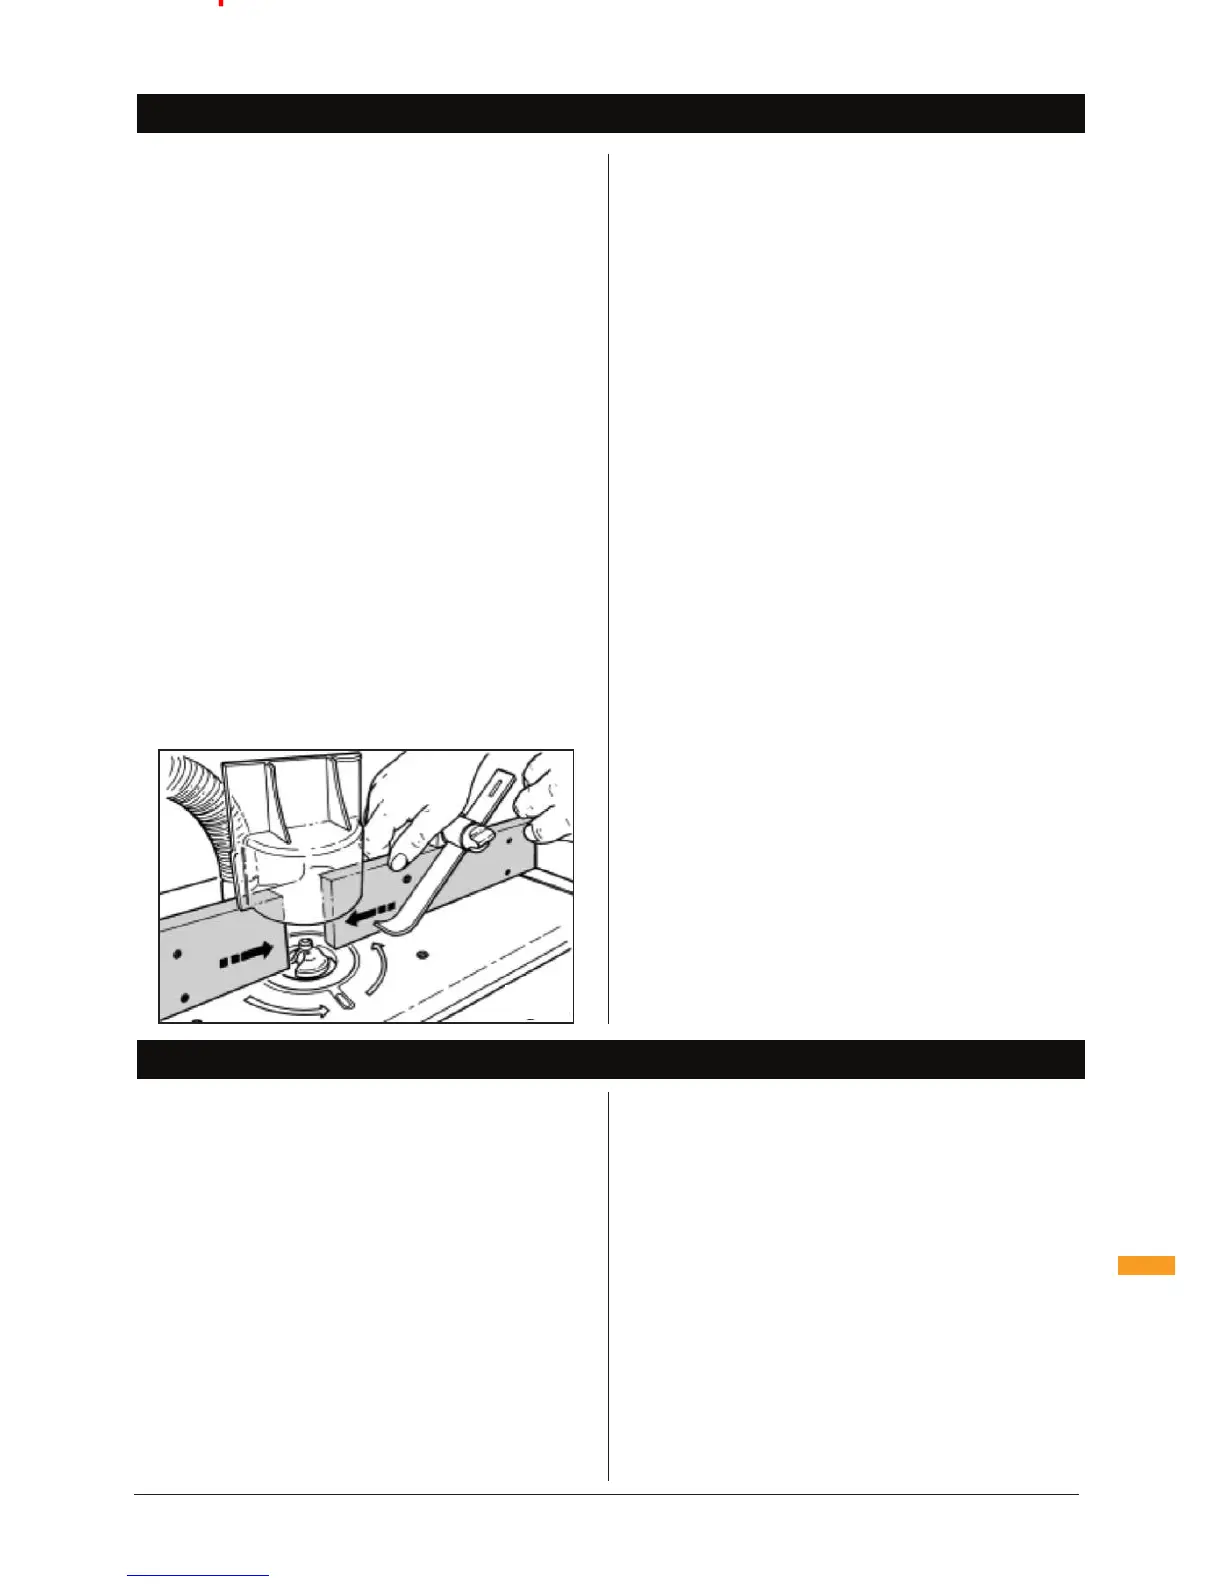
See Fig 16
reference only. They do not relate to any actual
dimensions, which are determined by the diameter of
the cutter used
have to be locked parallel on the table. The readings in
both fence windows may differ
pressure fingers. When they cannot be used ensure the
workpiece is pressed down on the table and against
the fence during the cut
material you will be working with, to ensure the desired
cut is achieved
components, slide the MDF fence faces toward each
other until they just clear the cutter. This provides
maximum support for the workpiece, close to the cutter
(Fig 16)
diameter and less than 50mm (approx. 2") replace the
small table insert with the larger size
permanently lock on, use tape or a releasable cable tie
to hold the switch on during operation. Alternatively a
trigger strap (part no. AGA001) can be ordered through
your local Triton stockist
Dust extraction
highly recommended
vacuum cleaner, domestic (bag-type) units can fill
up very quickly. For a much larger capacity, consider
fitting a Triton Dust Collector (DCA300) to your vacuum
cleaner
overhead guard and screw the Tapered Hose Adaptor
(4) onto the opposite end of the hose. Note that it has a
left-handed thread
cleaner into the tapered hose adaptor
If doing so, using the larger diameter table insert will
help wood shavings to fall beneath the table Ensure
shavings do not build-up between the fences and your
workpiece. Brush or blow away accumulated shavings
after every few cuts, when the cutter has stopped
spinning completely.
vacuum cleaner may exceed the rated amperage of
your domestic extension lead or power outlet; always
connect your vacuum cleaner and router to separate
electrical outlets, and switch on both appliances
separately
EDGE REBATING
See Figs 17 & 18
cutter. If using a bearing guided rebate cutter, refer to
‘Edge Moulding’
1. Start by setting the router fence flush with the cutter
2. Use a wooden straight edge along the fence face
and rotate the cutter until its cutting edge is in the
outermost position
3. Adjust the fence until the front and rear scale readings
are similar and the straight edge is touching the cutter,
then lock the fence
(eg. a cabinet backing), use an offcut of that
component to set up the cut as follows:
1. Set and lock the router fence flush with the cutter
2. Install the micro-adjusters in the table slot behind the
fence but do not yet tighten them into position
3. Place your offcut between the back flange of the fence
and the micro-adjusters then tighten them into position
(Fig 18)
4. Remove the offcut, re-position the fence back against
the micro-adjusters and lock it
scales as a reference or use the micro-adjusters as
follows:
1. Set the router fence flush with the cutter
2. Screw the thumbwheels on the micro-adjusters out to
provide sufficient adjustment
Fig.16
Key Factors for Quality of Cut / Edge Rebating
 Loading...