10200-7
4. ASSEMBLY STEPS
Recheck
All bolts and nuts are
tightened securely
before using the machine
•Twopeoplearerequiredtocompletetheassembly.
•Followthestepsbelowtoavoidinjury.
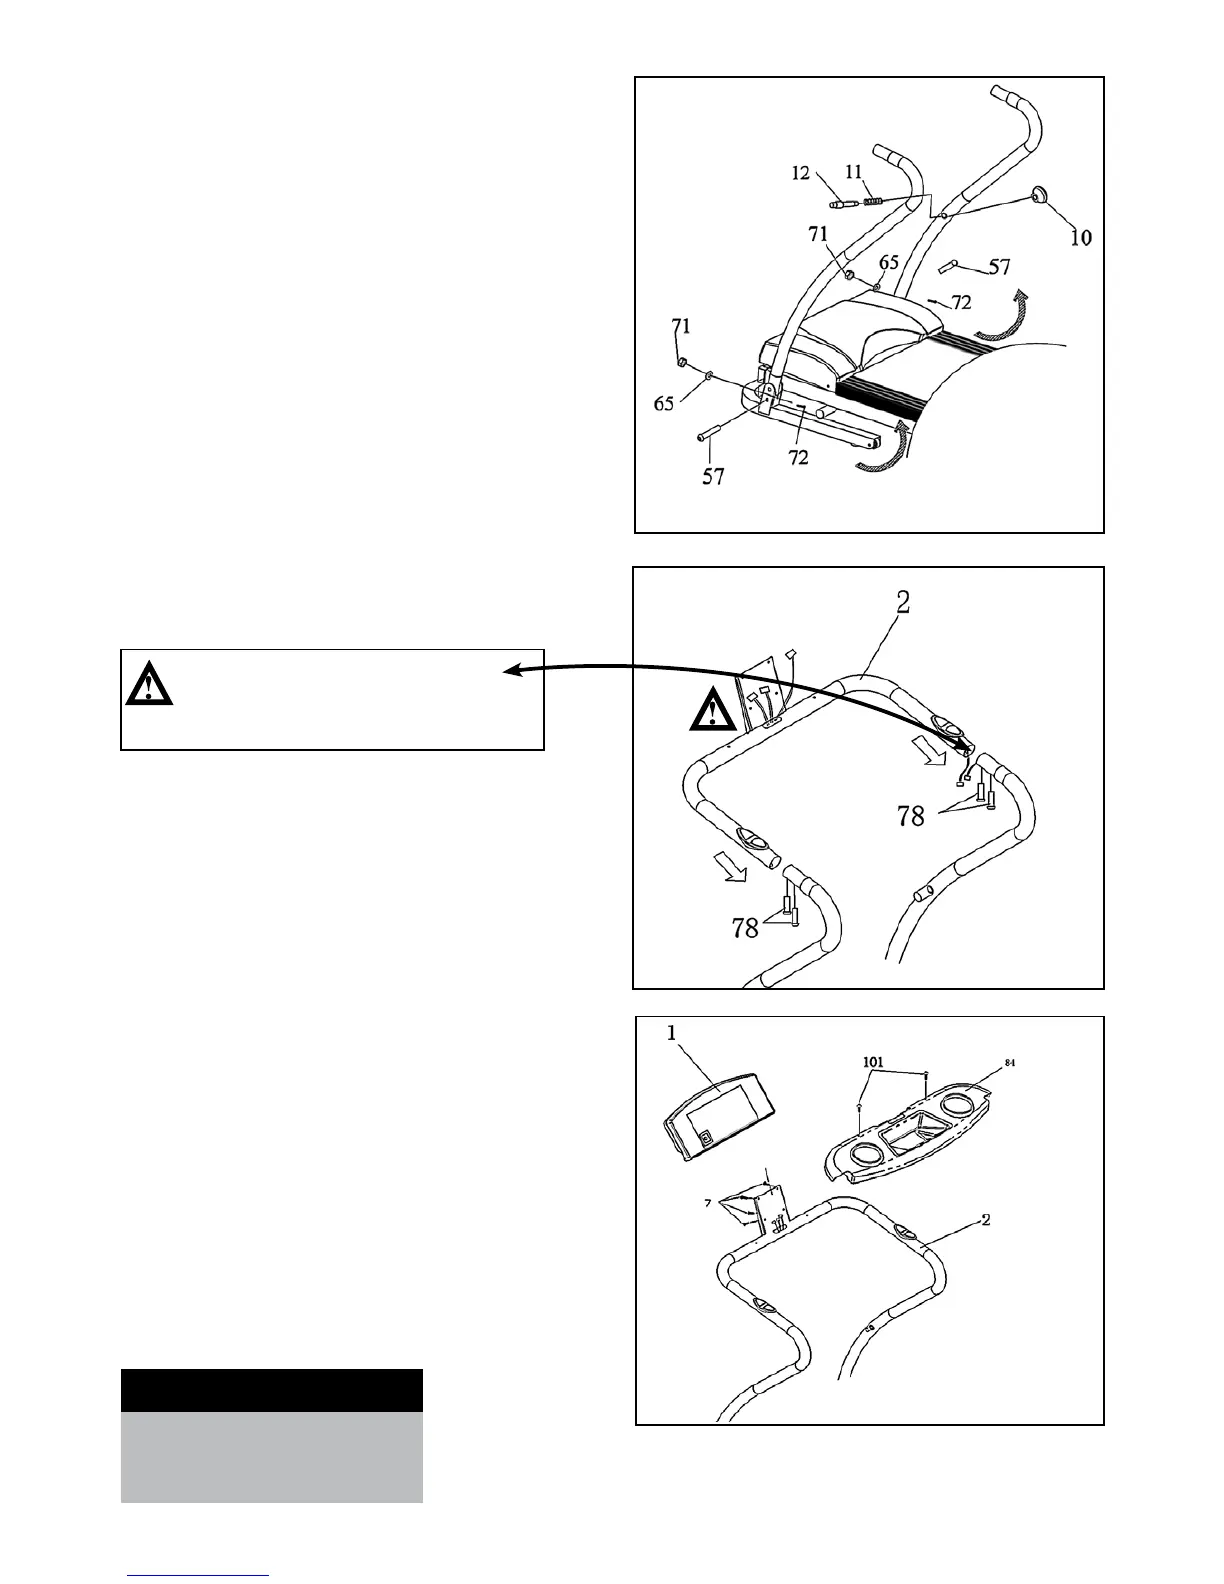
STEP 1 – UPRIGHT ASSEMBLY
•RaisetheLeftandRightUprightsintothevertical
position and secure them into place with one Bolt (72),
one Arc Washer (65), one Nylon Nut (71) and one
Bolt (57).
•TightenthePop-PinHead(10)ontheRightUpright.
STEP 2: HANDRAIL ASSEMBLY
•ThreadtheControlWiresintotheholeoftheLower
Computer Shelf (2), then pull them out of the hole of
the Upper Computer.
•ConnecttheControlWiresoftheUprighttothe
Control wires in the Handrail.
•InserttheHandrailsintotheUprightsandsecurewith
two Allen Bolts (78) on each side.
STEP 3 – COMPUTER AND BOTTLE
HOLDER ASSEMBLY
•PlacetheBottleHolder(84)onthetopofthe
Computer Handrail and secure it with two Screws (101).
•HoldtheComputerConsol(1)abovethetopoftheWater
BottleHolderandconnectalltheControlWires.Makesure
theconnectedwiresarepushedbackintotheHandrail
Tube (2) once connected.
•AttachtheComputerConsol(1)ontotheHandrail(2),
securing with four Screws (7).
CAUTION:
Ensure that cables are not damaged
during assembly or when tightening screws.