This document is an installation and user manual for the TRONXY X5SA-500-2E 3D printer.
Function Description
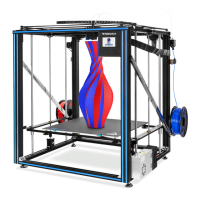
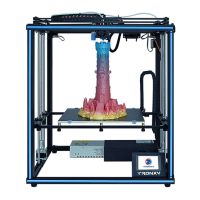
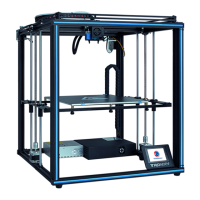
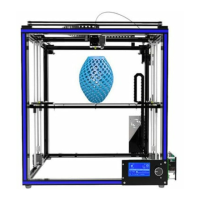
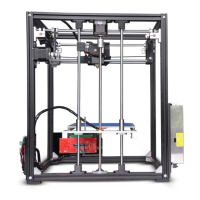
The TRONXY X5SA-500-2E is a FDM (Fused Deposition Molding) 3D printer designed for creating three-dimensional objects from various filament materials. It is intended for users who need a large build volume and offers features for both assembly and operation. The manual guides users through the complete installation process, from assembling the base frame and sliding plates to wiring and initial printing. It also provides instructions for using the slicing software and troubleshooting common issues.
Important Technical Specifications
Print Parameters:
- Print Principle: FDM (Fused Deposition Molding)
- Print Size: 500 × 500 × 600 mm³ (a very large build volume)
- Print Accuracy: 0.1-0.4 mm
- Positioning Accuracy: X/Y 0.00625mm, Z 0.0125mm
- Nozzle Quantity: 1
- Nozzle Size: 0.4 mm
- Print Speed: 20~100mm/s (suggested 60mm/s)
- Moving Speed: 100mm/s
- Filament Compatibility: PLA, TPU, ABS, wood, etc.
Temperature Parameters:
- Environmental Temperature: 8°C - 40°C
- Nozzle Temperature: Max 260°C
- Heat Bed Temperature: Support (specific temperature range not given, but typically adjustable)
Software:
- Slice Software: Cura (TRONXY Slicer V1.4.15 is provided and detailed in the manual)
- Input Format: .STL, .OBJ
- Output Format: GCode
- Connection: TF card, USB cable (suitable for skilled users)
Power Supply:
- Power Input: 110V/220V AC, 50/60Hz
- Power Output: 24V/21A DC
Physical Parameters:
- Machine Size: 810mm × 812mm × 915mm
- Machine Weight: ~28.5kg
Usage Features
Assembly and Installation:
The manual provides a detailed, step-by-step guide for assembling the printer, including:
- Base Frame Assembly: Involves connecting aluminum profiles with corner codes, ensuring parallel and vertical alignment.
- Sliding Plate Assembly: Attaching sliding plates to aluminum profiles, with attention to pulley orientation and screw locking for smooth movement.
- Print Head Assembly: Inserting the print head into the aluminum profile and ensuring flexible movement.
- XY Axis Motors and Wheels Assembly: Locking and fixing motor and wheel components, with tips for aligning M4 ship nuts.
- Belts Assembly: Tying the belts, adjusting motor gear distance, and ensuring equal tension. It notes that slight sound during printing is normal.
- Linear Bearing Assembly: Installing linear bearings and copper linear bearings onto beams.
- Z Axis Parts Assembly: Assembling lead screws, polish rods, and motor parts, with instructions for adjusting verticality.
- Feed Motor Installation: Assembling and locking the feeding motor components.
- Print Platform Assembly: Mounting the heat bed assembly onto transverse plates, fixing the tow chain bracket, and adjusting screws for flexible movement.
- Control Box Assembly: Installing the power supply and main control box, including photoelectric switches. This step can be done after wiring.
- Rack Assembly: Assembling and fixing the material rack.
- Decorative Strip and Feeding Tube, Lattice Glass Assembly: Installing decorative strips into aluminum profiles, connecting the feeding tube, and placing the glass fiber board on the aluminum substrate with clamps.
- Limit Switch Assembly: Fixing the Y switch assembly in the aluminum profile groove.
- Filament Run-Out Detector Assembly: Installing the detector on the aluminum profile.
- Strengthen Rods and Chains Assembly: Assembling and fixing strengthen rods and chains, and installing end covers.
- Wiring: Detailed diagrams show how to connect various components like the heat bed, motors (Z1, Z2, Y, X, E), filament run-out detection, Y-axis switch, and F-STOP. Users are reminded to check the power supply voltage (110V/220V).
Interface Operation and Printing:
- Print Test: Users can initiate a "Testing file" print.
- First Layer Adjustment: Instructions are given for adjusting the platform height if the first layer is not sticky (platform raised) or if there's too much filament (platform lowered).
- Unload Consumables: A process for unloading filament is described, involving preheating the nozzle to 180°C and extruding until the consumable is removed.
Slice Software (TRONXY Slicer V1.4.15):
- Installation: The manual guides users through installing the "TronxyInstall.exe" software from the SD card.
- Type Setting: Steps for configuring printer settings, including selecting "Dual XYZ/HBot/CoreXY" and setting dimensions (X, Y, Z, Material diameter, Nozzle size).
- Parameter Setting: Provides reference values for common print parameters such as layer thickness (0.1-0.3mm), print temperature (PLA 200°C/ABS 240°C), heatbed temperature (PLA 50°C/ABS 80°C), print speed (20-100mm/s, suggest 60mm/s), and support options. It also highlights the need to enable "double nozzle withdrawal parameters" and specifies a withdrawal length of 55mm.
Maintenance Features
Safety Instructions:
- High Temperature Warning: Do not touch working parts or the extruder directly when the printer is operating or immediately after printing. Allow parts to cool before handling.
- Ventilation: Use the printer in a spacious and well-ventilated environment.
- Temperature and Humidity: Recommended ambient temperature is 8°C-40°C, and humidity is 20%-80%.
- Emergency Shutdown: Turn off the power directly in case of emergency.
- Moving Parts: Be aware of high-speed moving parts to prevent pinching hands.
- Model Removal: Be careful not to swipe sharp objects at fingers when removing models.
- Eye Protection: Suggests wearing goggles when assembling or polishing models.
- Environmental Protection: Protect the printer from rain and moisture.
- Child Safety: Keep children away from the machine when it is running.
- Unattended Operation: Not recommended to run the 3D printer unattended.
- Grounding: Wires must be connected to the earth.
Troubleshooting (Fault Cause Analysis):
- Machine Cannot Start: Check power lines, supply voltage, screen/power supply damage, wire damage, and power fuse.
- SD Card Cannot Be Read: Check card reader, format SD card if empty, ensure correct insertion, rename files with illegal characters, and replace damaged SD card.
- Print Head Not Producing Enough Material: Check if print head temperature reached target (e.g., 200°C for PLA), check for knotted filaments, ensure filaments/pipes are inserted correctly, check for excessively high print head temperature causing softening, verify filament diameter matches software settings, and check for blockages or dirt in the nozzle. Suggests replacing with better quality filaments.
- First Layer Upwarp: Check hot bed leveling, surface cleanliness, distance between nozzle and platform, adequate hot bed temperature, and print speed in slicing software.
- Model Not Easy to Take Off: Heat hot bed to 50-70°C and try again after cooling, or use a shovel. Recommends TRONXY magnetic stickers.
- Cannot Heat Up: Check heating rod and thermistor contact/damage, target temperature setting in slice software, and thermistor wire connection.
- Motor Out of Step: Check belt tightness, pulley lock, current voltage, X/Y/Z axis motion smoothness, print speed, environment temperature, and suggest flashing firmware.
- Abnormal Motor Noise or Vibration: Check motor line contact/connection, motor temperature, motor damage, and printing load. Suggests flashing firmware.
General Maintenance Advice:
- The manual emphasizes checking accessories against the packing list upon receipt and contacting customer service for any questions.
- Relevant information is stored on the SD card, which should be checked.