- 18 -
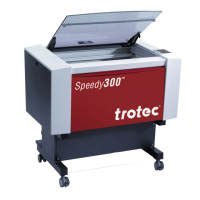
(4) Click the [Output] button.
• The alignment frame print data is sent to the
hot folder of RasterLink.
2. Set the paper media into the Mimaki
printer.
(1) Set the paper media on which you wish to
print the alignment frame onto the Mimaki
printer surface.
• Secure it with tape so that it stays in place.
(2) Set the Mimaki printer to REMOTE mode.
3. Print the alignment frame onto the paper media.
• For the printing method, please refer to the "Operation Manual" on the CD bundled with the Mimaki
printer.
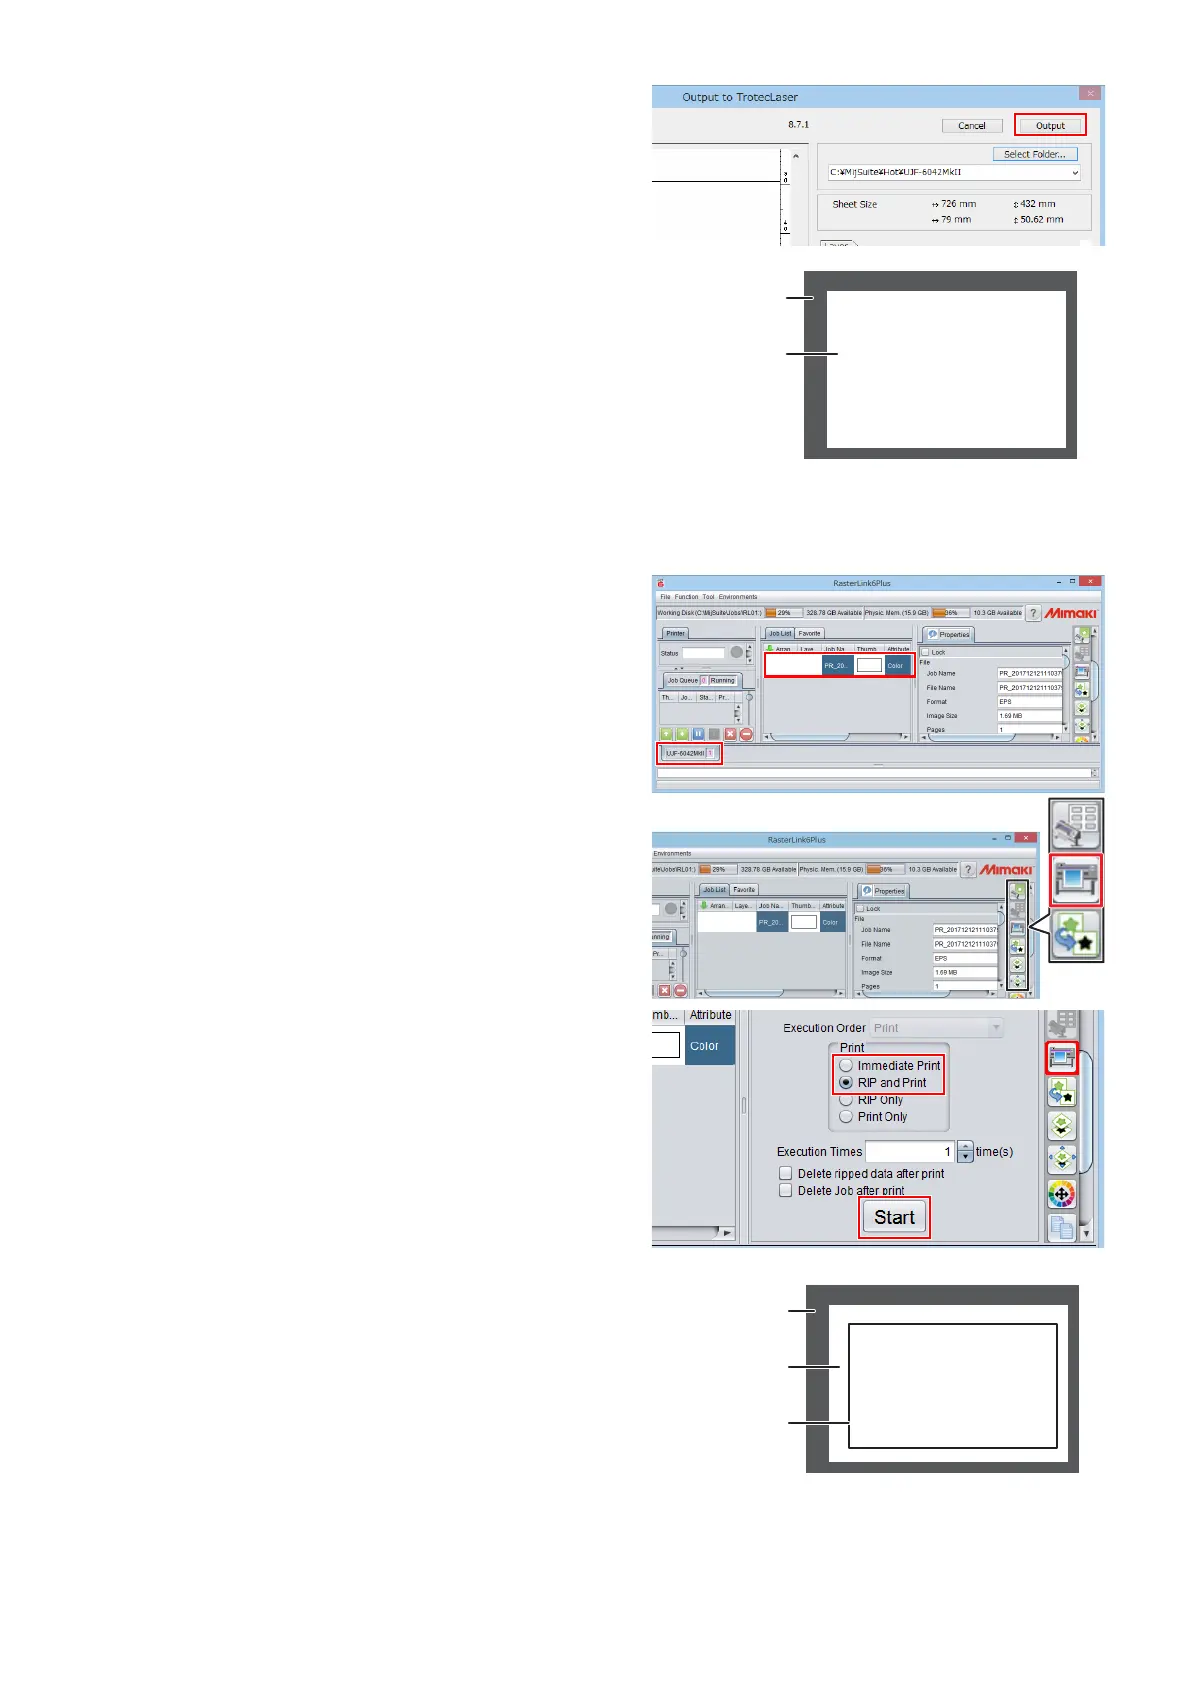
(1) Launch RasterLink.
(2) Click the Mimaki printer tab.
• Alignment frame data is automatically loaded
and then added to the [Job List].
(3) Click the [Execution] icon in the [Function
Icon] list to the right of the screen.
• The [Execution] panel is displayed.
(4) Select [RIP and Print] or [Immediate Print] on
the [Execution] panel and click the [Start] but-
ton.
• Printing will start.
(5) The alignment frame is printed.
Printer surface
Paper
Alignment frame
 Loading...