ID5000, XR5000 Level 1 Service Manual
Issue 4, 8/2017 34
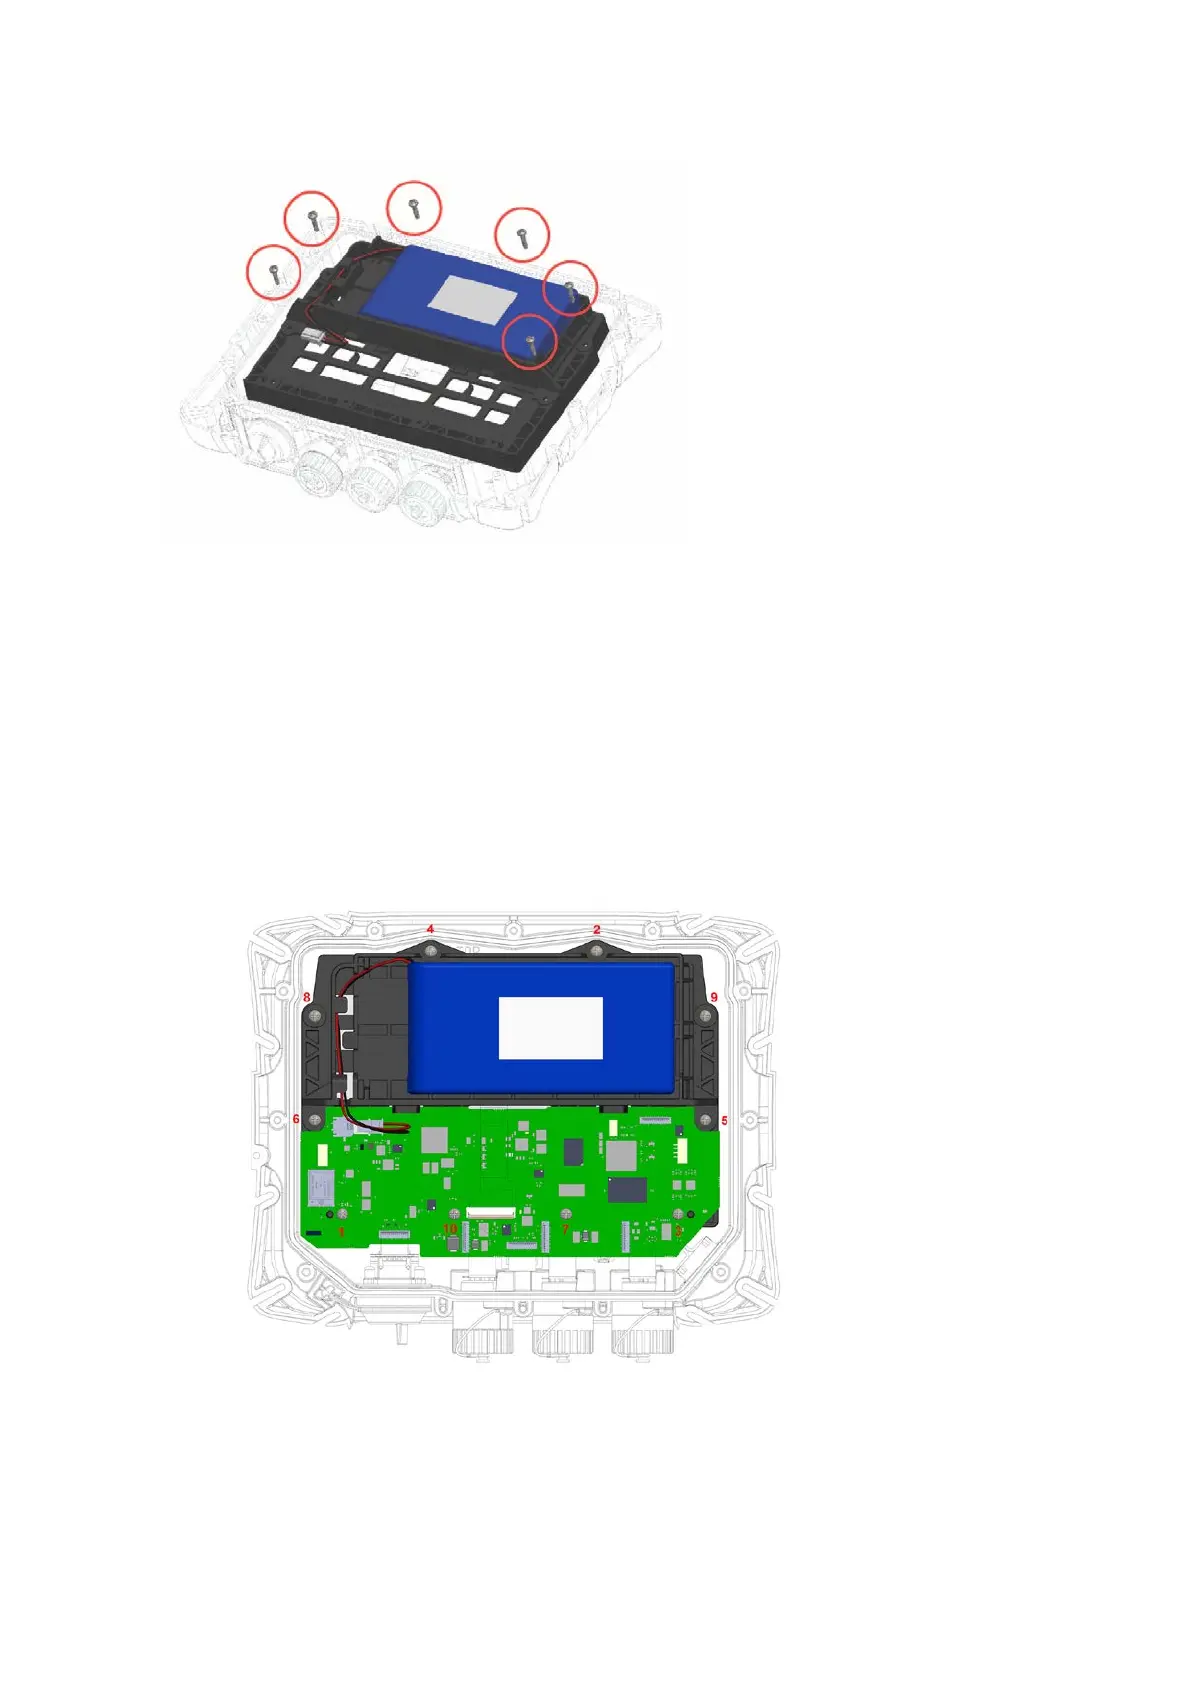
5 Unscrew the six screws securing the cradle to the case.
6 Lift the cradle out of the front case, taking care to pull the LCD FPC through the gap in the middle of the cradle.
1 Ensure that the LCD has been fitted with the LCD FPC into the LCD gasket and placed in the front assembly. See
Refitting
the LCD
on page 36.
2 Place the cradle into the case front, taking care to thread the LCD FPC through the gap in the middle of the cradle.
3 Fit the PCA in place in the cradle. See steps 1 and 2 of
Refitting the PCA
(on page 33).
4 Refit the battery (see page 28).
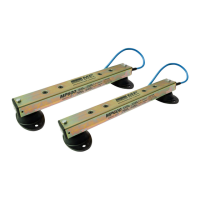
5 Screw in the ten screws to fasten the PCA and cradle to the case front. If available, use a torque limited screwdriver set to
0.5 Nm (4 lbf-in). Fasten the screws in the order shown in
Figure 18
.
Figure 19: Cradle and PCA
screw fastening order
6 Connect the six FPCs and the battery (see
Figure 16: PCA connections
).
7 Refit the case
back (see page 25).
8 Refit the rubber corner bumpers (see page 23).