ID5000, XR5000 Level 1 Service Manual
Issue 4, 8/2017 32
Refitting the USB connectors
1 Hold the new USB connectors assembly in place.
2 Tighten the four screws using a torque-limited screwdriver set to 0.5 Nm (4 lbf-in), or hand screwdriver. Do not over
tighten. Make sure the correct screws are used with the correct connector.
3 Gently slide the USB FPC into the connector body on the PCA.
4 Plug the battery connector into the PCA.
5 Replace the USB dust cap (see page 29).
6 Refit the case
back (see page 25).
7 Refit the rubber corner bumpers (see page 23).
Removing and refitting the PCA
1 Remove the rubber corner bumpers (see page 23).
2 Remove the indicator case back (see page 25).
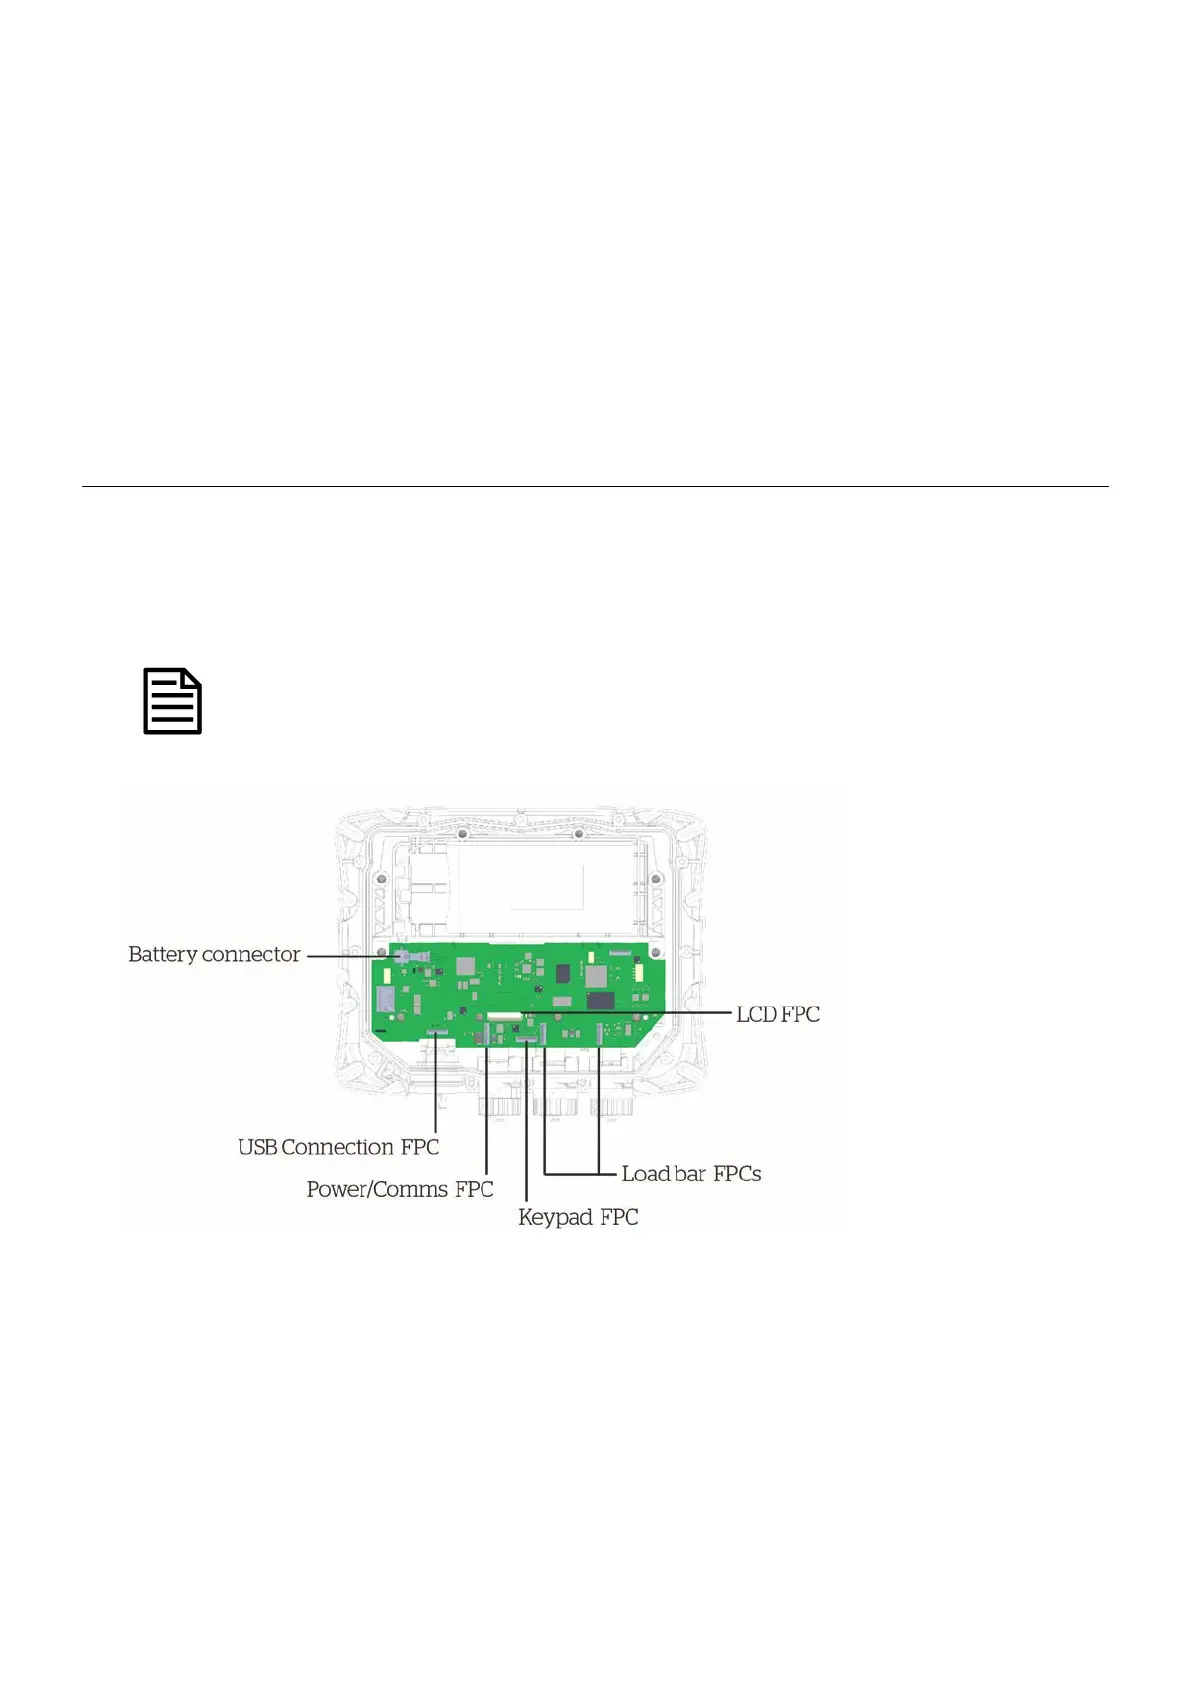
3 Disconnect the battery connector and the six FPCs, as shown below.
To remove the LCD FPC, carefully lift the back of the black locking bar of the connector body before sliding
out the FPC.
Figure 16: PCA connections