REFRIGERATED FOOD PREP
TEC_TM_090 | REV. C | EN 12/13/2022 Page 15 of 24
www.truemfg.com
Maintenance, Care & Cleaning (cont.)
Important Warranty Information
THE CLEANING OF THE CONDENSER IS NOT COVERED BY
WARRANTY!
If you have any questions, please contact your local TRUE
Manufacturing Service Department. See the front cover for
locations and contact information.
• Condenser coils accumulate dirt and require cleaning every 30
days or as needed.
• A dirty condenser coil can result in non-warranteed repairs and/
or cabinet failure.
• Proper cleaning involves removing dust from the condenser by
using a soft brush, vacuuming the condenser with a shop vac,
or using CO₂, nitrogen or pressurized air.
• Do not place any filter material in front of the condensing coil.
• On most units, the condenser is accessible by removing the
cabinet's outer grill cover.
• If you cannot remove the dirt adequately, please contact your
licensed refrigeration service provider.
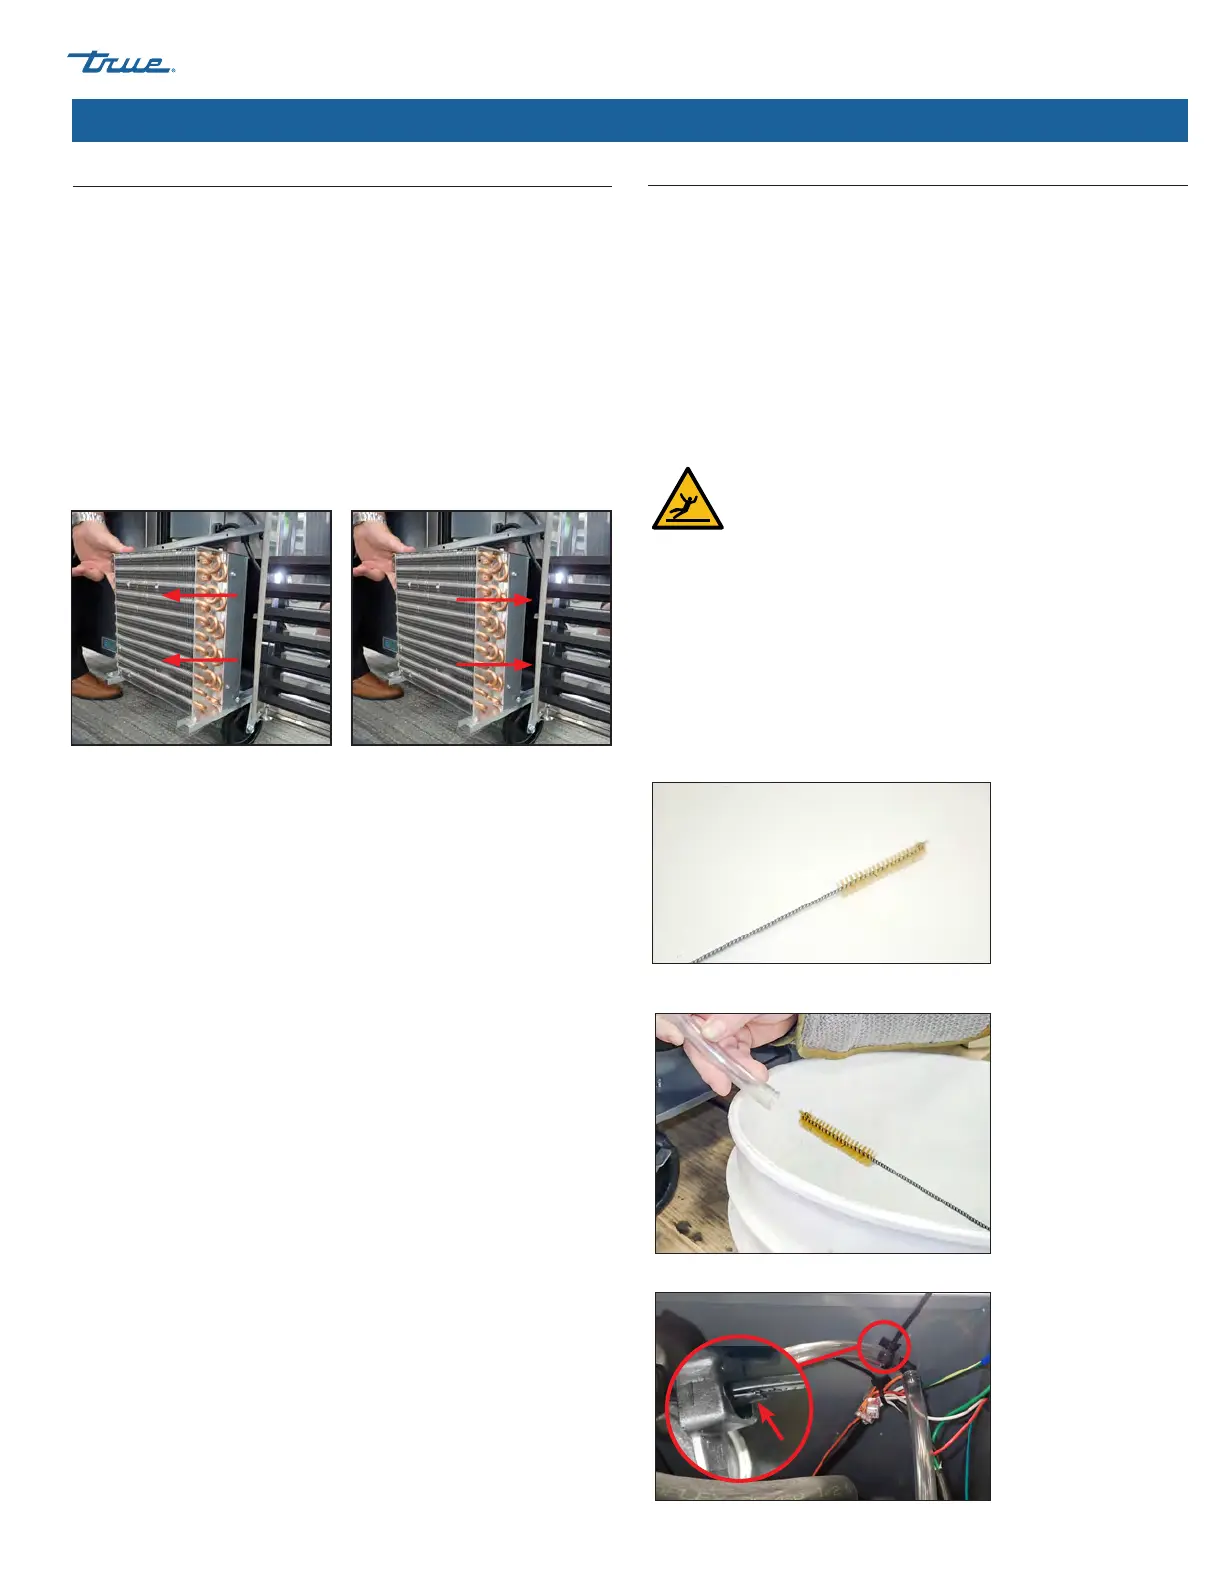
Cleaning the Condenser Coil (cont.)
5. Remove the condenser coil brackets. See fig. 5.
6. Carefully slide the condensing unit out (tubing connections
are flexible). See fig. 6.
7. Gently blow compressed air or CO₂ through the coil until it is
clean.
8. Carefully vacuum any dirt around and behind the condensing
unit area.
9. Carefully slide the compressor assembly back into position and
replace the bolts. See fig. 7.
10. Reinstall the rear cover (if so equipped), connect power to the
unit, and verify correct operation.
Fig. 6. Carefully slide the condensing
unit out.
Fig. 7. Carefully slide the condensing
unit back into position and replace bolts
and coil brackets.
Drain Line Cleaning
Required Tools
Required tools include (but may not be limited to) the following:
• Phillips Screwdriver or Bit Driver
• Drill (optional)
• Tube Brush* (see fig. 1)
• Large Container
*Tube brush must fit in 1/2” (12.7 mm) I.D. drain hose.
Procedure
WARNING! Slippery surface hazard.
To prevent slippery surfaces, clean the clogged hose
over a large container. See fig. 2.
1. Remove the rear cover.
2. Access the end of the clogged drain line.
NOTE: If applicable, DO NOT cut cable ties. Use the cable
release tab (see fig. 3). Remove drain fittings as needed to
access clog.
3. Withx a narrow tube brush, clear the clog from the drain line.
See figs. 1 and 2.
Fig. 2. Catch trapped liquid in a large container.
Fig. 1. Narrow tube brush.
Fig. 3. Cable tie release tab location.