S1/S2 Assembly Instructions – Rev N Page 6
HARDWARE PACK
• Felt Pads – 3/4” x 1/8” thick (6)
• Label Hardware Kit (1)
• Hex L-Key - 3/16” size (1)
• Torx Security L-Key - T25 (1)
• Hex L-Key - 5/32” size (1)
• Keys Set Tablet Cart (1)
• Screw 10-24 x 3/4" Security Torx, Button head, SS (1)
• Screw 1/4-20 by 1" Socket Head, Zinc (4)
• Belleville (dome) Washer 1/4" 18-8 SS (4)
ADDITIONAL TOOLS NEEDED FOR INSTALLATION
• Scissors for cutting channel cover to length
ASSEMBLY INSTRUCTIONS
Note: Shipping box pictures show S1 Cart for assembly reference.
Configurations may vary, but the installation process will be
similar.
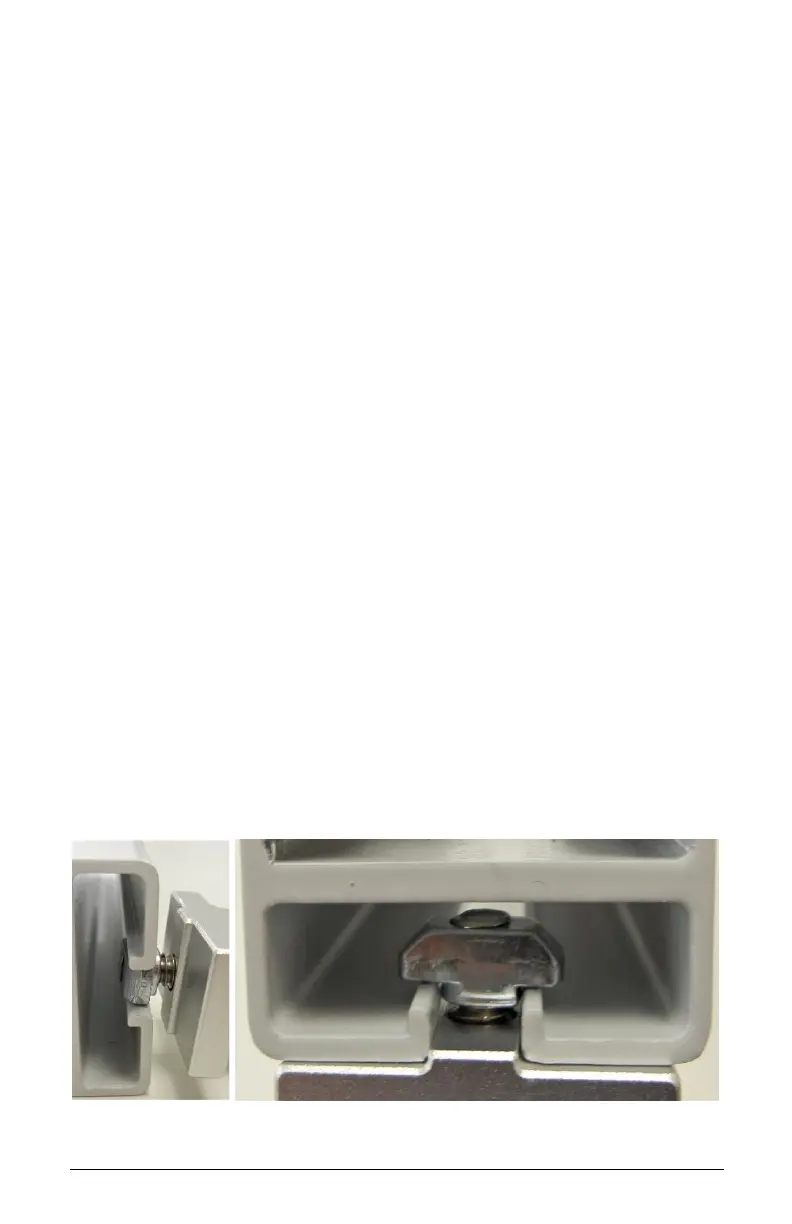
INSTALLATION OF ACCESSORIES TO THE CARTS
Note: When installing accessories, the Z or T-Nut has to be loose
and aligned vertically (up/down) when inserted into the extrusion
channel. Once adjusted at the desired height, tighten the screw
until it is fully locked to the extrusion. Always verify that the nut is
aligned horizontally (left/right) when fully tightened.