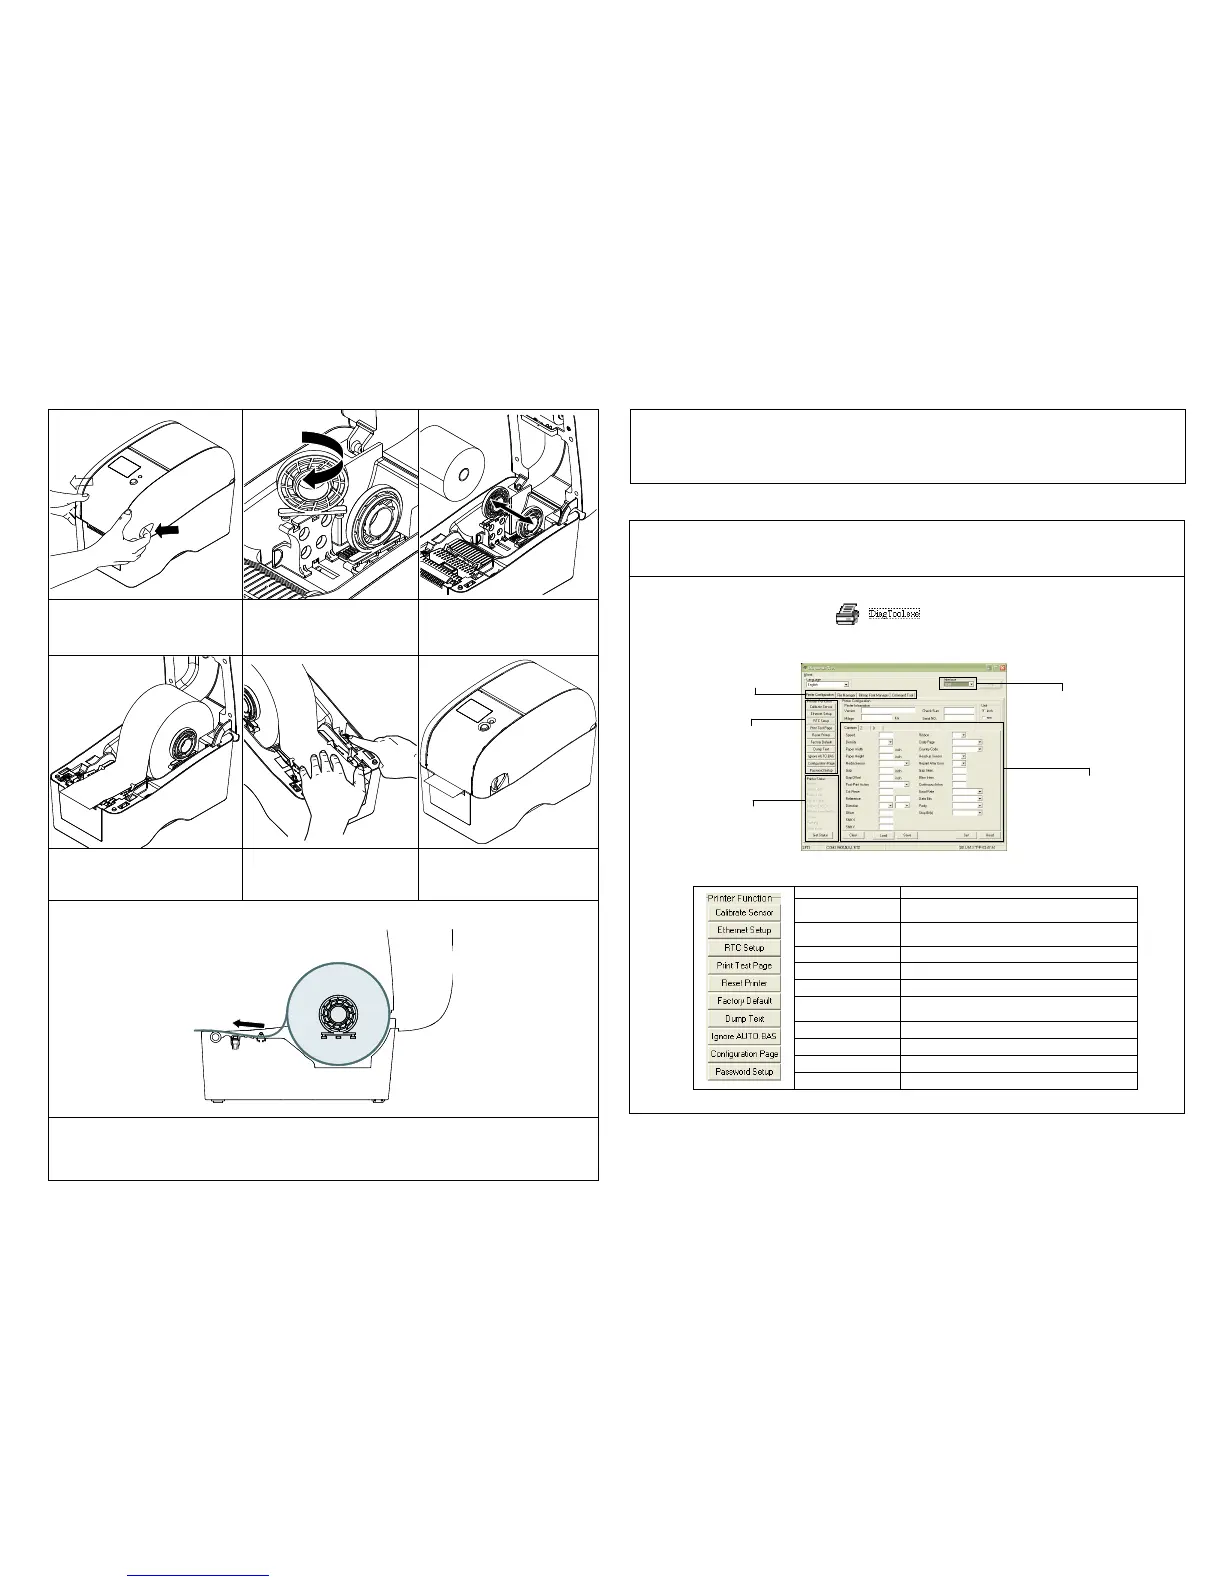
(1) Open the printer top cover by pulling
the tabs located on each side towards
the front of the printer, and then lift the
top cover to the maximum open angle.
(2) The media holder can be used for
1” and 1.5” media core by rotating
the upper part of label holder 180
degrees clockwise.
(3) Separate the media holders to the
label roll width. Place the roll
between the holders and close
them onto the core.
(4) Place the paper, printing side face up,
through the media guides, media
sensor and place the label leading
edge onto the platen roller.
(5) Move the media guides to fit the
label width by turning the guide
adjuster knob.
(6) Gently close the top cover. Make
sure the cover latches securely.
(7) Use “Diagnostic Tool” to set the media sensor type and calibrate the selected sensor. (Start the “Diagnostic tool”
Select the “Printer Configuration” tab Click the “Calibrate Sensor” button )
Note:
Please calibrate the gap/black mark sensor when changing the media.
(1) Feed labels
When the printer is ready, press the button to feed one label to the beginning of next label.
(2) Pause the printing job
When the printer is printing, press the button to pause a print job. When the printer is paused the LED will blink green.
Press the button again to continue the printing job.
Diagnostic Utility is an integrated tool incorporating features that enable you to explore a printer’s settings/status; change
a printer’s settings; download graphics, fonts and firmware; create a printer bitmap font; and send additional commands
to a printer. With the aid of this powerful tool, you can review printer status and settings in an instant, which makes it
much easier to troubleshoot problems and other issues.
Start the Diagnostic Tool:
(1) Double click on the Diagnostic tool icon to start the software.
(2) Four features (Printer Configuration, File Manager, Bitmap Font Manager, Command Tool) are included in the
Diagnostic utility.
(3) The Printer Functions group provides the following options:
Calibrate the sensor specified in the Printer
Setup group media sensor field
Setup the IP address, subnet mask, gateway for
the on board Ethernet
Synchronize printer Real Time Clock with PC
Initialize the printer and restore the settings to
factory default.
To activate the printer dump mode.
Ignore the downloaded AUTO.BAS program
Print printer configuration
Set the password for DiagTool
Note:
* For more information and features about this printer, please refer to the User’s Manual inside the CD disk.
* Please switch OFF printer power switch prior to plug in the power cord to printer power jack.
* Specifications, accessories, parts and programs are subject to change without notice.
 Loading...