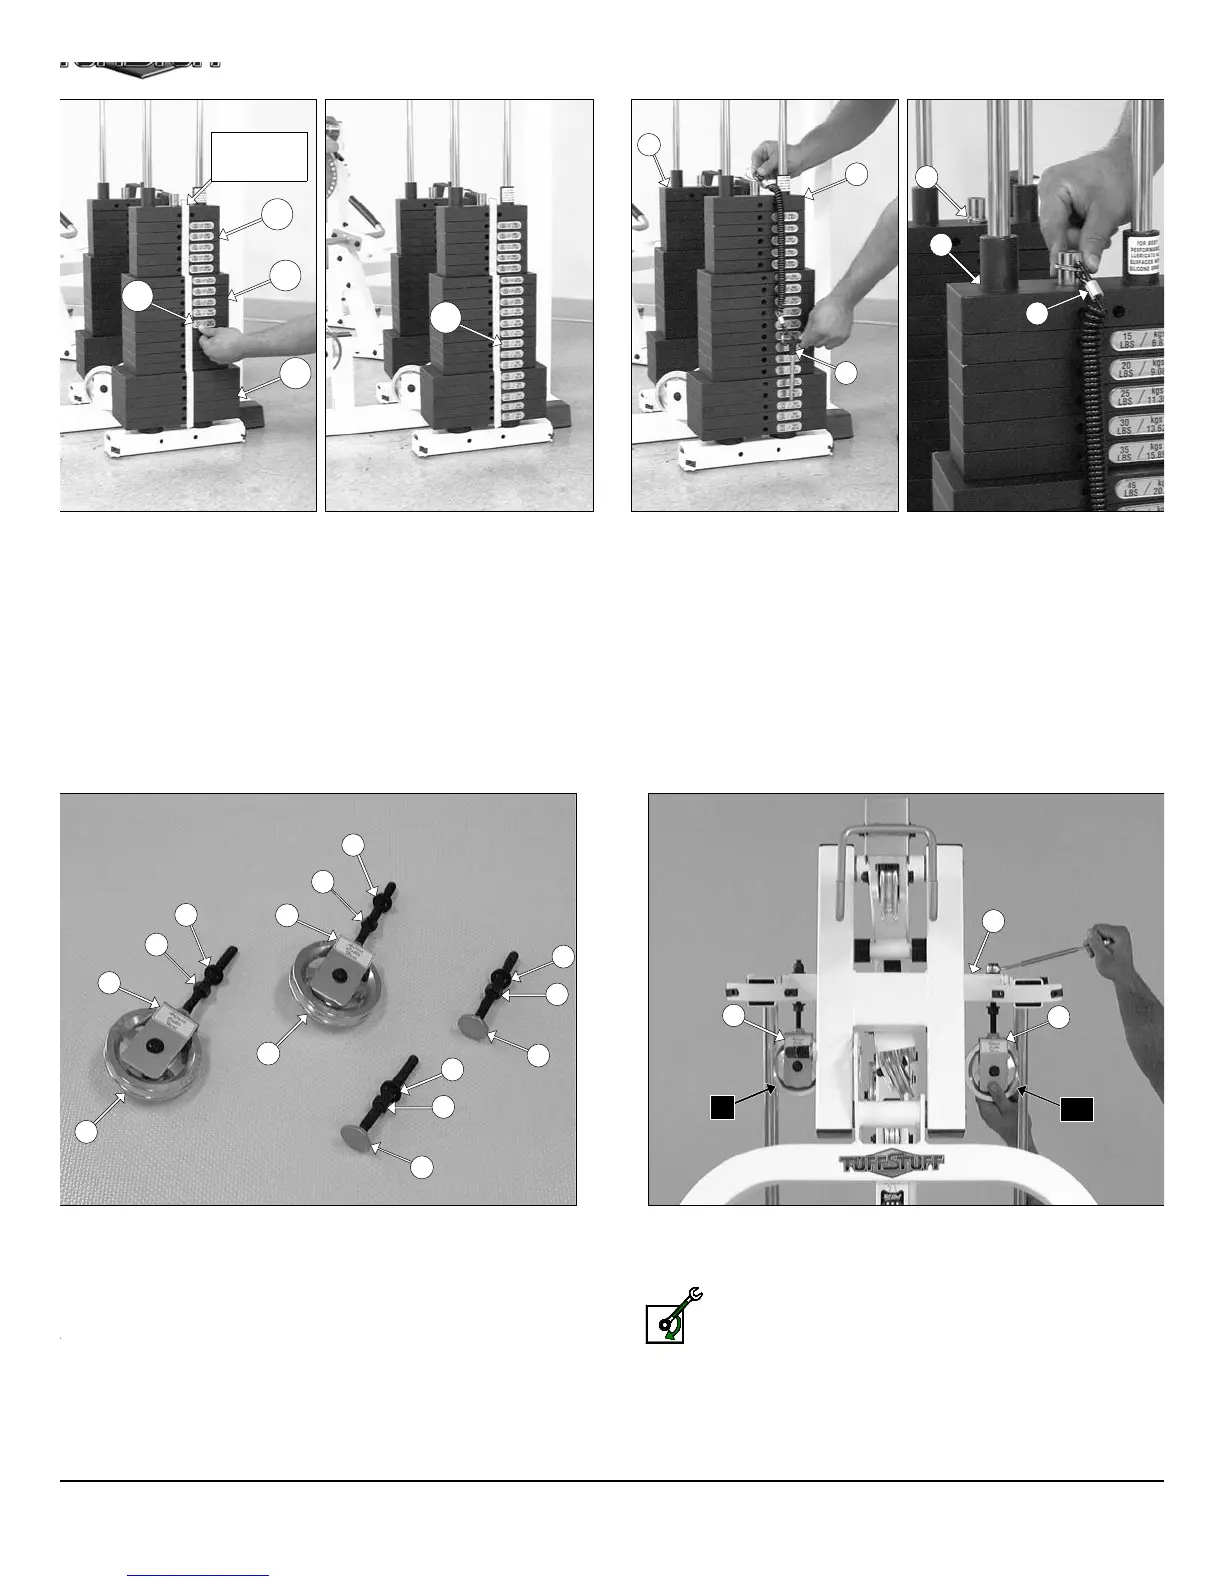
IG. 36 To attach the Decal-Numbers we recommend using a piece of
asking tape as a guide to vertically align the Decal-Numbers. Attach the
ecal Weight Numbers (#116) to the Weight Plates (#133, #23, #134) in
e corresponding order. Begin with the 15 at the top, 20 next, and so on.
IG. 38 Locate the two Adjustable Pulley Brackets (#36) and at-
ch two Pulleys 4 1/2 Rd. (#68) using two Hex Head Cap Screws 3/8-
X 1 3/4 (#110), four Flat Washers SAE 3/8” (#91), and two Nylon
sert Jam Lock Nuts 3/8-16 (#101). Next, thread two Regular Hex
uts 1/2-13 (#99) and insert two Flat Washers SAE 1/2” (#90) over the
lts of the Adjustable Pulley Brackets (#36). Next, locate the two
djustable Stoppers (#33) and thread one Regular Hex Nut 1/2-13
99) and insert one Flat Washer SAE 1/2” (#90) over each of the bolts,
shown above.
FIG. 39 Attach the two Adjustable Pulley Brackets (#36) to th
Top Pulley Assembly (#5) using two Flat Washers SAE 1/2” (#90) an
two Nylon Insert Lock Nuts 1/2-13 (#98).
Loosely Fasten: Do not completely fasten this hardwa
assembly at this time, as it will be completely fastened later
the assembly process.
FIG. 37 Next, attach the Selector Pins w/Coil (#83) to the Select
Bars (#24).
11
MASKING
TAPE
133
23
134
116
116
24
24
83
83
90
99
36
90
99
36
90
99
33
90
99
33
68
68
5
36
C10
36
A6
83
24
AP-250S_AP-250D Apollo 2-Stack Gym Syste