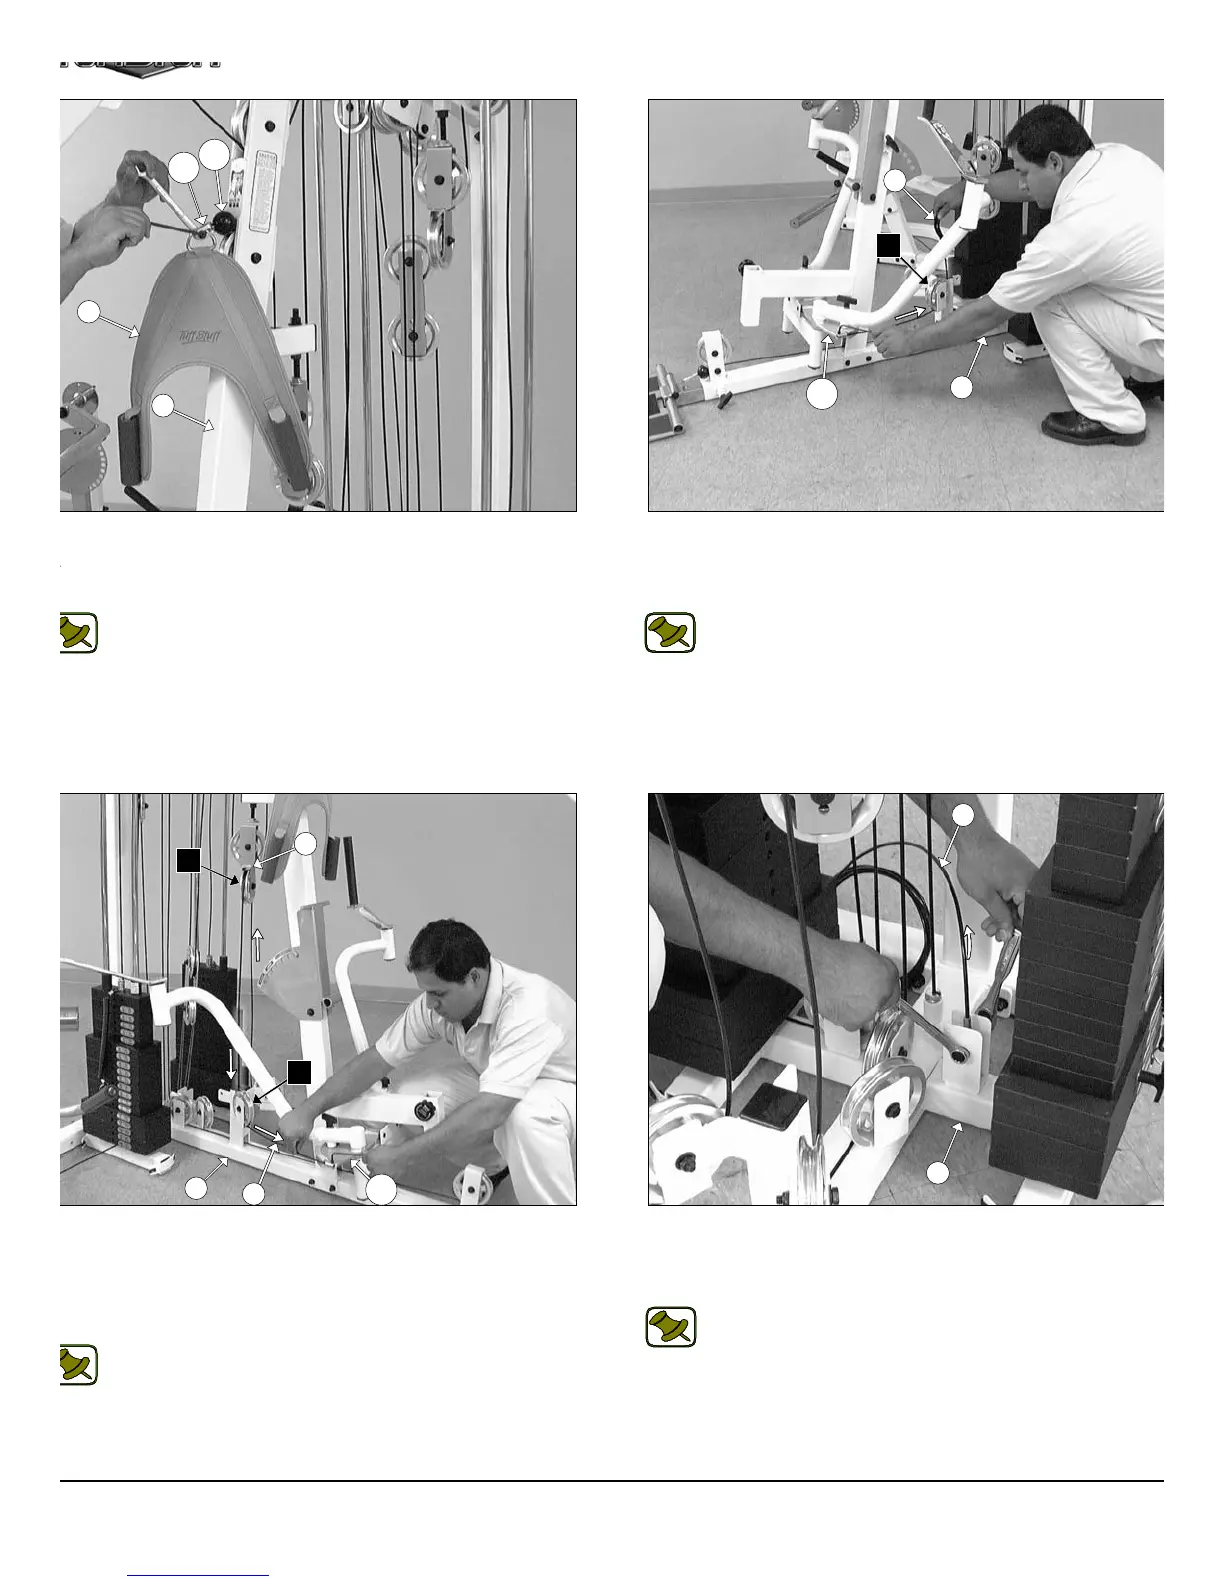
IG. 60 Attach the Abdominal Strap (#65), one Nylon Ball 1 3/4 X
16 (#119), and one Strap Bracket #20 (#118) to the Low Row/
bdominal Cable (#38) using one Shoulder Bolt 3/8 X 3/4 (#117), and
e Nylon Insert Lock Nut 5/16-18 (#102).
Note: Refer to Fig. A on page 27 for further clarification of this
hardware assembly.
IG. 62 Continue routing the Pec Dec Cable (#39) up and over the
ulley 4 1/2” Rd. (#68-Labeled E2). Next, route the cable down and
der the Pulley 4 1/2” Rd. (#68-Labeled E3). Next, attach the end of
e Pec Dec Cable (#39) to the Aluminum Cam Plate (#144) and se-
re it into place using one Socket Head Cap Screw 1/4-20 X 3/4
143).
Note: Refer to Fig. A1 and Fig. A2 on page 28 for further
clarification of this hardware assembly. In addition, refer to the
Cable Mapping Diagram on page 28 for further detailed
illustration of the Pec Dec Cable (#39) routing.
FIG. 61 Attach one end of the Pec Dec Cable (#39) to the Alum
num Cam Plate (#144) and secure it onto place using one Sock
Head Cap Screw 1/4-20 X 3/4 (#143). Next, route the Pec Dec Cabl
(#39) under the Pulley 4 1/2 Rd. (#68-Labeled E1).
Note: Refer to Fig. A1 and Fig. A2 on page 28 for furth
clarification of this hardware assembly.
FIG. 63 Locate the Tension Cable (#40) and attach it to the pull
bracket of the Base Frame (#2) using one Hex Head Cap Screw 3/8-1
X 1 3/4 (#110), two Flat Washers SAE 3/8” (#91), two Nylon Space
3/8 X 3/8 (#120), and one Nylon Insert Jam Lock Nut 3/8-16 (#101).
Note: Refer to Fig. B on page 29 for further clarification of th
hardware assembly.
17
118
65
119
3
2
39
144
E1
26
E2
E3
2
144
39
2
40
AP-250S_AP-250D Apollo 2-Stack Gym Syste