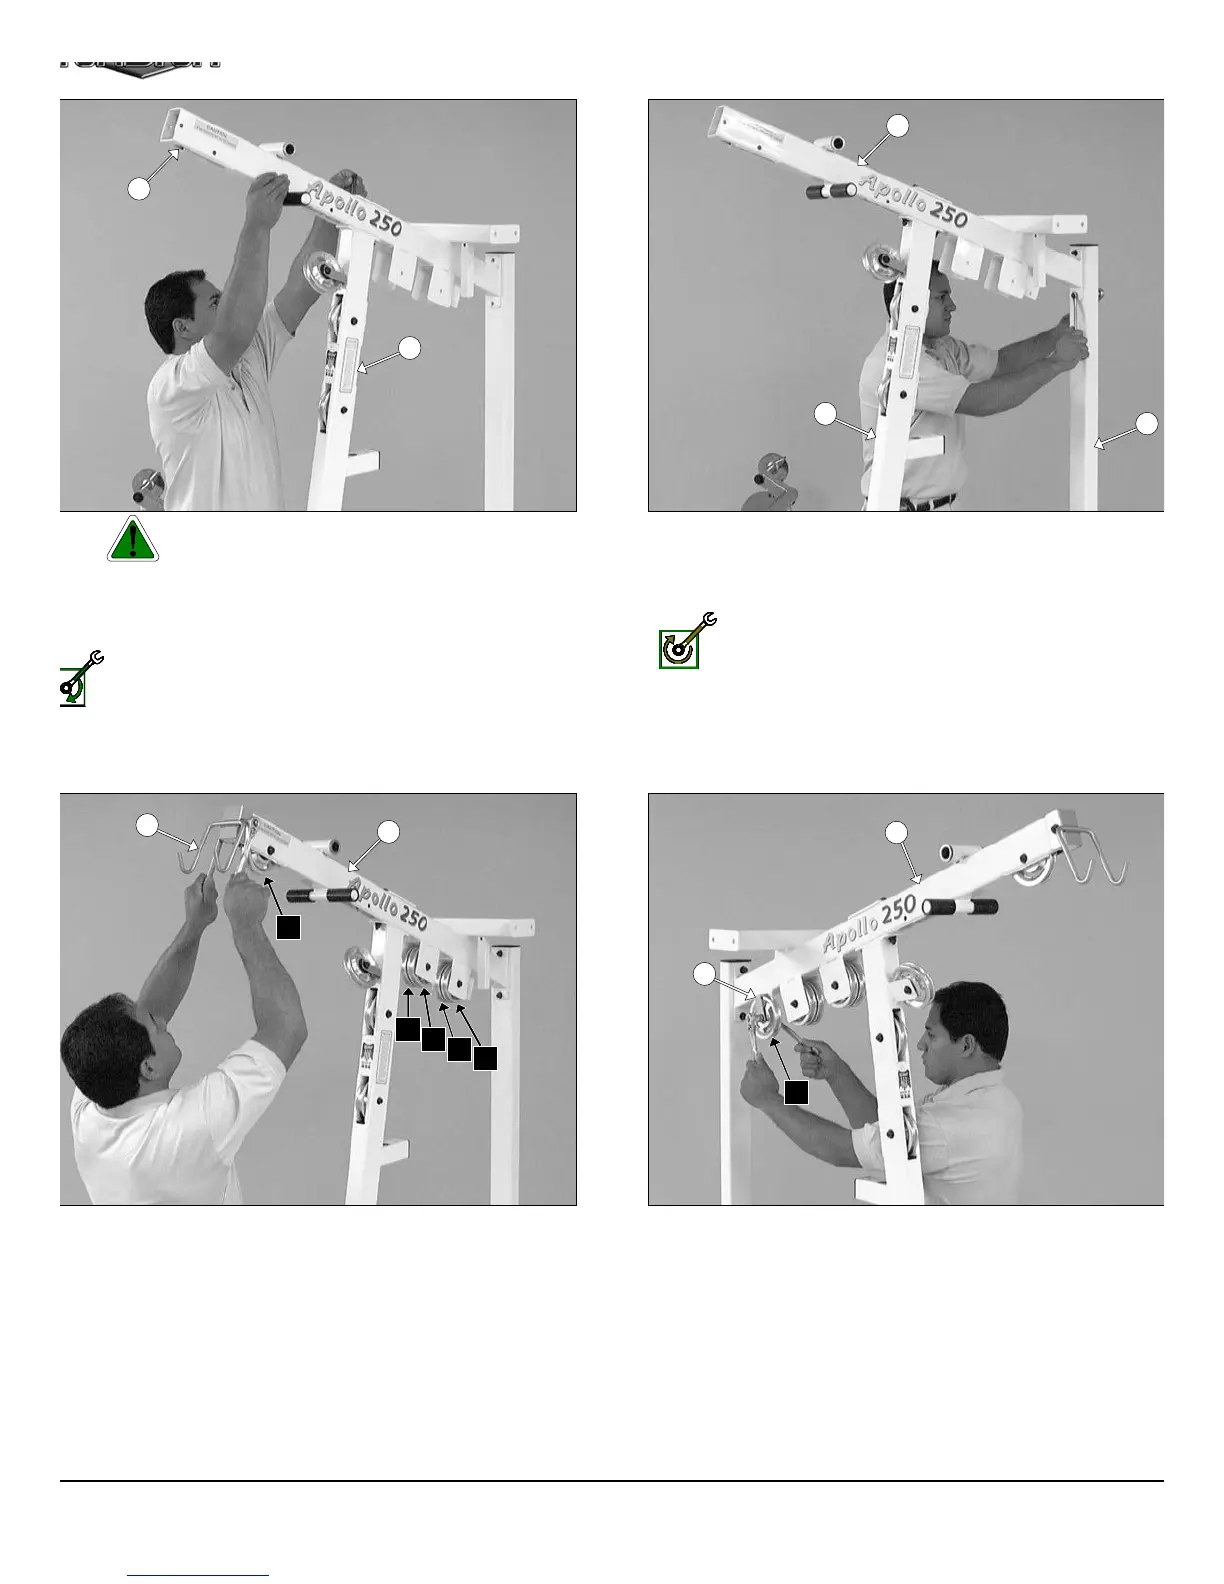
IG. 20 Caution: It is strongly recommended to use another
person in assisting with this assembly.
ttach the Top Pulley Assembly (#5) to the Front Upight (#3) using
o Hex Head Cap Screws 3/8-16 X 4 1/4 (#104), four Flat Washers
AE 3/8” (#91), and two Nylon Insert Lock Nuts 3/8-16 (#100).
Loosely Fasten: Do not completely fasten this hardware
assembly at this time, as it will be completely fastened later in
the assembly process.
IG. 22 Attach four Pulleys 4 1/2 Rd. (#68-Labeled D5, C7, D3, C8)
the pulley brackets of the Top Pulley Assembly (#5) using two Hex
ead Cap Screws 3/8-16 X 2 3/4 (#107), four Flat Washers SAE
8” (#91), and two Nylon Insert Jam Lock Nuts 3/8-16 (#101). Next,
tach another Pulley 4 1/2 Rd (#68-Labeled C1) to the Top Pulley As-
mbly (#5) using one Hex Head Cap Screw 3/8-16 X 2 1/2 (#108),
o Flat Washers SAE 3/8” (#91), and one Nylon Insert Jam Lock Nut
8-16 (#101). Next, attach the Lat Bar Holder 2 X 3 (#19) to the Top
ulley Assembly (#5) using one Hex Head Cap Screw 3/8-16 X 2 3/4
107), two Flat Washers SAE 3/8” (#91), and one Nylon Insert Jam
ck Nut 3/8-16 (#101).
FIG. 21 Next, attach the Top Pulley Assembly (#5) to the Re
Upright (#4) using two Hex Head Cap Screws 3/8-16 X 3 1/4 (#106
four Flat Washers SAE 3/8” (#91) and two Nylon Insert Lock Nuts 3/
16 (#100).
Fully Fasten: Proceed to align and fully fasten this hardwa
assembly and all the previous assemblies that were l
loosely fastened.
FIG. 23 Next, attach one Pulley 4 1/2 Rd. (#68- Labeled A4), an
one Cable Retainer L-Shaped Bracket (#28) to the pulley plate of th
Top Pulley Assembly (#5) using one Hex Head Cap Screw 3/8-16 X
3/4 (#110), two Flat Washers SAE 3/8” (#91), and one Nylon Insert Ja
Lock Nut 3/8-16 (#101). Be sure to position the Cable Retainer
Shaped Bracket (#28) as shown above.
7
5
3
4
5
3
19
5
C7
D5
D3
C8
C1
5
28
A4
AP-250S_AP-250D Apollo 2-Stack Gym Syste