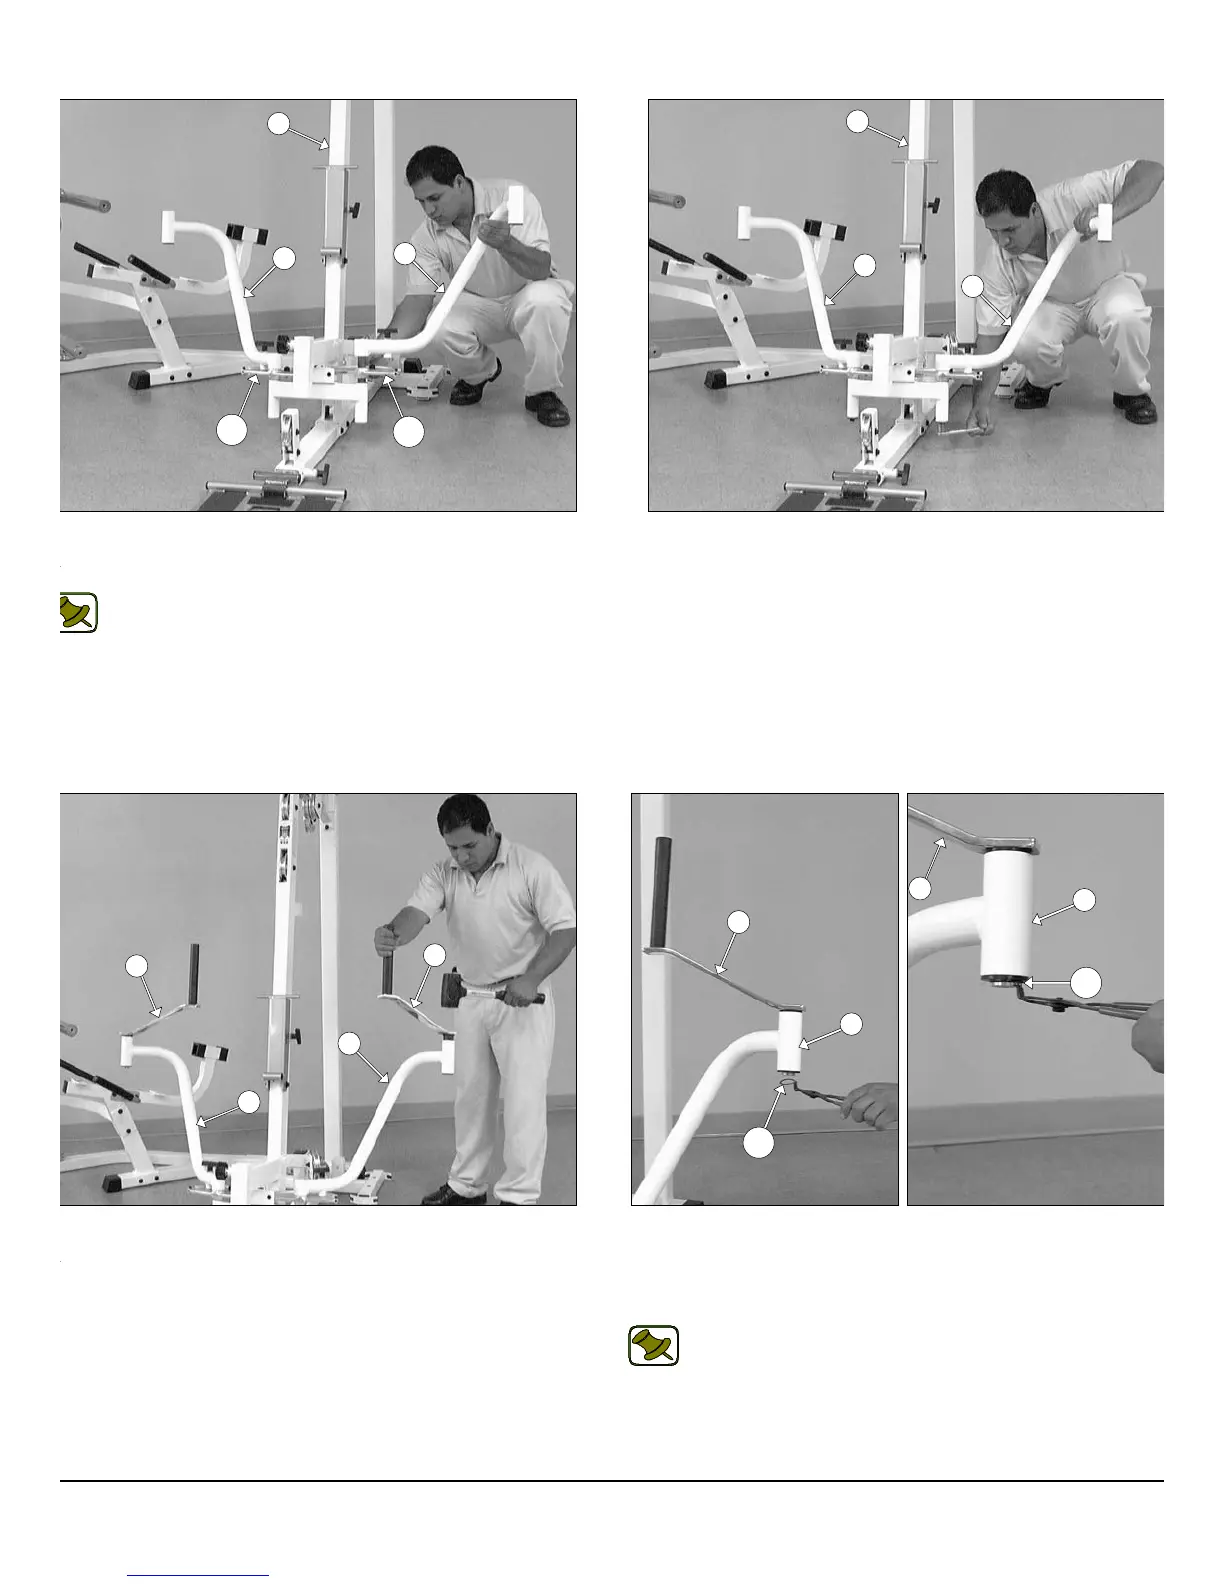
FIG. 27 Next, secure the Pec Dec Swivel Handles (#8) using two R
taining Snap Rings (#115). If possible, use Snap Ring Pliers for this jo
as shown above. If the tool is not available, carefully work each Retainin
Snap Ring (#115) into the groove, then push up alternately with a scre
driver working the Retaining Snap Ring (#115) into the groove.
Note: Be careful not to distort the Retaining Snap Rings (#115)
bend them.
IG. 24 Insert the Left Pec Dec Arm (#7) along with the Aluminum
am Plate (#144) into the receptacle of the Front Upright (#3).
epeat the same procedure for the Right Pec Dec Arm (#6).
Note: It is recommended to grease both axles of the Left and
Right Pec Dec Arms (#7,#6) with multi-purpose grease prior to
assembling.
IG. 26 Using a rubber mallet, insert a Pec Dec Swivel Handle
8), in the position as shown above, into the Left Pec Dec Arm (#7).
epeat the same procedure for the Right Pec Dec Arm (#6).
FIG. 25 Secure the Left Pec Dec Arm (#7) into place using on
Hex Head Cap Screw 3/8-16 X 1 (#113), one Split Lock Wash
3/8” (#95), and one Fender Washer 3/8 X 1 1/2 (#92). Repeat th
same procedure for the Right Pec Dec Arm (#6).
8
wner
s
anua
:
ssem
y
nstruct
on
7
6
3
144
144
7
6
3
8
7
6
8
8
7
7
8
115
115
P-250S_AP-250D Apollo 2-Stack Gym System