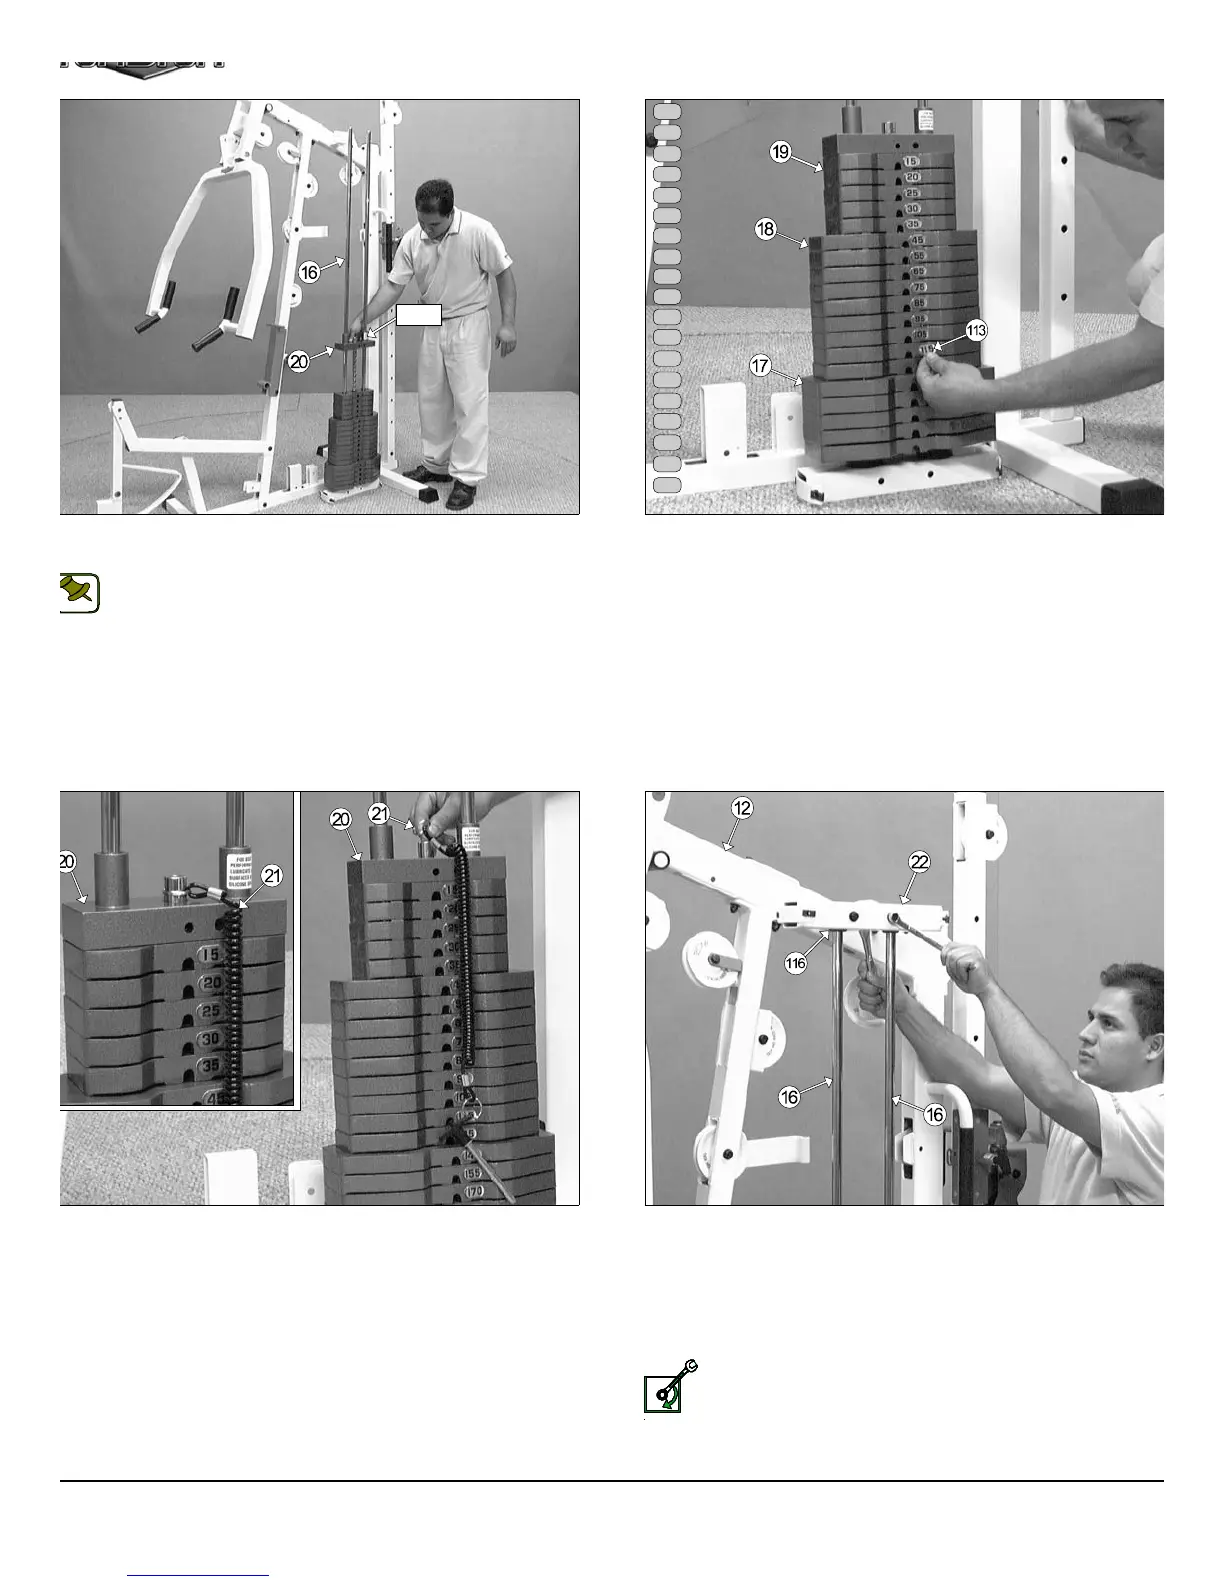
IG. 28 Slide the Top Plate/Selector Bar (#20) over the Guide Rods
16) allowing it to come to rest on the completed weight stack.
Note: Be sure the Label located on the Top Plate/Selector Bar
(#20) is facing toward you before you slide the Top Plate/Selector
Bar (#20) over the Guide Rods 3/4 X 72 (#16).
FIG. 29 Attach the Decal Weight Numbers (#113) to the Weight Plat
(#17, #18, #19) in the corresponding order. Begin with the 15 at the to
20 next, and so on.
IG. 30 Next, locate the Selector Pin w/Coil (#21) and slide its ring
er the Selector Bar (#20) as shown above.
FIG. 31 Maneuver the two Guide Rods 3/4 X 72 (#16) into the hol
on the bottom side of the Guide Rod Retainer Housing (#22).Ne
mount the Guide Rod Retainer Housing (#22) along with the two capti
Guide Rods 3/4 X 72 (#16) to the side of the Top Pulley Assembl
(#12). Secure this assembly using two Hex Head Cap Screws 3/8-16 X
(#112), four Flat Washers SAE 3/8” (#87), and two Nylon Insert Lock Nu
3/8-16 (#92).
Loosely Fasten: Do not completely fasten this hardwa
assembly at this time, as it will be completely fastened later in t
assembly process.
9
TS-1000 Home Gym w/Adjustable High-Low Pulley Syste
Label
NOTE:
15
20
25
30
35
45
55
65
75
85
95
105
115
125
140
155
170
185
200