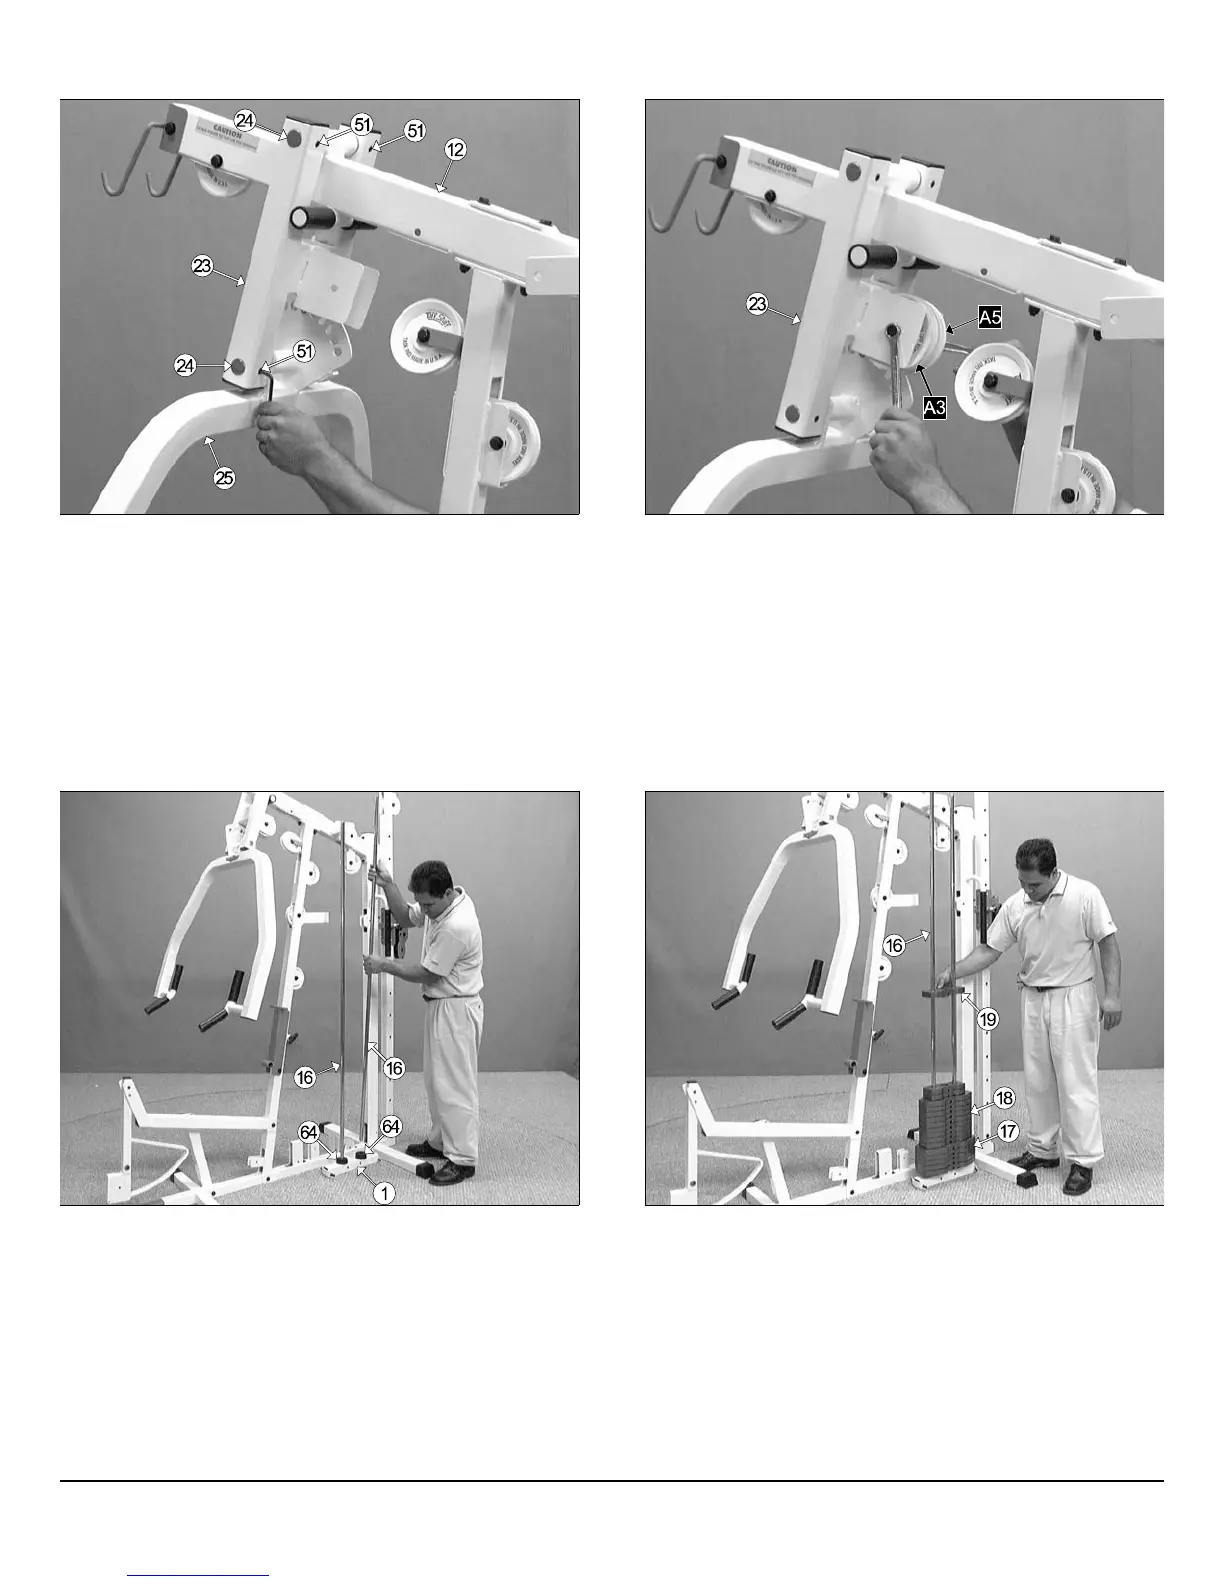
IG. 24 Next, secure the Press Bar Selector Housing (#23) to the
ivot Axle 1 X 8 1/8 (#24) using two Set Screws 3/8-16 X 1/2 (#51), as
own above. Then, secure into place the Press Bar (#25) to the Pivot
xle 1 X 8 1/8 (#24) using two Set Screws 3/8-16 X 1/2 (#51). Use the
upplied Hex Key 3/16 (#114) for securing the Set Screws 3/8-16 X 1/2
51) into the threaded sockets on the Press Bar Selector Housing
23).
FIG. 25 Next, attach two Nylon Pulleys 4 1/2 Rd. (#67-Labeled A3, A
to the pulley bracket located on the Press Bar Selector Housing (#2
and secure them into place using one Hex Head Cap Screw 3/8-16 X
3/4 (#100), two Flat Washers SAE 3/8” (#87), and one Nylon Insert Ja
Lock Nut 3/8-16 (#93).
IG. 26 Insert one Rubber Donut 3/4 x 2 1/2 (#64) onto each Guide
od 3/4 x 72 (#16). Next, insert the two Guide Rods 3/4 x 72 (#16) into
e receptacles on the Base Frame (#1), as shown above.
FIG. 27 Carefully begin sliding the Weight Plates over the Guid
Rods (#16) beginning with the five 15 Lb. Weight Plates (#17) at the b
tom, the nine 10 Lb. Weight Plates (#18) in the middle, and the five 5 L
Weight Plates (#19) on top of the weight stack.
S-1000 Home Gym w/Adjustable High-Low Pulley System 8
wner
s
anua
:
ssem
y
nstruct
on