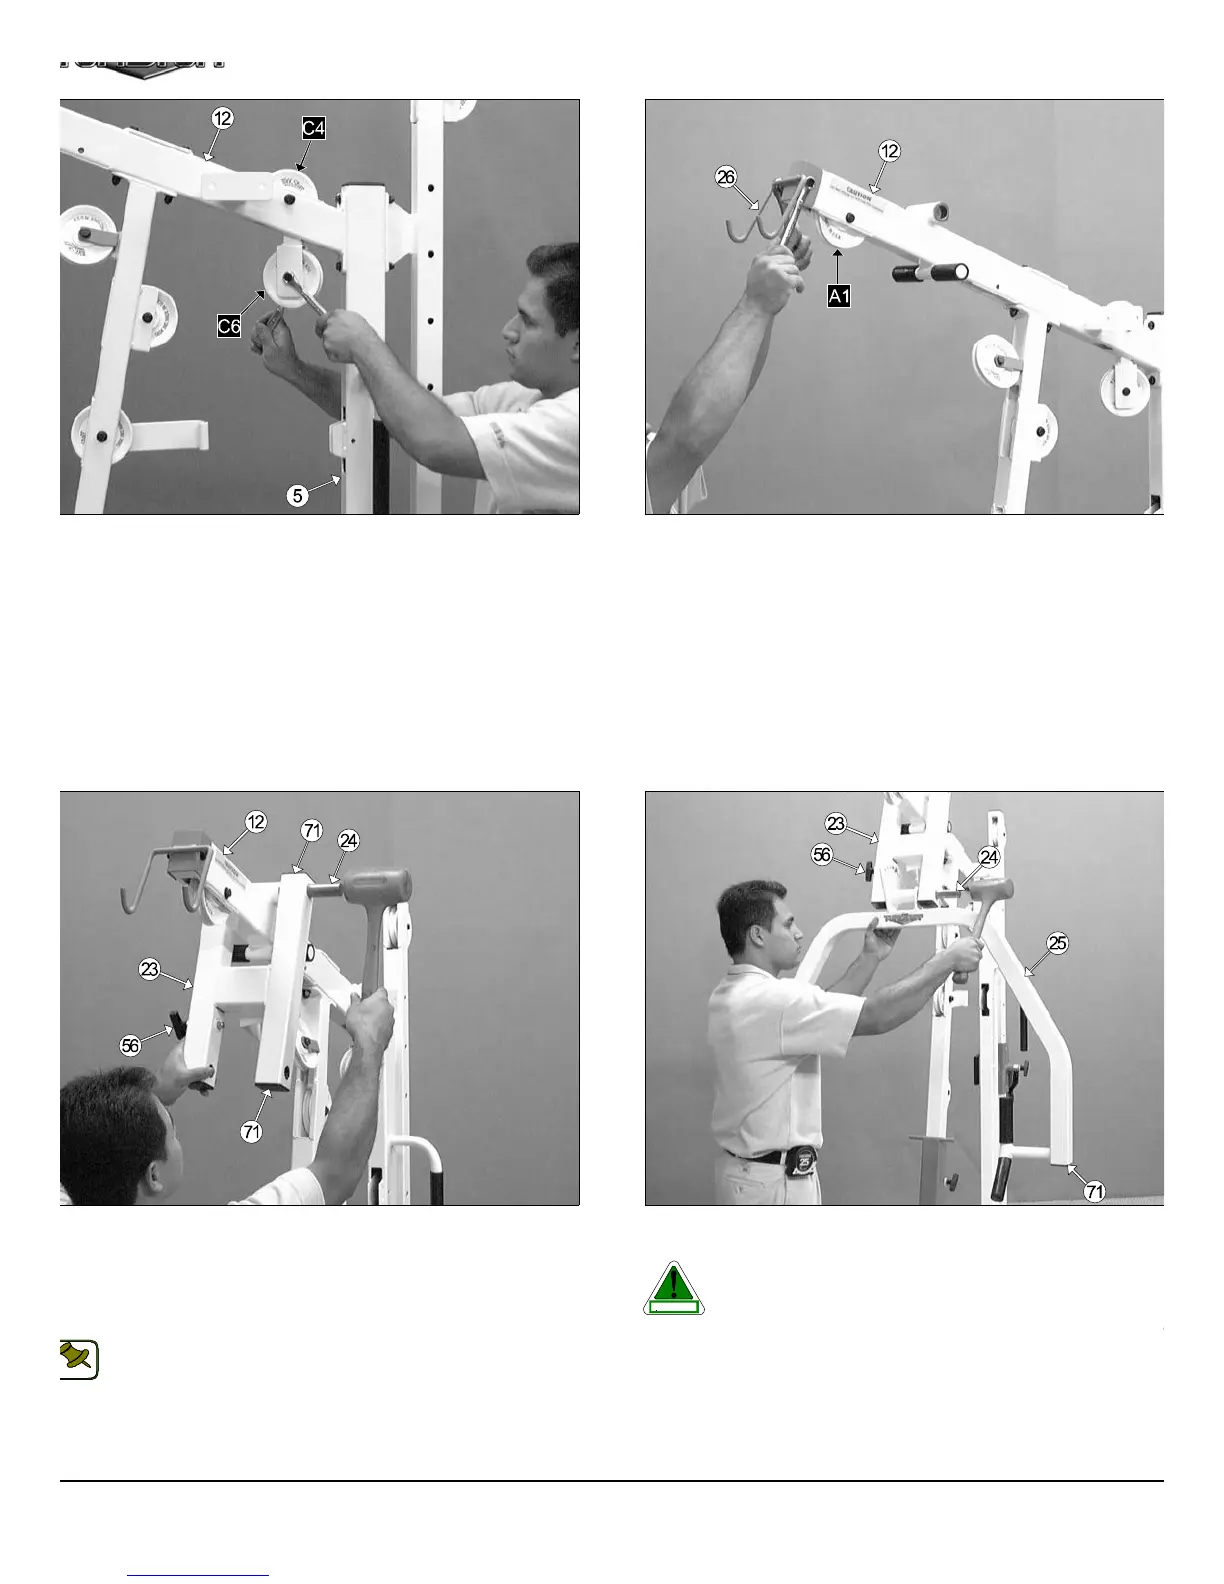
IG. 20 Attach a Nylon Pulley 4 1/2 Rd. (#67-Labeled C4) into the pulley
racket located on the Top Pulley Assembly (#12) and secure it into
lace using one Hex Head Cap Screw 3/8-16 x 2 1/2 (#101), two Flat
ashers SAE 3/8” (#67), and one Nylon Insert Jam Lock Nut 3/8-16
93). Next, attach a Nylon Pulley 4 1/2 Rd. (#67-Labeled C6) into the
ulley bracket located on the Top Pulley Assembly (#12) and secure it
to place using one Hex Head Cap Screw 3/8-16 x 1 3/4 (#102), two Flat
ashers SAE 3/8” (#67), and one Nylon Insert Jam Lock Nut 3/8-16
93).
FIG. 21 Attach a Nylon Pulley 4 1/2 Rd. (#67-Labeled A1) into the pull
bracket located on the Top Pulley Assembly (#12) and secure it in
place using one Hex Head Cap Screw 3/8-16 x 2 1/2 (#101), two Fl
Washers SAE 3/8” (#67), and one Nylon Insert Jam Lock Nut 3/8-1
(#93). Next, attach the Lat Bar Holder (#26), in the position as sho
above, to the Top Pulley Assembly (#12) and secure it into place usin
one Hex Head Cap Screw 3/8-16 x 2 3/4 (#100), two Flat Washers SA
3/8” (#67), and one Nylon Insert Jam Lock Nut 3/8-16 (#93).
IG. 22 Attach the Press Bar Selector Housing (#23) to the Top
ulley Assembly (#512), as shown above. Using a rubber mallet, insert
Pivot Axle 1 X 8 1/8 (#24) through the holes in the Press Bar Selector
ousing (#23) and through the receptacle on the Top Pulley Housing
12) until it is flush with both sides of the Press Bar Selector Housing
23).
Note:The four Plastic Insert Caps 2” Sq. (#71) located in the tube-
ends of the Press Bar Selector Housing (#23) have been pre-
assembled by the factory.
FIG. 23 Insert two Plastic Insert Caps 2” Sq. (#71) into the tube-end
the Press Bar (#25).
Caution: It is recommended to use another person in assisti
with this assembly.
Next, insert the Press Bar (#25) up into the Press Bar Selector Housin
(#23) and support in into place using the Push Pull Pin (#56). Next, usin
a rubber mallet, insert the Pivot Axle 1 X 8 1/8 (#24) into the Press B
Selector Housing (#23) and through the Press Bar (#25) until it is flus
with both sides of the Press Bar Selector Housing (#23).
7
TS-1000 Home Gym w/Adjustable High-Low Pulley Syste
OTE:
CAUTION