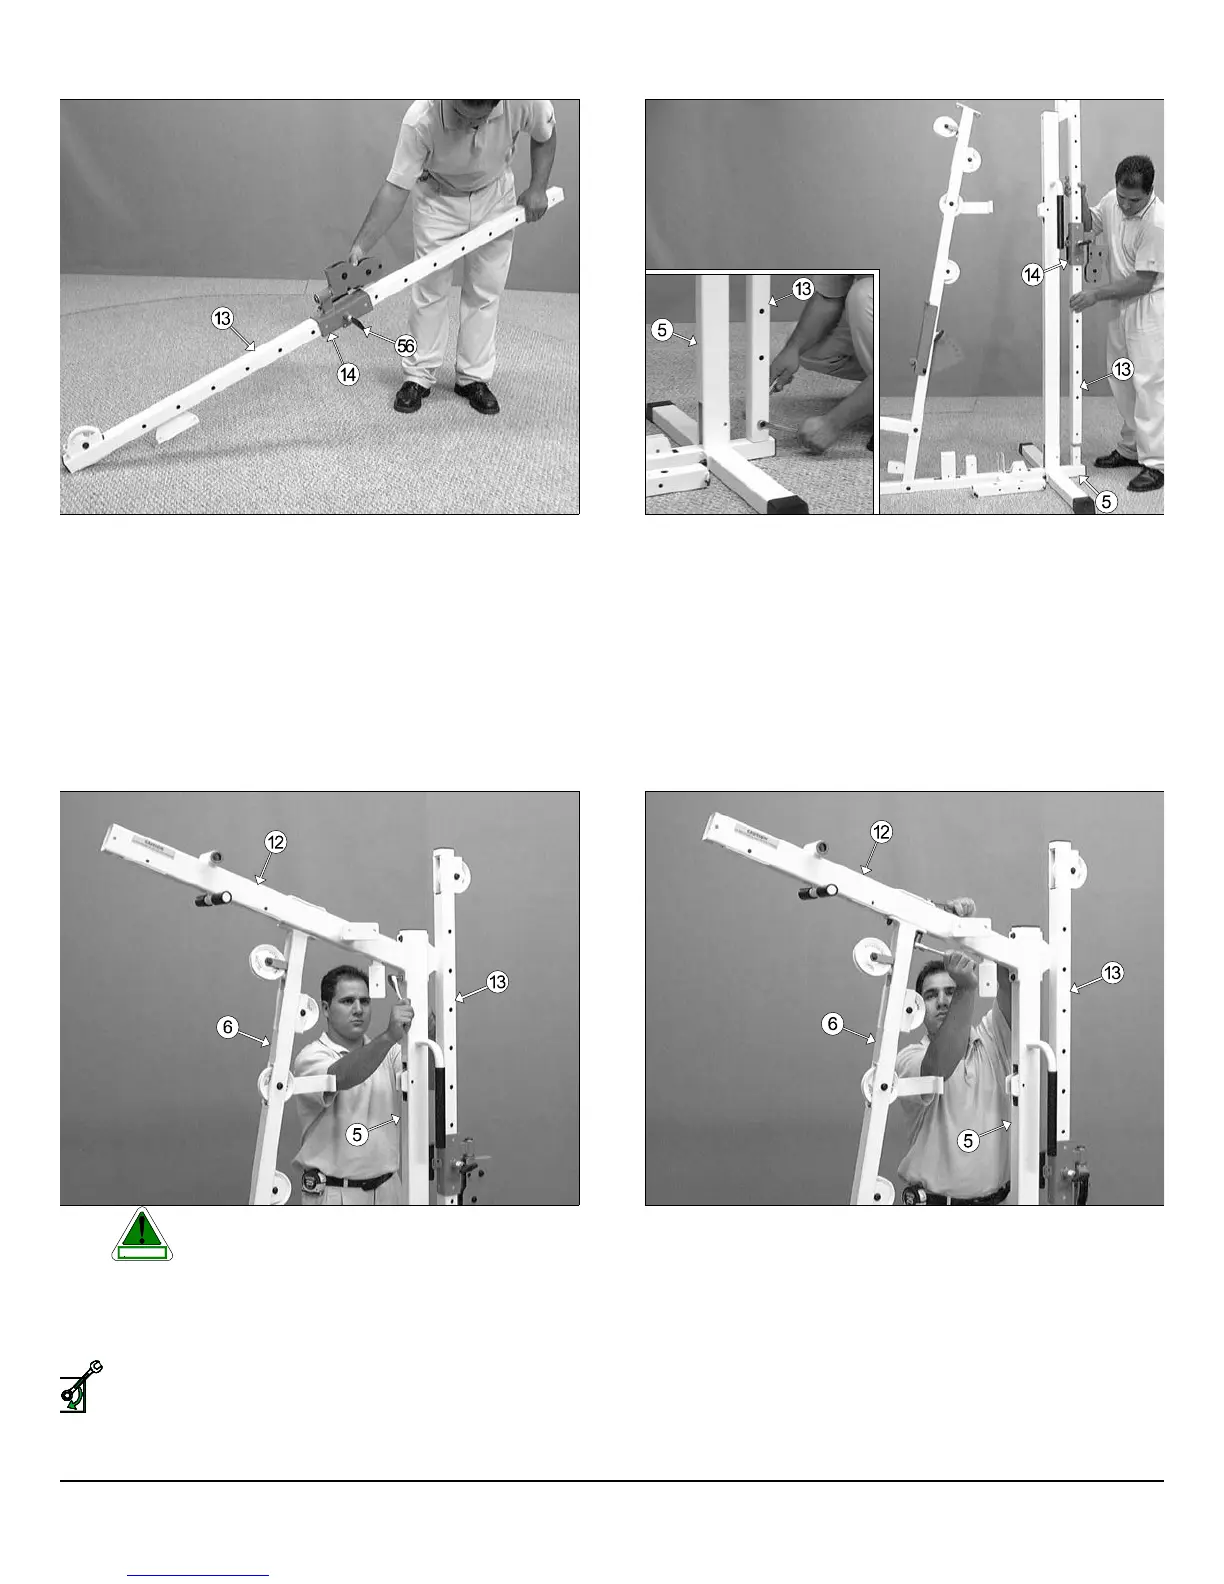
IG. 16 Slide the High-Low Carriage (#14) onto the High-Low Selec-
rized Upright (#13), in the position as shown above. Be sure to release
e Push Pull Pin 1/2 x 3 1/2 (#56) to allow the insertion of carriage as-
mbly.
FIG. 17 Next, insert the High-Low Sectorized Upright (#13) onto th
tube-connector of the Rear Upright (#5) and secure it into place usin
one Hex Head Cap Screw 3/8-16 x 2 1/2 (#101), two Flat Washers SA
3/8” (#87), and one Nylon Insert Jam Lock Nut 3/8-16 (#93).
FIG. 19 Affix the Top Pulley Assembly (#12) to the Front Upright (#
using two Hex Head Cap Screws 3/8-16 x 4 1/4 (#97), four Flat Washe
SAE 3/8” (#87), and two Nylon Insert Lock Nuts 3/8-16 (#92).
S-1000 Home Gym w/Adjustable High-Low Pulley System 6
wner
s
anua
:
ssem
y
nstruct
on
IG. 18 Caution: It is recommended to use another person in
assisting with this assembly.
ount the Top Pulley Assembly (#12) to the Front Upright (6), and affix
to the Rear Upright (#5) and the High-Low Selectorized Upright (#13)
ing two Hex Head Cap Screws 3/8-16 x 4 1/4 (#97), four Flat Washers
AE 3/8” (#87), and two Nylon Insert Lock Nuts 3/8-16 (92).
Loosely Fasten: Do not completely fasten this hardware assem-
bly at this time, as it will be completely fastened later in the as-
sembly process.
CAUTION
SELY FASTEN