Service Procedures
18
Turbofan E20D Series Convection Ovens © Copyright Moffat Ltd. 10 February 2016.
Amendment 1
5. Clean off any existing silicone
from around the temperature
probe opening in the oven inner
wall.
6. Fit a new gasket to the rear of
the new temperature probe and
from inside the oven, feed the
probe cable through oven
cavity.
7. Secure temperature probe to
the inside of the oven using the
supplied screws.
8. Connect temperature probe cable to oven control board.
9. Refit the control panel.
10. Refit the rear access panel.
11. Carry out a functional check of temperature probe using the
oven controller.
Temperature Probe Type PT1000
Temperature
o
C (
o
F) Resistance ± 5%
0 (30) 1000 Ω
50 (122) 1194 Ω
100 (212) 1385 Ω
150 (302) 1573 Ω
180 (356) 1685 Ω
Temp
Probe
Gasket
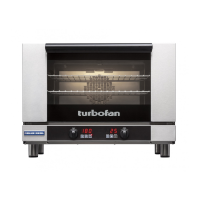
5. Remove 2 screws securing overtemp and remove overtemp
from rear of oven.
6. Refit in reverse order.
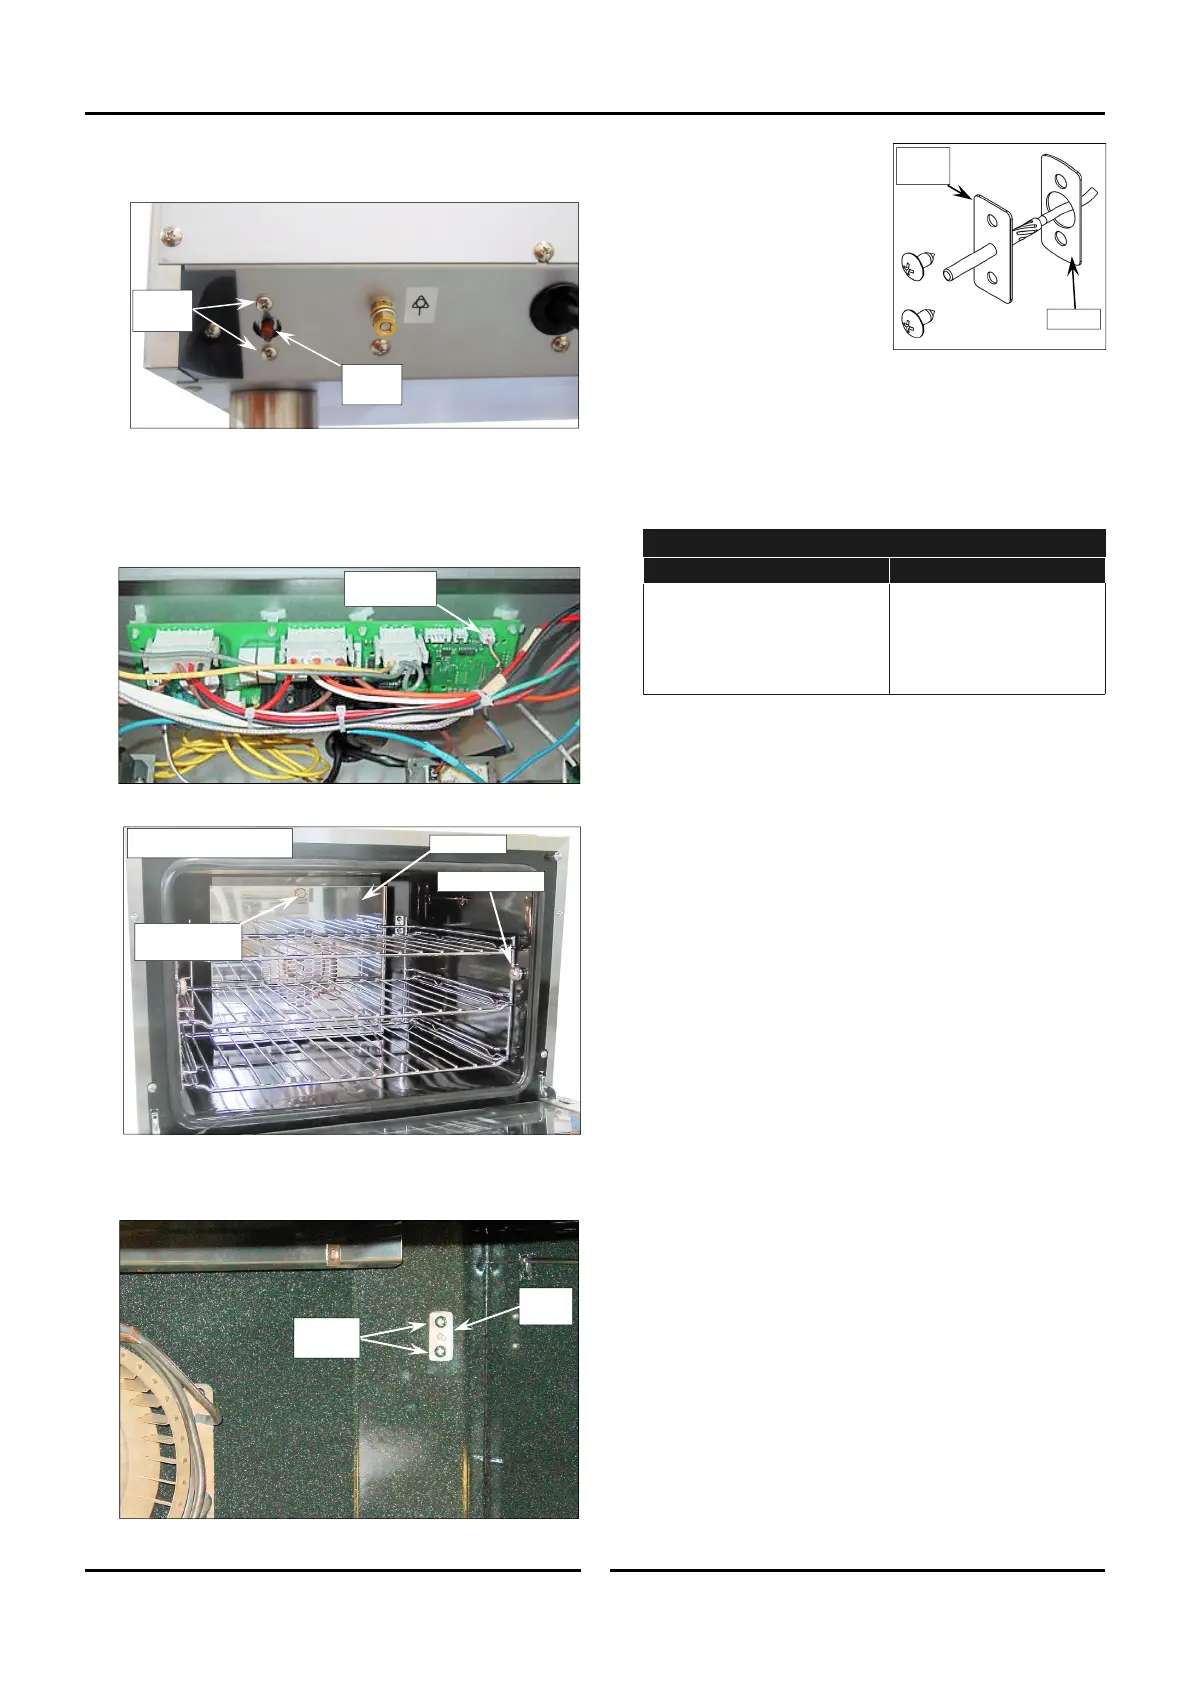
Temperature Probe
1. Disconnect temperature probe cable from the rear control
board.
2. From inside the oven, remove the oven racks and fan baffle.
3. Undo the temperature probe securing screw(s).
4. Withdraw probe and cable through the oven cavity and into the
oven.
Temp Probe
Connection
Remove
2 Screws
Temp
Probe
Remove
Screws
Reset
Button
Securing Screw
Baffle Securing
Screw
Fan Baffle
E23D Oven Shown.
 Loading...