Cleaning and Maintenance
17
Cleaning Guidelines
To achieve the best results, cleaning must be regular and thorough.
If any small faults occur, have them looked at promptly. Don't wait
until they cause a complete breakdown.
NOTE:
Carefully read and follow the safety instructions on the label
of the cleaning product to be used.
DO NOT use harsh abrasive scouring pads or abrasive
detergents as they could damage the oven.
Ensure that any detergent or cleaning material has been
completely removed after each cleaning.
To keep your oven clean and operating at peak efficiency, follow the
procedures shown below.
Oven Cleaning
NOTE:
If the oven usage is very high, the cleaning procedure
should be carried out on a more frequent basis.
Allow the oven interior to cool to approx 50˚C - 120˚F
before commencing cleaning.
Stainless Steel Surfaces
a. Thoroughly clean the exterior surfaces of the oven with, a
damp cloth moistened with a mild detergent solution, or a
soft bristled brush.
b. Baked on deposits or discolouration may require a good
quality stainless steel cleaner. Always apply cleaner when
the oven is cold and rub in the direction of the grain.
Side Racks
a. Remove the oven racks.
b. Partially undo thumbscrews
(anti-clockwise) securing the
racks to the oven wall, until
racks are loose.
c. Pull racks forward to
disengage location pins at rear
of rack from fan baffle,
remove side racks from oven.
d. Clean all racks with a mild anti bacterial detergent and hot
water, using a soft bristled brush.
e. Dry the racks thoroughly with a dry cloth.
f. To refit the racks, engage the
locating pins at rear of side
rack into locating holes in fan
baffle at rear of oven.
g. At the same time locate the
front of the racks over the
thumbscrew and hand tighten
the thumbscrew.
h. Refit the oven racks to the oven.
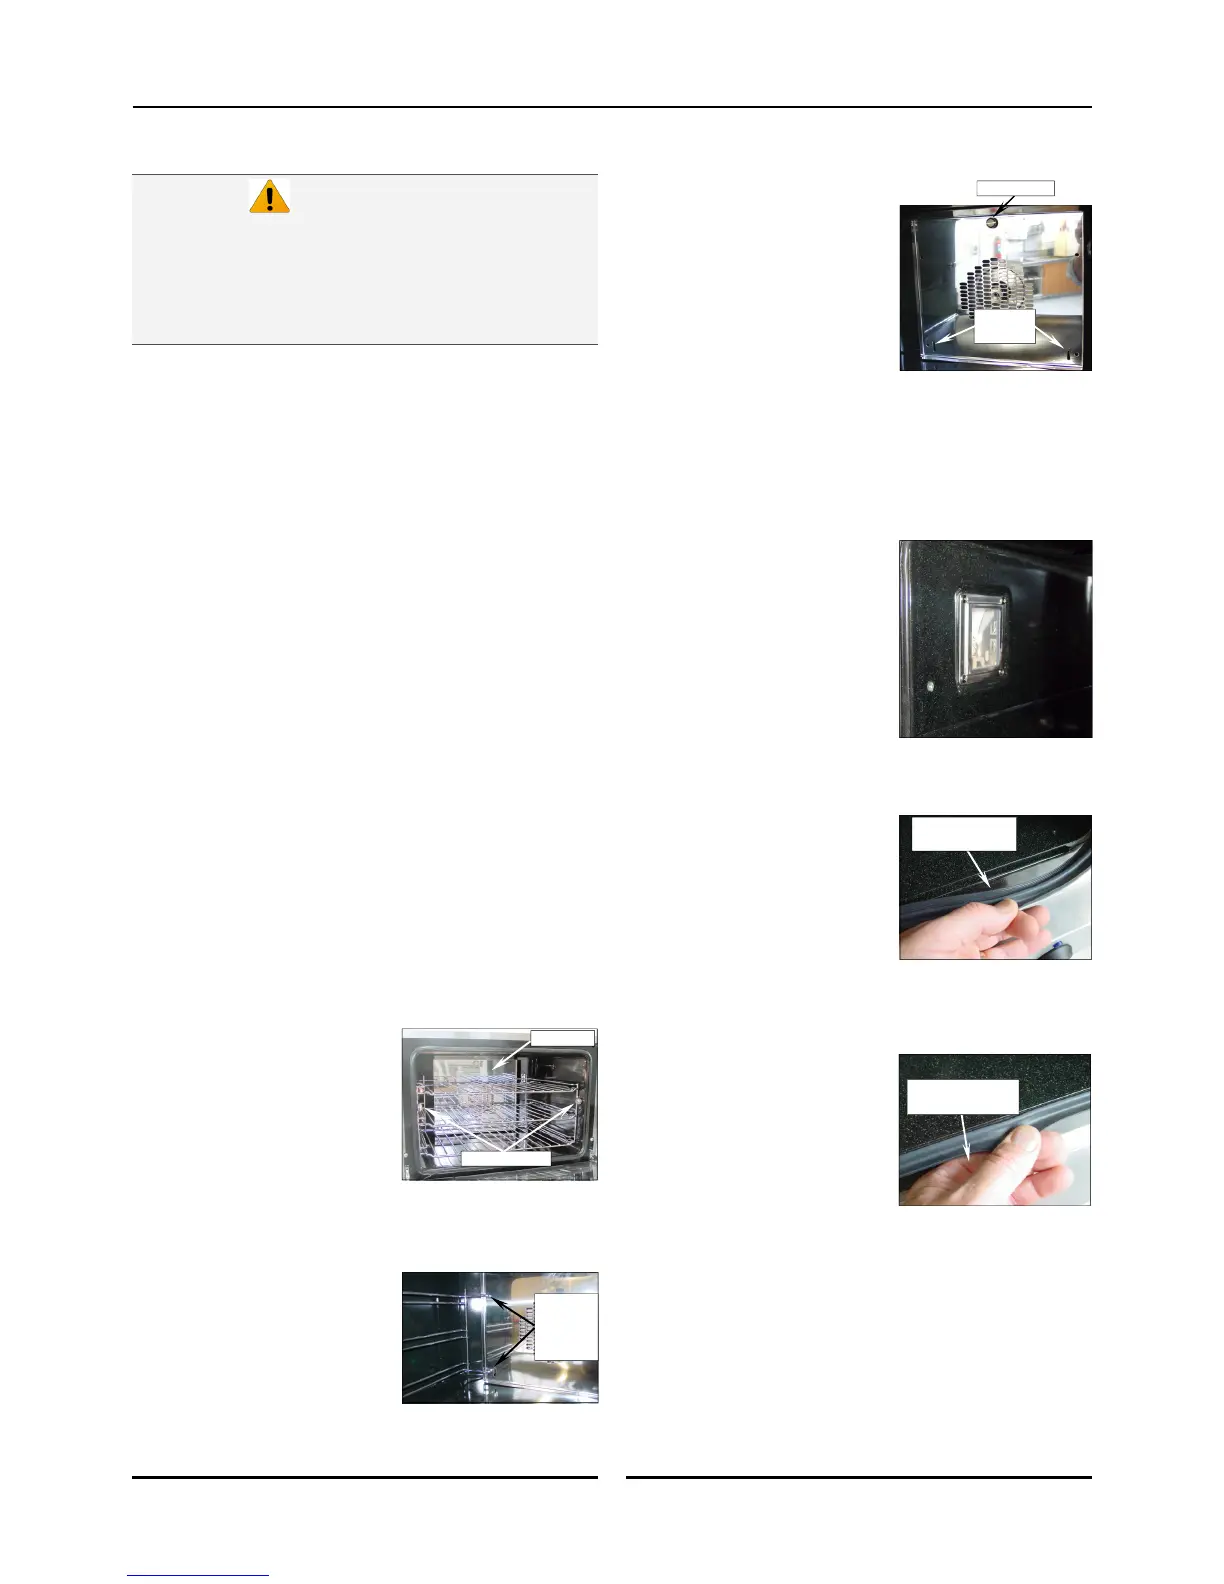
Fan Baffle
a. Remove side racks as shown
previously.
b. Undo (anti-clockwise) and
remove the thumbscrew at the
top of the fan baffle. (E27 /
E28 Ovens, have 2
thumbscrews).
c. Tilt the fan baffle forward and
lift up off the location brackets
at rear of oven.
d. Clean fan baffle with mild anti bacterial detergent and hot
water solution with a soft bristled brush.
e. Dry fan baffle thoroughly with a soft dry cloth before
re-fitting.
f. Refit the fan baffle and hand tighten the thumbscrew(s) to
secure the fan baffle.
Lamp Glass
a. Remove the LH side rack as
shown previously.
b. Wash the glass lens with a soft
sponge using warm water and
a detergent solution. Rinse
with clean, warm water.
c. Dry the glass lens thoroughly
with a dry cloth.
d. Refit LH side rack as shown
previously.
Door Seal
a. To remove door seal, pull the 1
piece seal forward until it pulls
out of the location groove
around the oven. Note the
way the seal is fitted to the
oven, with the lip facing
inwards.
b. Check for wear and damage
and replace as required.
c. Wash the door seal in a sink,
taking care not to cut or
damage the seal.
d. Dry the seal thoroughly.
e. Refit seal with lip facing into
centre of the oven.
f. Press the seal into the locating
groove in the front face of the
oven until the seal is properly
located all around the oven.
Always turn off the electrical power supply at
the mains supply before commencing
cleaning.
This oven is not water proof. Do not use
water jet spray to clean interior or exterior
of the appliance.
Caution
Thumbscrew
Location
Brackets
Refit Seal with Lip
facing inwards
Thumbscrews
Side Rack
Rear
Location
Pins
Fan Baffle
Pull Seal out of
locating channel