AudioTron Quick-Start Guide
Page 5
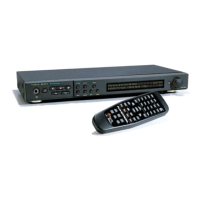
AudioTron Setup Procedure
Follow this basic procedure to set up your AudioTron. For more details, please refer to the appropriate sections in
this Quick Start Guide or see the Reference Manual on the enclosed CD.
Install the sample music files so the proper directories will be configured.
Install AudioStation if you do not already have a PC jukebox program, or if you would like to use
AudioStation to manage your digital music library.
See "Installing the AudioStation CD" for details
Make sure your HPNA or Ethernet network is operating properly before setting up AudioTron.
See "Connecting AudioTron to your Network" for details
Install the AudioStation CD
Connect AudioTron to your
network
Connect AudioTron to your
audio system
Use either the analog line outputs or SPDIF digital optical output (for highest audio quality.)
See "Connecting AudioTron to your Audio System" for details.
Power-on AudioTron
Turn on the rear panel power switch, wait a few seconds. Press and hold the
standby button. for a few seconds, then release.
See "Powering AudioTron" for details
"No Hosts Found"
Then main menu displays
"No songs found"
Searches for songs, then
displays the main menu
with a song title
Press Play
See "Network Troubleshooting Procedure"
Finds Host PC.
Then main menu displays
"No Songs Found"
See "Song Directory
Troubleshooting
Procedure"
Song plays. No sound.
See "Audio
Troubleshooting
Procedure"
AudioTron is ready.
See "Playing your PC
Digital Music LIbrary"
What happened?
What happened?
"Waiting for Network"
then displays
"No Hosts found"