4
Page.
/ 8
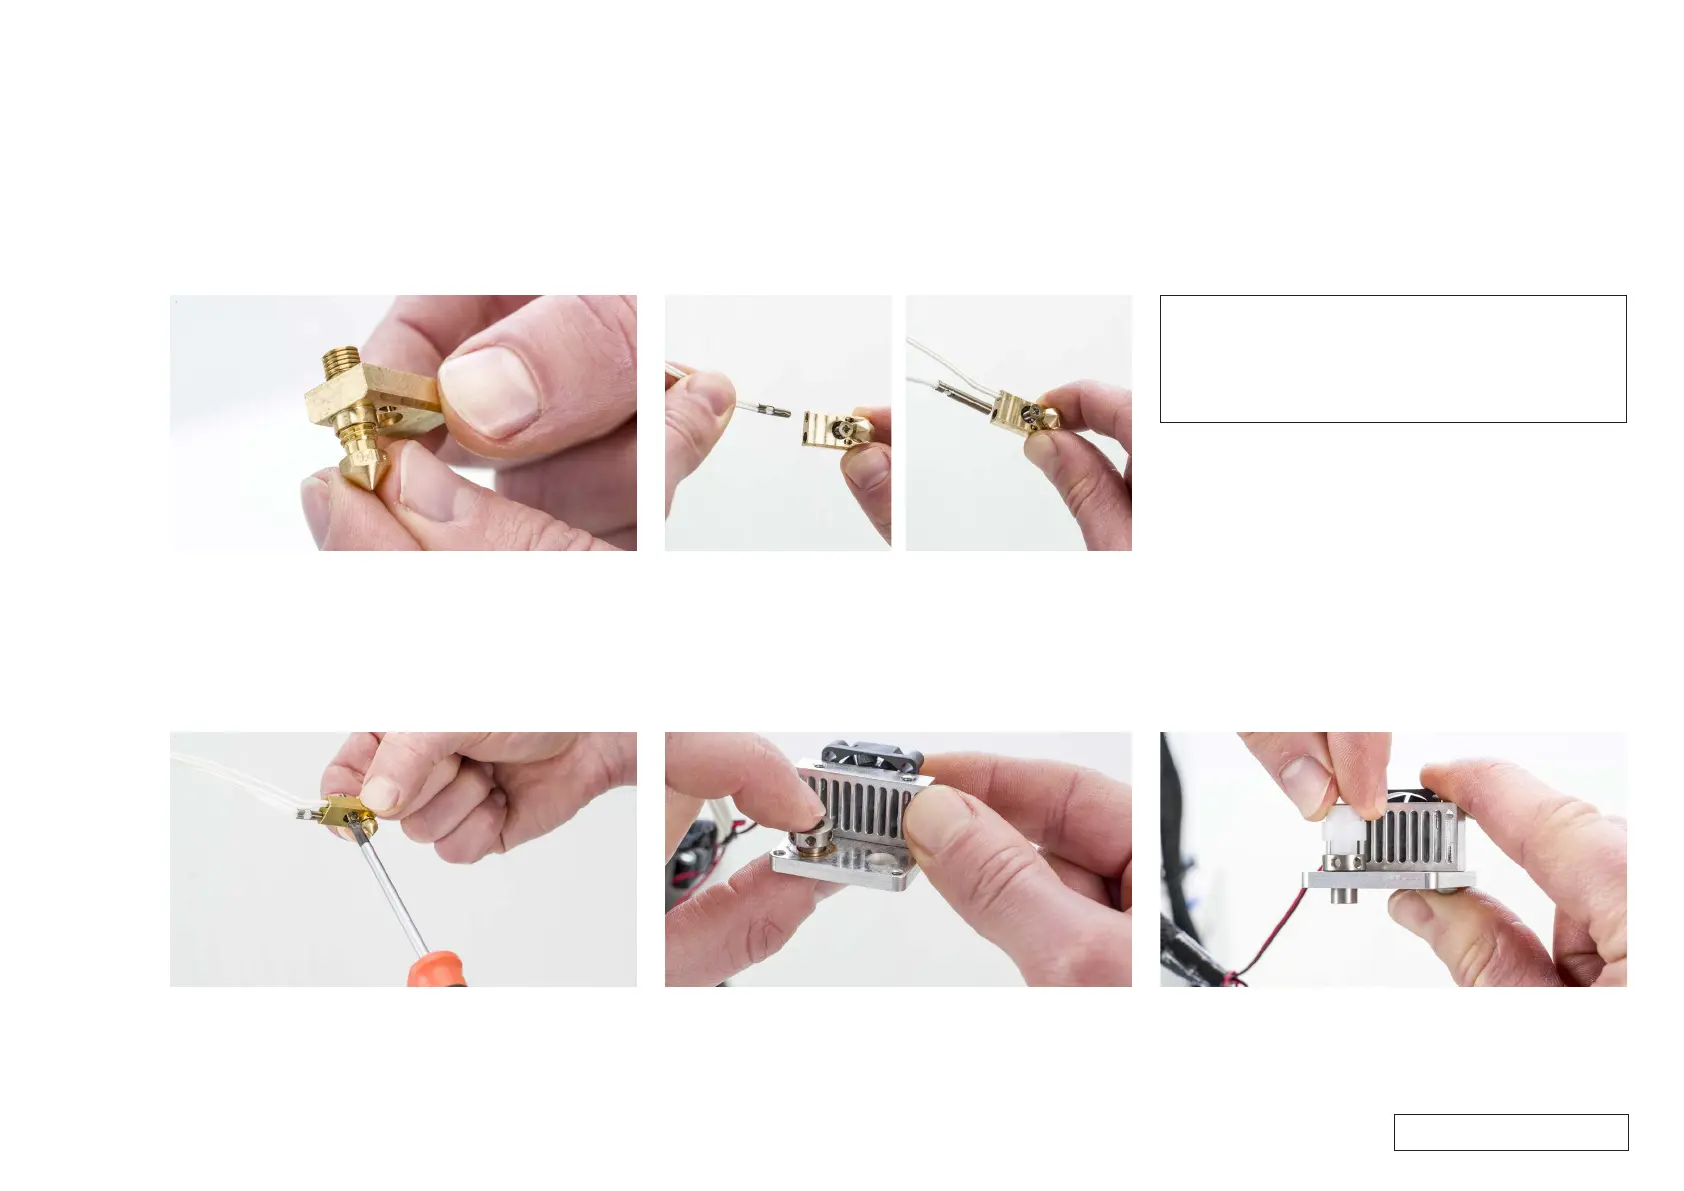
1. Prepare the new heater block
• Take a new 0.4 mm nozzle and screw it onto the new heater block.
• Place the nozzle ring in the round opening at the bottom of the
heater block.
• Insert the countersunk M3x16 bolt in the bottom of the heater block
and screw it about halfway in.
3. Secure the sensor and heater
• While keeping the cables in place, secure them by completely
tightening the countersunk M3x16 bolt. Use the 0.5 Nm torque
screwdriver with PH1 bit.
• Gently pull at both wires to check if they are properly secured.
4. Place the hot end isolator
• Take the new hot end isolator and apply copper grease to its edge.
• Place it through the left opening of the aluminum hot end holder
bottom.
2. Insert the sensor and heater
• Insert the PT100 sensor into the smaller opening on the right.
• Make sure that it is fully inserted; no part of the metal should still
be visible.
• Insert the heater cartridge into the larger opening on the left.
Reassembly
Note: Make sure that the open sides of the cuffs are facing down.
Because the heater cartridge and PT100 sensor are still loose in the
heater block, they may rotate after inserting them. Ensure they are
in the correct orientation before tightening the countersunk bolt in
the next step.
5. Place the TFM coupler and spacer
• Put the new TFM coupler in the hot end isolator. Make sure it is
fully inserted.
• Place the spacer on top of the TFM coupler.
For internal use only