5
HX120
Product overview
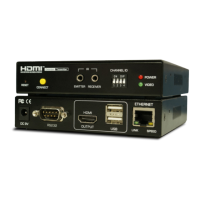
Transmitter
Front panel Rear panel
1 2 5 4 6 7 9 10 15 16 17 14
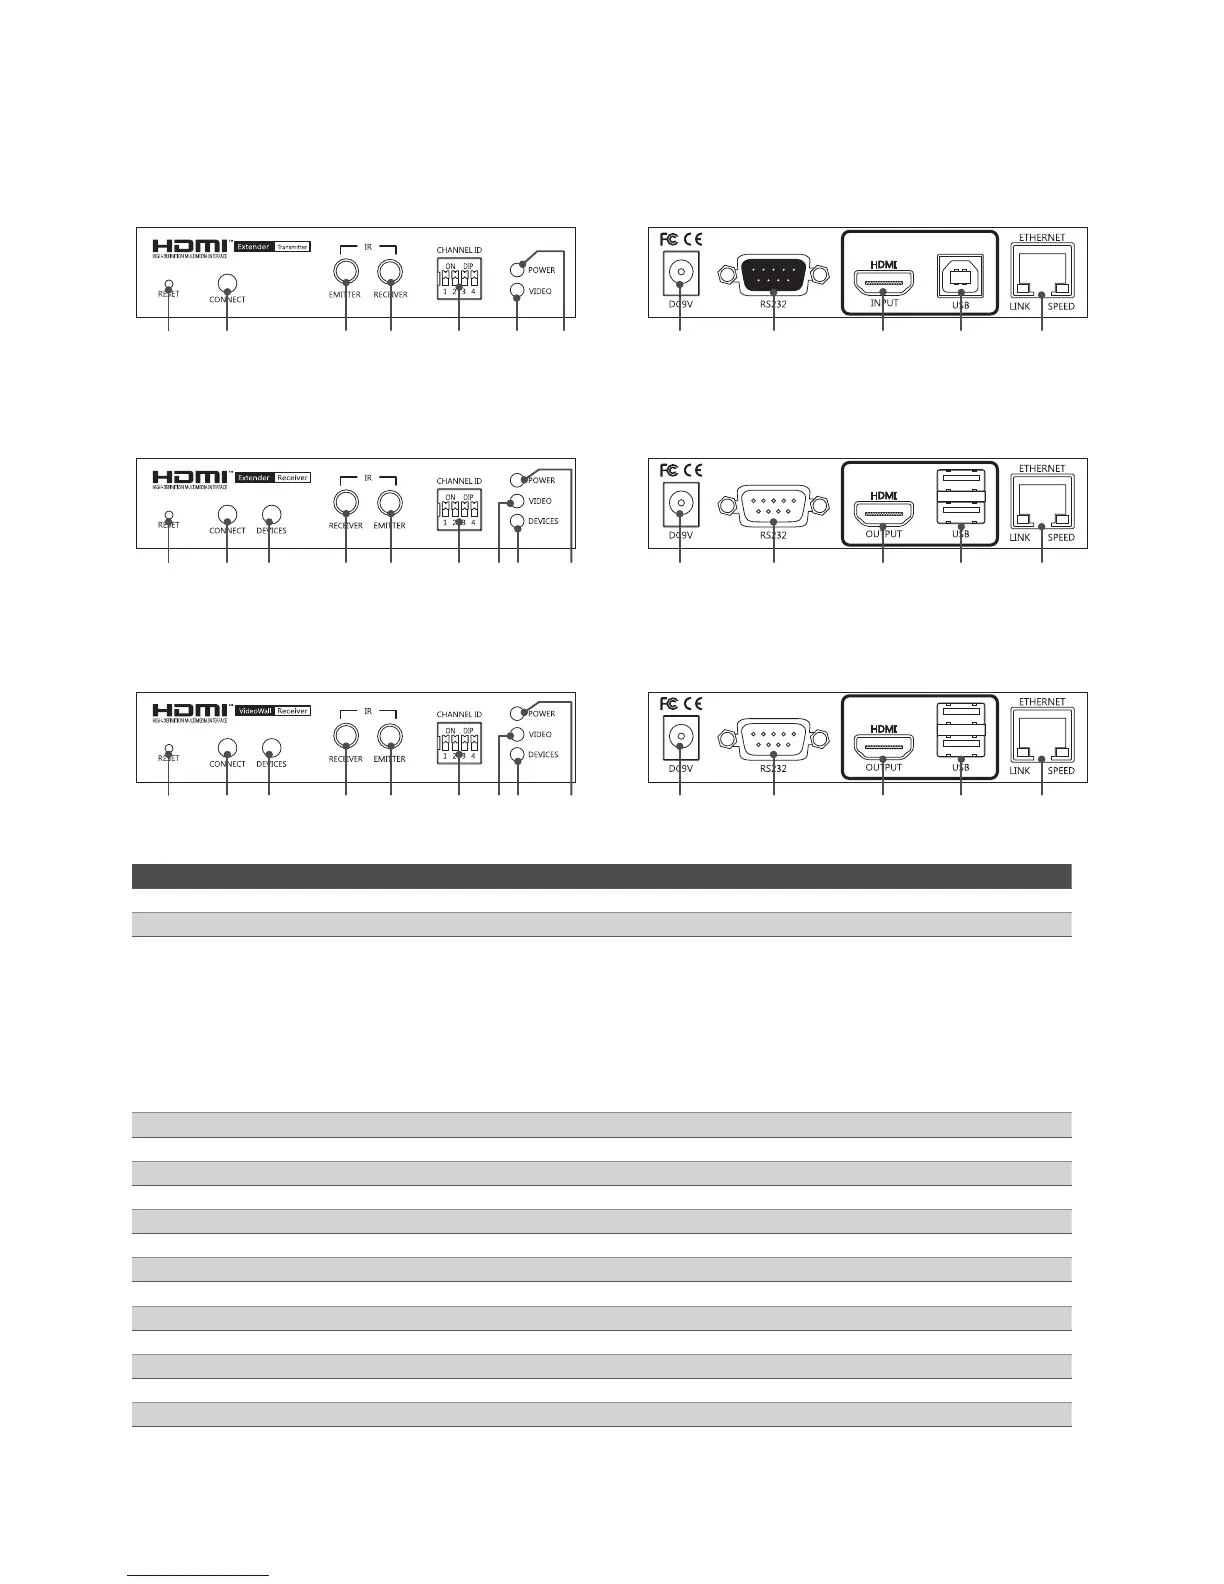
Receiver
Front panel Rear panel
1 2 3 4 5 6 7 8 9 10 11 12 13 14
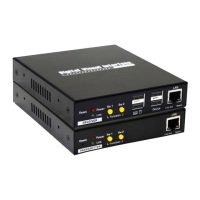
Video Wall
Front panel Rear panel
1 2 3 4 5 6 7 8 9 10 11 12 13 14
No. Item Description
1 Reset Press to re-start the unit.
2 Connect Press to re-connect the Transmitter/Receiver if the DIP switch has been reset.
3 Devices
■
Press to connect the device which plugged into Receiver's USB port to console.
Note: Please check the Devices indicator (No. 8) after USB device has been plugged in to the
unit. No device will be found if the Device indicator (No. 8) lights off. If it happens, press this
button to light it up and re-connect.
■
Press to update the EDID of connected monitor. To update the EDID, remove the
Receiver's power. Hold the device button and then power on the unit. Release the
Device button when the Power indicator flashes.
4 IR receiver Connect to a IR receiver.
5 IR Emitter Connect to a IR emitter.
6 DIP switch 4-position dip switch for pairing with Transmitter and Receiver.
7 Video indicator Lights when video is transferring.
8 Devices indicator Lights when the device is connected to console (Devices button is pressed).
9 Power indicator Lights when power is on.
10 Power jack Connect to the power adapter.
11 RS232 male connector Connect to RS232 device.
12 HDMI Output Connect to a display device.
13 USB Type-A connector Connect to USB devices.
14 RJ45 connector Connect to Transmitter/Receiver.
15 RS232 female connector Connect to a host PC.
16 HDMI input Connect to a video source/PC.
17 USB Type-B connector Connect to a host PC.