Do you have a question about the Unico M Series and is the answer not in the manual?
Essential steps and checks to perform before commencing the installation of the Unico System unit.
Vital safety advisories concerning electrical shock, proper grounding, and safe appliance usage.
Notification for installers and owners to retain the manual for essential information and future reference.
Key safety advice covering codes, grounding, and drain pan installation for secure unit operation.
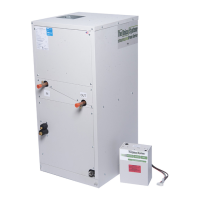
Information on unit part identification and optimal placement for servicing and installation efficiency.
Instructions on assembling modules, including flange connections and gasket compression for a secure fit.
Specific guidance for setting up the unit modules in a horizontal airflow arrangement.
Details on utilizing the vertical return plenum module or conversion kit for vertical up-flow setups.
Steps for mounting and connecting the control box, including knockout removal and screw fastening.
Guidelines for mounting the unit horizontally on a platform, ensuring proper drain pitch.
Instructions for suspending the unit using chains and angle iron supports from ceiling or rafters.
Recommendations for vertical unit placement on platforms or floors due to top-heavy design.
Connecting the main supply duct using plenum adapters for round and square ducts.
Explains the restrictor plate's role in airflow tuning for single-speed blowers to reduce noise.
Steps for installing the return air box and filter, ensuring proper fit and sealing.
Guidelines for pitching, trapping, and insulating condensate lines to prevent operational issues.
Instructions for connecting refrigerant lines, including sizing, filter driers, and sight glass usage.
Procedures for safely releasing nitrogen holding charge from refrigerant coils before installation.
Detailed steps for installing the Thermostatic Expansion Valve (TXV) for proper refrigerant flow control.
Instructions for connecting the small tube to the distributor on iSeries coils.
Procedures for installing and connecting hot water coils, including bleeding air and freeze protection.
Mandatory warning to disconnect power before wiring to prevent shock or death.
Methods for checking airflow using restrictors, static pressure, and velometers.
Detailed instructions for measuring static pressure in the supply plenum using manometers.
Procedures for charging the system, adhering to environmental laws and using recovery devices.
Method to measure sub-cooling for verifying correct refrigerant charge.
Method to measure superheat for verifying expansion valve operation.
Steps for removing the motorized blower assembly for service or replacement.
The Unico System 'M' Series Air Handler Units are a complete indoor comfort system designed for efficient and quiet operation. This system includes an indoor air handling unit and a small duct system, engineered to work together to provide optimal airflow and temperature distribution. The conditioned air is supplied through a series of 2-inch ducts, creating an aspiration process that entrains and mixes room air for a more even temperature.
The Unico 'M' Series air-handling units are modular, allowing for flexible configurations as heating-only, cooling-only, or combined heating and cooling systems. They can be arranged in vertical-up-flow, vertical counter-flow, and horizontal-flow configurations. The system can even be used for ventilation-only by utilizing just the blower module. Each module is available in five sizes: 1218, 2430, 3036, 3642, and 4860.
The three basic modules are:
The modular design allows for easy latching together of components. For installations requiring a refrigerant coil, anti-frost switch wires must be routed to the control box during module connection. The units can be assembled either horizontally or vertically, with specific instructions for each flow arrangement. For vertical up-flow, the return air can enter through the bottom or side return opening of the cooling module (2430, 3036, 3642), with the bottom opening being preferred. The 4860 cooling module has a single return opening for both horizontal and vertical applications.
| Series | M Series |
|---|---|
| Cooling Capacity | 6, 000 - 60, 000 BTU/h (depending on model) |
| Heating Capacity | 6, 000 - 60, 000 BTU/h (depending on model) |
| Airflow | 200 - 2000 CFM (depending on model) |
| Voltage | 120V or 208-230V (depending on model) |
| Sound Level | 38-48 dBA (depending on model and installation) |
| Dimensions (H x W x D) | Varies widely depending on model; consult product brochure |
| Weight | Varies widely depending on model; consult product brochure |