Do you have a question about the Unico 3642 and is the answer not in the manual?
Provides essential safety guidelines and precautions before installing or operating the unit.
Provides instructions and diagrams for electrical wiring of the Unico System modules.
Describes how the system operates in cooling, heat pump, and electric heat modes based on thermostat settings.
Details the sequence of operation during the cooling cycle, including delays and component activation.
Explains the heating cycle operation for heat pump systems, including thermostat and reversing valve control.
Describes the operation of electric heat-only systems, focusing on thermostat and electric duct heater control.
Instructions on how to measure and interpret static pressure readings in the supply plenum.
Guidance on measuring motor amperage to determine system airflow and compare it to specifications.
Method for measuring and summing airflow from individual outlets to verify total system airflow.
Detailed procedure for measuring static pressure using a manometer or gauge.
Explains how to use the superheat method for verifying expansion valve operation and system charge.
Covers procedures for servicing and removing the motorized blower assembly.
The Unico System is a comprehensive indoor comfort solution comprising an indoor air handling unit and a small duct system. Designed for integrated operation, the system delivers conditioned air through 2-inch ducts, creating a stream that entrains and mixes room air. This aspiration process ensures a more even temperature distribution throughout the room.
The Unico 'M' Modular Series air-handling units are composed of various modules that can be easily latched together. These modules offer flexible configurations, including vertical-up-flow, vertical-counter-flow, and horizontal-flow. They can be combined to create heating-only, cooling-only, or heating and cooling air handler units. All insulated Unico System modules feature closed-cell insulation for enhanced sound attenuation, eliminating exposed fiberglass insulation.
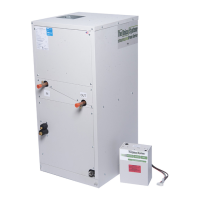
Each module is available in three sizes: 2430, 3642, and 4860. A 3660 model number indicates that the unit piece is compatible with either the 3642 or 4860 models. The system consists of three basic modules: a blower module, a cooling module, and a heating module. The blower module includes the blower wheel, blower housing, motor, and electrical control box. The cooling module can house a cooling-only refrigerant coil, a heat pump coil, or a chilled water coil. The heating module is an empty cabinet designed to accommodate a slide-in hot water coil. Modules can be arranged to provide only the necessary options, such as heating-only systems (blower module, heating module, hot water coil), cooling-only systems (blower module, cooling module), or combined heating and cooling systems. The blower module alone can also be used for ventilation-only applications.
Unico's direct-drive or EC motors are integrated into the air stream, with each blower wheel balanced to Unico specifications. The blowers feature a quick twist-and-lock motor mount for simplified maintenance. The motorized blower assembly includes the motor, mounted to the inlet ring, and the wheel, mounted to the motor shaft.
Other available options and modules include an electric duct heater, a multiple return plenum, and a vertical plenum stand, designed to add features or simplify installation.
The units are shipped in individual cartons and are inspected prior to shipping. Upon receipt, all cartons should be inspected for damage, and any concealed damage reported to the carrier.
The air handler should be located to minimize plenum elbows and fittings, keeping supply duct runs as short as possible. Minimum clearance on both sides of the unit is required for servicing. For attic installations, placing the unit above a central hall, closet, bathroom, or other normally unoccupied space is recommended. The unit can also be installed in closets, crawlspaces, or basements. If local codes permit, it can be located in a garage, provided ductwork is well sealed, especially the return duct. While not designed for outdoor use, it can be placed outside with adequate weather protection, typically requiring mounting on blocks with a sheet metal cover or cap to protect against rain and extreme weather.
The return air box and filter should be positioned near the unit, allowing at least one 90° bend in the return duct for proper acoustical performance. Most modules, except the MC4860 cooling module, are designed to fit through a 14-inch (356 mm) opening, typical of 16-inch (406 mm) center-to-center joist spacing. The MC4860 module requires an 18.5-inch (470 mm) opening. If no access is provided, an opening must be cut, ideally using the size required for the return air box, especially in attic installations.
Unit assembly can be horizontal or vertical. When using a refrigerant coil, anti-frost switch wires must be routed to the control box during module connection. Modules are fastened by tilting them to insert the connection flange over the mating flange, potentially requiring squeezing or prying to compress rubber gaskets. Latches secure the modules, further compressing the gasket.
The Unico EC motor includes an electronic circuit board sensitive to overheating. The absolute limit for the motor is 158°F (70°C) air temperature, at which point the motor will automatically slow down. For maximum motor life, the recommended air temperature around the motor is less than 130°F (54°C). This allows use with all heat pump and electric heating applications without issues, and with hot water coils where air temperature leaving the coil is below 130°F (54°C), typically with water temperatures below 135°F (57°C), depending on water and air flow.
Most systems are installed horizontally, with airflow from right to left when viewed from the connections. Modules are factory-set for horizontal airflow. The heating module should be arranged on the inlet (return) side of the cooling module. The 4860 cooling module includes a small drip shelf that must be installed on the air exit side of the drain pan for horizontal applications. When installing the heat module or return air plenum module upstream of the cooling module, a hook flange must first be installed to the bottom of the cooling coil.
For vertical installations, the modular system can be configured for up-flow or down-flow. The arrangement of modules differs, and specific instructions must be followed. For 2430 or 3642 cooling modules, the top and bottom access panels may need repositioning, requiring an insulation piece and removal of existing insulation for proper fit over the default side return. For vertical up-flow installations, the Vertical Return Plenum Module (MV module) is recommended. The spacer included with the MV module (except for the 4860 unit, where it's with the cooling module) should be used. If not using the MV module for 2430 or 3642, the Vertical Conversion Kit (UPC-63A or UPC-64A) is needed, and a field-fabricated mount for the unit. To ensure proper condensate drainage, the 2430 or 3642 cooling module should not be turned or rotated. The 4860 cooling module has an L-shaped drain pan that works properly when the module is turned 90 degrees.
A secondary drain pan MUST be installed where condensate overflow could cause water damage. It should be placed on the mounting base, platform, or angle iron support frame, allowing room for the drain line connection. The assembled unit should be raised above the 1.5-inch (38mm) sides of the secondary drain pan using rails with rubber pads for isolation. For vertical up-flow arrangements using the cooling module, 2-module drain pans can be used if space permits and return air enters from the side. For vertical down-flow (counter-flow) arrangements, fabricating a secondary drain pan with an opening for blower discharge and plenum adapter, while maintaining a sealed drain pan, is necessary.
The control box is shipped with the blower module and can be installed on either the discharge side or top of the blower cabinet. To install, remove two knockouts, mount the control box with four sheet metal screws, feed anti-frost switch wires through the hole and bushing, connect leads to low voltage terminals 3 and 6, and connect the motor wiring harness plug.
For horizontal platform mounting, the unit should be mounted on a platform, ensuring proper drain line pitch. The platform height must allow at least a 1/4 inch drop per lineal foot (20 mm per meter) for condensate drain lines. For horizontal suspended mounting, the unit can be suspended from the ceiling or rafters using "J" hooks, chains, and eyebolts, with angle iron supports. The secondary drain pan is placed on top of the angle iron with isolation pads. The length of eyebolts and chains should be adjusted for a slight pitch towards the drain end. Vertical units are not recommended for suspension due to being top-heavy and should be mounted on a platform or floor.
Unico offers a full line of round and square plenum adapters. All blowers include a restrictor plate to be installed between the supply adapter and the unit to eliminate objectionable outlet noise by reducing excess airflow. The restrictor plate is used to set the system airflow to 200-250 CFM per nominal ton (27-34 L/s per nominal kW). The system airflow should be measured by motor amperage. The restrictor plate should not be used to adjust plenum static pressure. The plenum adapter is attached with eight sheet metal screws after installing the restrictor plate. Sheet metal ducts should be secured to the supply adapter with screws or nails and taped with UL 181A aluminum tape. The plenum adapter should be wrapped with supplied blanket insulation, secured with UL 181A tape.
Unico provides a return duct system, but any return duct system is acceptable if pressure loss does not exceed 0.15 inches of water (37 Pa), including filters. The return duct should have at least one 90° bend to reduce sound transmission. The typical return duct is 10-foot (3 m) long, with a minimum length of 7-feet (2 m) to avoid increased sound transmission. An opening for the return box should be cut as specified in Table 1. The return air box should be centered so the filter frame flange covers all gaps and is flush against the wall or ceiling, secured with nails or screws. The return duct adapter is attached to the heating or cooling module, and then the return duct to the adapter and return air box using Q-bands and Q-clips. The return air adapter ships with an insulation blanket that must be wrapped and taped.
For multiple returns, Unico offers a return plenum (MR) module, available in 2430 and 3660 sizes, which includes a central filter. Multiple return openings can be cut in the top, back, or sides of the box.
All piping must comply with local codes and ordinances. The primary drain pan condensate connection is a 3/4-inch (19mm) female pipe thread fitting, and the secondary drain pan connection is a 3/4-inch (19mm) PVC socket fitting. The unit must be elevated so condensate lines are pitched at least 1/4-inch per lineal foot (20 mm per meter). The condensate line near the unit should be trapped using a U-trap (A00924-G03). Insulation may be needed to prevent water condensation, and in some climates, the trap may need protection from freezing. The secondary drain line should not be trapped or terminated into the primary drain line; it should be run to indicate drainage immediately without causing property damage, such as above a windowsill. If a secondary drain line cannot be run, a float switch or micro switch with a paper fuse should be added.
All refrigerant coils are shipped from the factory pressurized with nitrogen and do not contain refrigerant. Before releasing nitrogen gas, face away from the Schrader valve to prevent injury. If no nitrogen pressure is present, the coil may have a leak and should be returned. If pressure is present, relieve it and cut off the ends of the connections. All refrigerant coils require a thermostatic expansion valve (TXV), shipped loose and attached prior to charging. For R-410a systems, the R-410a valve must be used, and new Teflon seals (A00809-001) should be used when replacing the TXV. The refrigerant lines are copper sweat connections (liquid line 3/8-inch (9.5mm) OD, suction line 7/8-inch (22mm) OD). A liquid line filter drier should be installed as close to the coil module as possible. For long line sets or attic installations, a moisture indicating sight glass should be installed between the filter-drier and expansion valve.
For hot water coil installations, remove the side coil access panel, cut away insulation, slide the coil into the cabinet, and secure with brackets. After installation, replace the access panel. All water connections are 7/8-inch (22mm) sweat connections. Sweat the connections, fill the system, and bleed air from the coil by backing off the screw inside the bleed valve. If the unit is in an unconditioned space below freezing, a glycol-water antifreeze solution should be used. After venting the chilled water coil, replace the access panel and seal connections with the rubber gasket. The coil should be sprayed with liquid detergent or evaporator cleaner solution and thoroughly rinsed before installation to ensure proper condensate drainage and maximum coil performance.
All electrical wiring must comply with local codes and ordinances. Blower module controls and components are bonded for grounding and meet safety standards (UL Standard 1995, CAN/CSA-C22.2 No. 236, ETL listed). 50 Hz units are CE marked and conform to Low Voltage 73/23/EEC and EMC 89/336/EEC Directives. A separate 1 ph, 230/208V, 60/50 Hz power supply with a 15 amp breaker and appropriate wire gauge per code is required. Two control boxes are available: one with a variable ventilation speed control, and one without. Standard units include a variable speed motor controller, adjustable down to half airflow. The control box includes a 24-volt transformer, blower relays, and terminal blocks. Space is provided for a heat pump heating mode bypass relay and an additional double pole double throw (DPDT) relay for wiring a boiler, pump, or valve for hot water heating.
To wire, first connect the motor plug to the wiring harness from the control box. Route anti-frost switch lead wires (from the refrigerant coil) through the modules to the control box and connect to terminals #3 and #6 of the Low Voltage Terminal Block. Connect control wiring per figures 17-19. For electric duct heaters, refer to Bulletin 30-34 and match thermostat anticipator settings to the combined amperage load of all components. Connect power supply to terminals L1 and L2 on the high voltage terminal block and connect a ground wire to equipment grounding on the side of the control box. The low voltage transformer is factory set for 230V; for 208V, remove the ORANGE lead from L2, connect the RED lead to L2, and insulate the unused ORANGE wire.
The controller is factory-set for constant ventilation when the speed switch is ON. This feature can be turned on or off at the thermostat using the FAN switch. The variable speed switch on the control box is factory-set to OFF. To enable constant ventilation, set it to the lowest speed (fully clockwise). To allow the user to turn ventilation mode on or off at the thermostat, the factory wiring can be modified as shown in figures 22-25.
Before charging the system, check for proper airflow. Record the restrictor plate position, plenum static pressure, and motor amperage to determine airflow. Do not operate the blower with free discharge or low static pressures (below 1-inch w.c. (250 Pa)) to prevent motor overloading. As a further check, use a velometer to measure airflow from each outlet. The Turbo-Meter (Davis Instruments Catalog No. DS105107) provides direct LED readout in Knots (FPM x 100), which, when multiplied by 2, gives CFM with 10% accuracy. The total airflow from all outlets can be compared to the motor amperage.
Measure the external static pressure in the supply plenum at least 18-inches (457mm) from the unit, but before any tee or elbow, ideally between 2 and 3-feet (0.6 to 0.9m). Use an inclined manometer or magnehelic gauge. Insert a 1/4-inch (6mm) metal tube 1-inch (25mm) into the duct, flush with the inside wall and perpendicular to the air stream. The plenum static pressure should be 1.4 to 1.6 inches of water column (350 to 400 Pa) for 9-inch (229mm) diameter plenums, or about 1.8 inches (450 Pa). Return duct static pressure (including filters) should not exceed 0.15 inches of water (37 Pa).
DO NOT VENT REFRIGERANT TO THE ATMOSPHERE. After leak testing and evacuating, release R22 operating charge in the condensing unit. For heat pumps, refer to Bulletin 30-24. The system is ready for refrigerant charge adjustment. If the coil has a threaded TXV, verify threads are tight. Start the system and run for 20-30 minutes to stabilize conditions. Do not adjust charge below 75°F (24°C) outdoor temperature; 75-85°F (24-29°C) is preferred. If checking charge below 80°F (26.7°C), block the condenser coil until head pressure equals the charging chart for 85°F (29°C). For heat pumps, always check charge in cooling mode.
Sub-cooling Method: Measure liquid line pressure and record corresponding saturation temperature. Measure liquid line temperature with a thermometer or thermocouple taped to the line and covered with insulation. Sub-cooling = Saturated Temperature - Liquid Line Temperature. If sub-cooling is low, the system is undercharged. Typical sub-cooling values are 3-8°F (2-5°C). DO NOT ADD LIQUID CHARGE INTO SUCTION PORT to prevent compressor damage.
Superheat Method: Superheat measurements should only be used to verify TXV operation. Superheat should be 8-12°F (4-7°C) at the indoor coil. For larger capacity match-ups, 15-18°F (8-10°C) is satisfactory. Superheat values depend on outdoor air temperature. To measure superheat, record suction pressure at the evaporator outlet (or service port on suction valve fitting at condensing unit plus estimated pressure loss) and corresponding saturation temperature. Measure suction line temperature at the evaporator outlet with a thermometer under insulation. Superheat = Suction Line Temperature - Saturated Temperature. If superheat is high, the system is overcharged, and refrigerant must be removed.
The Unico System is compatible with R-410A. Changing to R-410A involves changing the expansion valve. The refrigerant coil is shipped with an R-22 expansion valve that must be replaced with an R-410A expansion valve for the correct tonnage.
For maintenance, the entire blower assembly can be removed as a unit from the piping connection side. To remove, loosen six screws, twist counter-clockwise, and pull the assembly away. To prevent damage, do not grab the assembly by the wheel or set it down with the wheel supporting the assembly; always set it down with the wheel on top. If the wheel needs changing, loosen the motor set screw and pull the wheel off the motor shaft. If the motor needs changing, remove the blower wheel, then remove screws fastening the motor to the inlet ring. To reinstall, reverse the steps.
| Brand | Unico |
|---|---|
| Model | 3642 |
| Category | Air Handlers |
| Language | English |