Bulletin 30-20 — Page 5
© Copyright 2010, Unico, Inc.
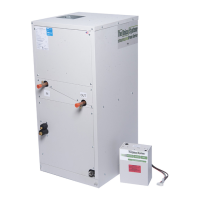
Cooling Module
Return Air
Plenum
or
Heating-
Module
Hook Flange
(shipped loose with MR or MH unit)
Latch Hook
(shipped loose with MR module)
IL00220a.CNV
Figure 6. Hook flange location.
Vertical Installations
As shown in figure 1, the modular system can also be
configured for vertical up-flow or down-flow. The ar-
rangement of modules is different so be sure to follow
these instructions.
In most cases connecting the modules is straight forward
– just use the arrangement shown in figure 1. However,
if you are using a 2430 or 3642 cooling module, the top
and bottom access panels of the cooling module will
need to be repositioned. When repositioning the bottom
panel, it will be necessary to add an insulation piece and
remove a portion of the existing insulation to fit properly
over the default side return.
For vertical up-flow installations, we recommend using
the Vertical Return Plenum Module (MV module). The
spacer shown in figure 1 is included with the MV mod-
ule (except for the 4860 unit, where it is included with
the cooling module). If you are not using the MV mod-
ule for the 2430 or 3642, you will need to use the Vertic-
al Conversion Kit (UPC-63A or UPC-64A) and provide
a field fabricated mount for the unit.
CAUTION
To allow proper condensate drainage, do
not turn or rotate the 2430 or 3642 cooling
module.
For vertical up-flow the return air may enter through the
bottom or side return opening of the 2430 or 3642 cool-
ing module, although the bottom is opening is preferred.
The 4860 cooling only has one return opening for either
horizontal or vertical applications. The 4860 drain pan is
‘L’ shaped and will work properly when the module is
turned 90 degrees.
Follow the following steps for vertical installations of
cooling-only or heating-and-cooling systems:
Filler Panel
(Item A)
Install first
IL00301b.CNV
Trim to fit
approx. 1.5 inches (38 mm)
2
1
emove
Latches
Move
Move
1
Top panel
2
Bottom panel
Add insulation
piece
STEP 1. (2430 and 3642 only) Remove top and bottom pa-
nels and install as shown. Install filler panel (Item
A) first, then the side panel (1) as shown.
Remove panel from bottom of the coil (bottom of the coil shown).
 Loading...