DeutschEnglishFrançaisNederlandsItalianoEspañolPortuguês
13
Installation of the telephone
See also overview on page 2.
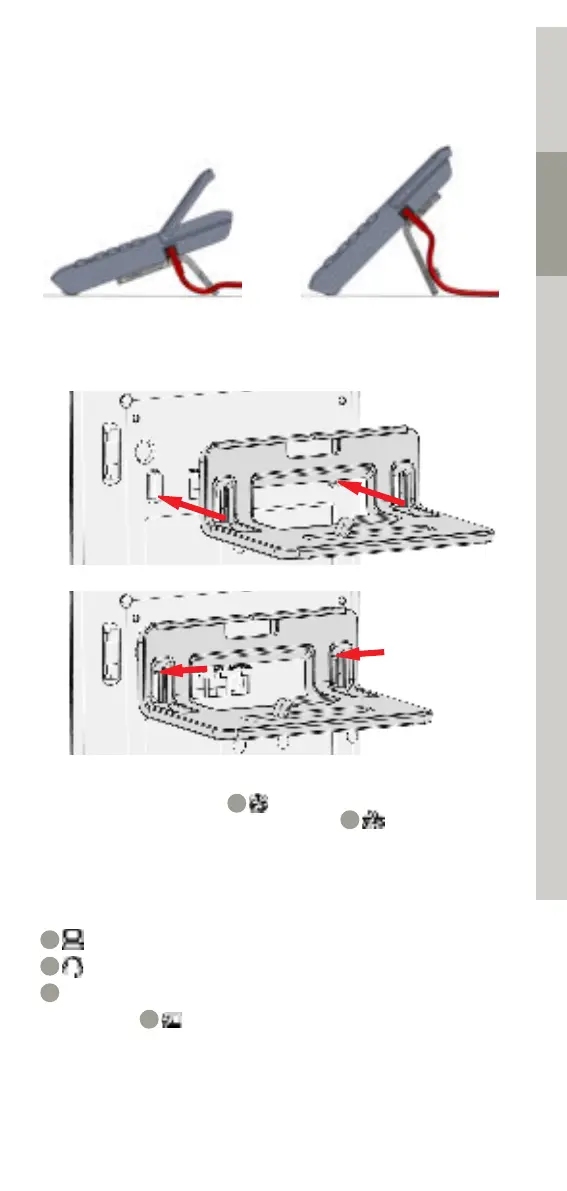
Desk Installation
By mounting the stand on the telephone using the long or short
end you can select between 20° and 45° tilt angle:
1. Place the phone upside down on a soft surface and remove all
cables from the phone except the handset cord
d.
2. Insert the stand along the L-shaped bars on the base of the
telephone as shown.
3. Slide the stand to the stop at the left until it locks into place.
4. If your LAN does not have PoE (Power over Ethernet; ask your
administrator), then you need to use a power supply connec-
ted to the power jack .
5. Connect the LAN cable with the jack on the base of the
telephone and the wall jack.
Optional Connections
If desired, you can connect further devices to your phone (see also
overview on page 2):
Connection to PC
Connection to Headset
Connection to Key Module
The Aux jack is used as service interface.
If further settings are required for correct operation of the telepho-
ne, please contact your administrator.
long end: 20° short end: 45°
B
D
C
E
G
H
 Loading...