ACCESSORIES
Section 8-16
WARNING
TURN THE LASER SYSTEM OFF BEFORE
CONNECTING OR DISCONNECTING
THE ROTARY FIXTURE
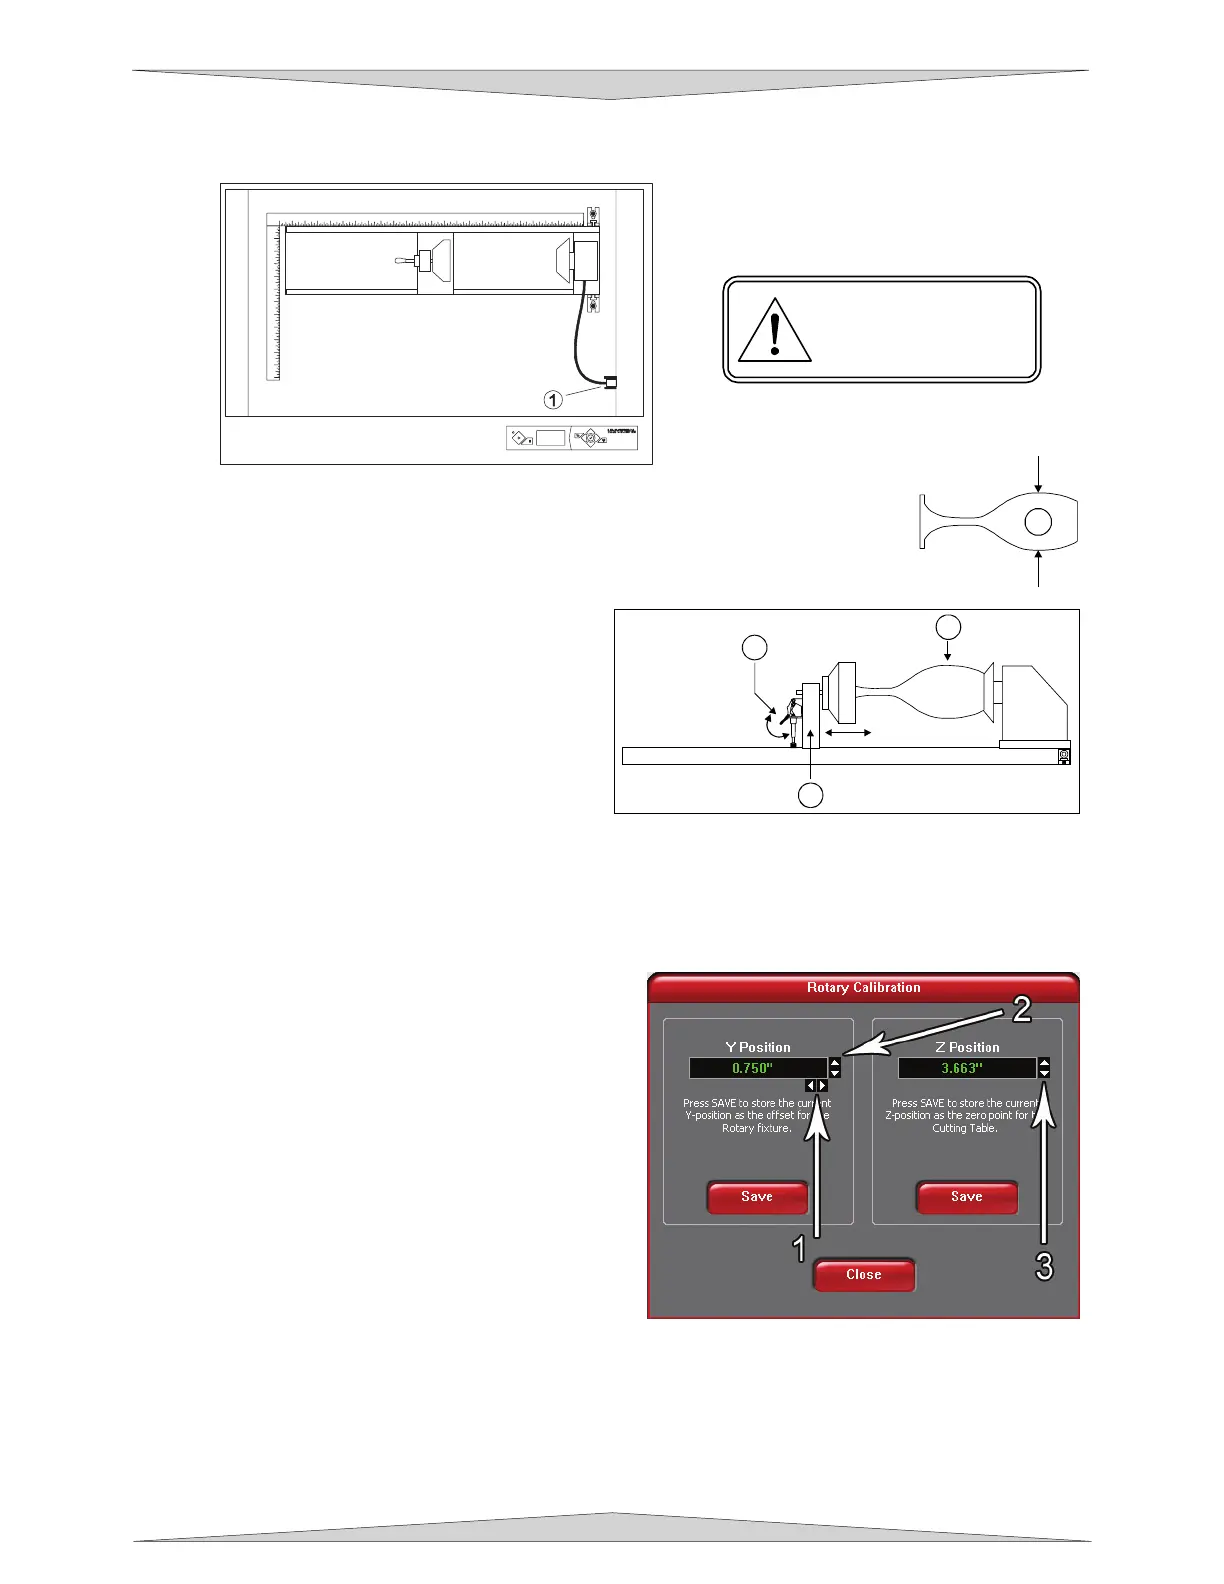
8. With the power to the system still OFF, connect the 7-pin Rotary Fixture control cable to the
receptacle on the laser engraving system (1).
9. Before loading the glass into the fixture, measure the diameter (1) of the glass in
the area where the engraving is to be located by using a caliper or similar
measuring device. Either remember this number or write it down.
10. Place the open end of the glass (3) on the
right side of the Rotary Fixture. Lift the lever
(1) on the adjustable end of the fixture and
slide it up against the base of the glass so the
glass rests firmly centered inside of the
inverted cone. Push the adjustable end of the
fixture (2) to the right, firmly against the bottom
of the glass. Do not to apply too much
pressure, especially with glass. You only
need enough pressure to prevent the object
from slipping on the cone while it rotates. Lower the lever on the end of the fixture to lock it in place.
11. Power ON the laser system and wait for the display to show the Model #, copyright year, Universal
Laser Systems, INC, and (DISCONNECTED). The rotary will run through a self test and will slightly
rotate. This movement is normal. Next start up the UCP.
12. Select the System Tab and click on the
CALIBRATE button in the Rotary box. After the
button has been clicked a Rotary Calibration
window will appear with Y Position and Z Position
boxes. Now, in the Y Position box use the Y Axis
buttons (2) to move the focus carriage back and
forth. Place the focus carriage exactly at 2.625”.
Next, use the X Axis buttons (1) to move the focus
carriage left and right and place the red LED over
the flat part of the concave metal fixture normally
located on the left hand side on the rotary. Now,
use the Z Axis buttons (3) to move the table up
and down and use the Focus Tool method
(Section 9-17) to focus on top of the flat part of the
concave metal fixture with the focus tool. DO NOT
focus on top of the black metal cover that is
located on the left hand side of the rotary. Ignore any mention to the MANUAL FOCUS POSITION
feature and carefully focus on the top of the concave metal fixture using the Z-Axis buttons (3). After
focusing is complete click both SAVE buttons on the Rotary Calibration window. Once complete click
the CLOSE button and the focus carriage will re-home once you exit the window. Calibration is now
complete.
1
3
2
1
2
3
4
5
6
7
8
9
10
11
12
1 2 3 4 5 6 7 8 9 10 11 12 13 14 15 16 17 18 19 20 21 22 23 24
1