50
4.7 THE RUBBER STAMP OPTION
There are two switches in the ULS Windows printer driver which manage the rubber stamp option, the
RUBBER STAMP switch and the INVERT FILL switch. The RUBBER STAMP selection taper
profiles the engraving and automatically mirrors the entire page about it’s centerline. The INVERT
FILL switch will turn the entire page into a negative while it is printing. This image inversion causes the
laser system to engrave out the background and leave the characters standing up. The INVERT FILL
selection is only used when engraving a full sheet of stamps because it creates the negative image for the
entire sheet, not just an individual stamp. Selecting both features allows the user to create a full sheet of
rubber stamps as a positive and unmirrored image on screen. Since there are several different methods
in creating and producing rubber stamps, we will give just a few examples to follow so that the process
becomes fully understandable. Experiment with the different techniques and choose the method most
desired.
To create the artwork and engrave only one or a few stamps, set the page size in the graphics program
to something smaller than the full field. Just as an example, we will use a page size that is 8.5 x 11
inches in the Landscape mode. In this way we can output to a paper printer, before engraving, for
proofreading. Do not use the full 17 x 11.5 inch size for one or a couple of stamps because printing
time will be longer. Make sure that this page size is set up the same in the ULS Windows printer driver.
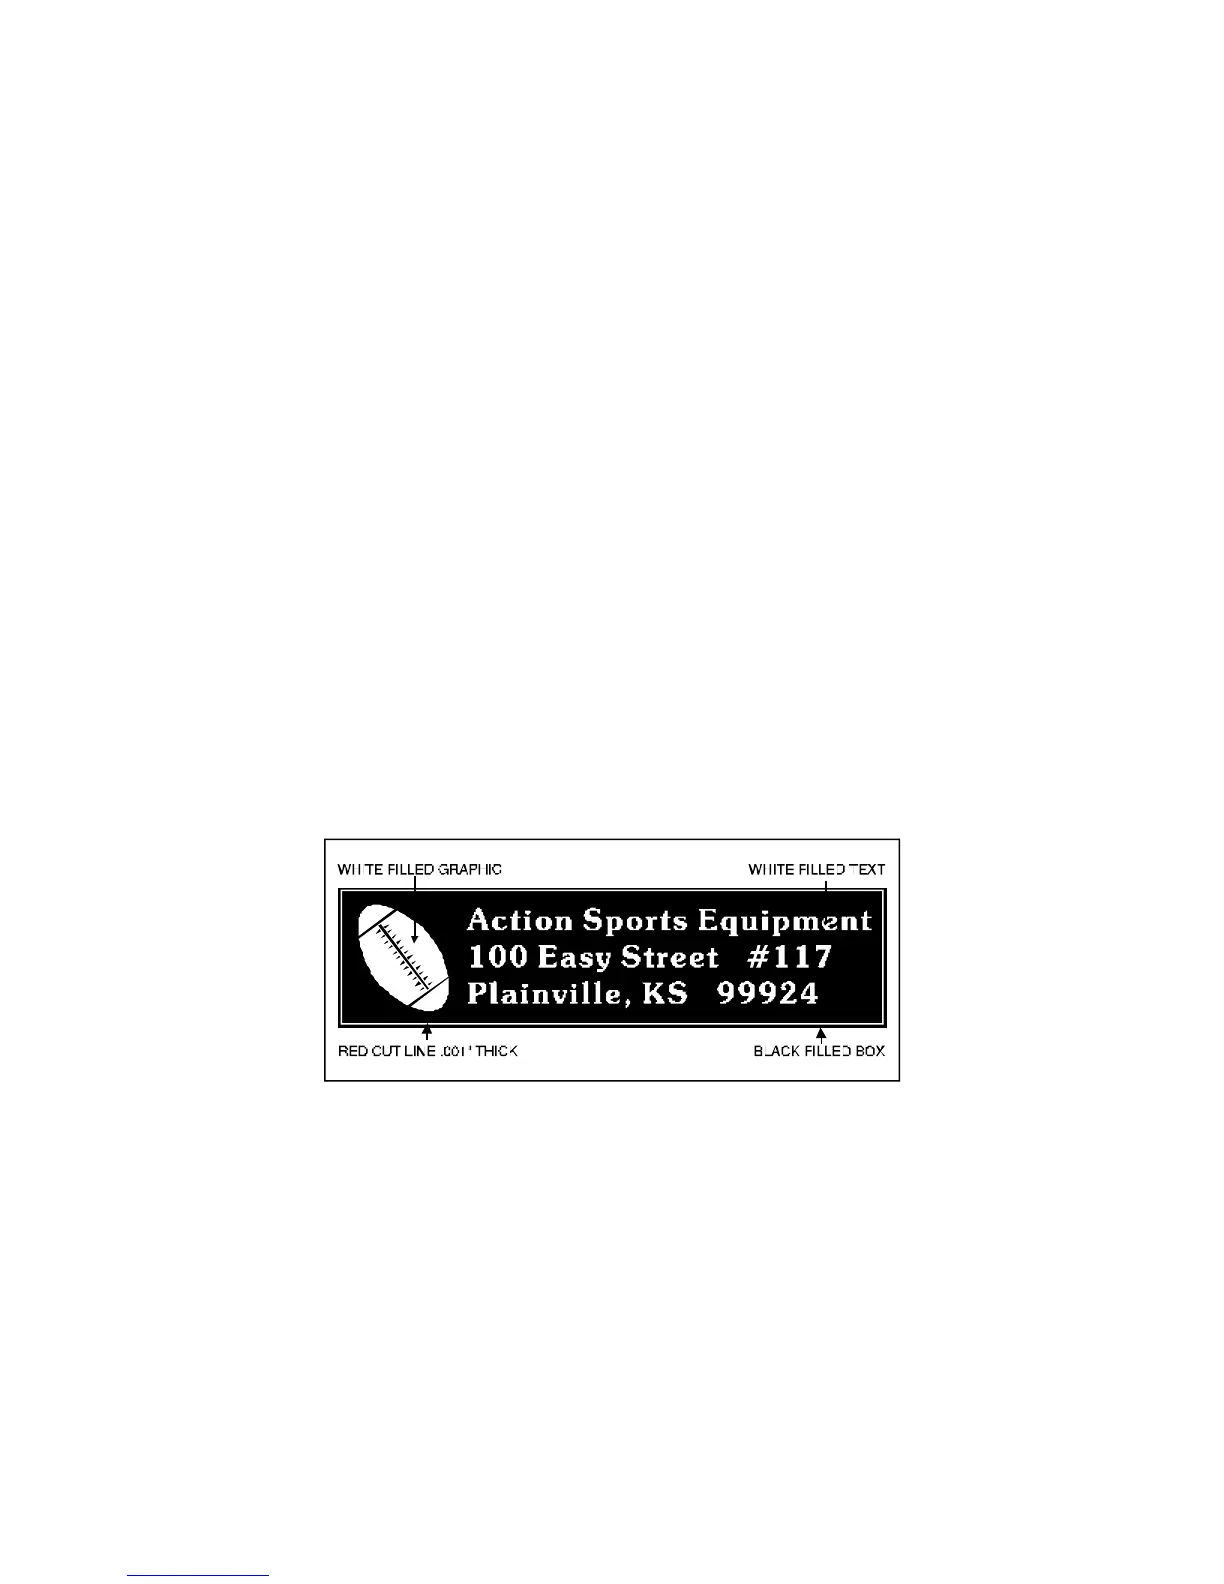
Draw a black box slightly larger than the size of the stamp desired. Type in or add graphics within that
area and color them with a fill of white. It is not necessary to mirror the image. Then draw a red outline
box (.001” line thickness) for the cut. An example is shown below.
Since the driver automatically mirrors the entire page when the RUBBER STAMP option is selected,
be aware that the stamp will engrave on the opposite side of the page. As an example, position the
stamp in the upper right hand corner of the page and place a full sheet of rubber in the upper left side of
the engraving area inside the laser system. We recommend installing the High Resolution lens for
engraving rubber stamps. Focus on the material using the correct focusing tool and go to the ULS
Windows printer driver to set the power settings. There are some sample settings in section 4.8 of this
manual for rubber stamps. They might have to be adjusted for different types of rubber and
thicknesses. When selecting RUBBER STAMP in the driver, notice that the INVERT FILL switch
automatically becomes selected. Deselect the INVERT FILL option because it will not be used in this