UP Plus 2 3D Printer User Manual v 2013.10.24
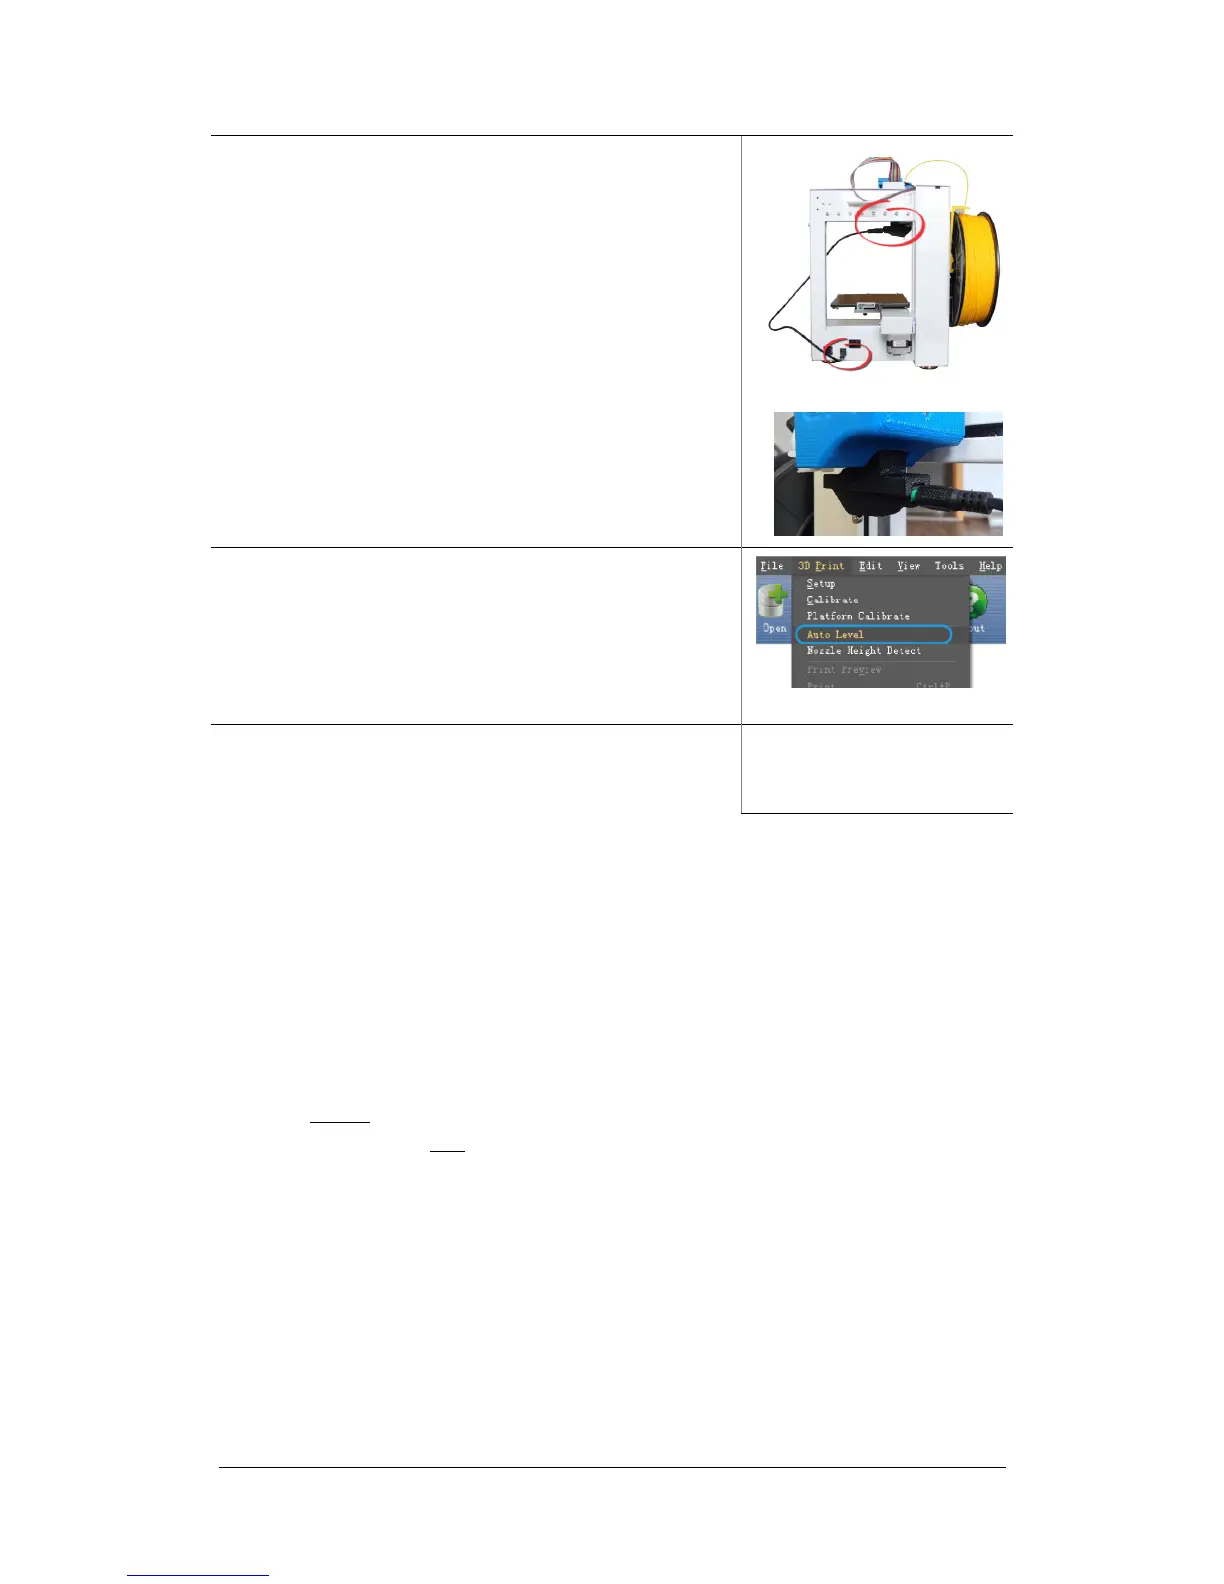
3. Plug in the black calibration cable into the auto level-
ling sensor and mount under the print head.
4. In the software, click 3D Print / Auto Level.
The platform will rise up and the auto level sensor will
touch the Perfboard in nine points and record the level-
ling positions.
ONCE COMPLETE REMOVE THE AUTO-LEVEL
SENSOR.
5. if “Auto Level” is greyed out check the connections,
leave the printer switched on and the software open and
check back in 5 minutes.
The auto levelling sensor will measure the height at nine locations and record it. This process can
be done manually if you wish in the software levelling calibration below.
How does automatic platform levelling work?
The software will make any corrections during printing the raft. Example, the front left is 134 and
front right is 134.5. This means the raft will be thinner on the right and thicker on the left.
The auto levelling will only work within a 1mm unevenness of the platform.
If printing without a raft, you will need to manually level the platform as the automatic levelling
only works when printing with a raft.
6.2 (not required) Manual Software Platform Levelling
This is not required as the UP Plus 2 has automatic platform levelling, refer to 6.1
Ensure your Perfboard is clean and smooth both sides, as a small piece of plastic could cause the
levelling to be uneven.
Initialise the printer.
Click “3D Print” \ “ Platform Calibrate”